Replacing a transceiver module, Replacing the xfp, sfp+, sfp, and qsfp+ modules – H3C Technologies H3C S12500 Series Switches User Manual
Page 97
87
Replacing a transceiver module
Replacing the XFP, SFP+, SFP, and QSFP+ modules
CAUTION:
Do not touch the golden finger of a transceiver module during replacement.
The replacement procedures for the XFP, SFP, SFP+, and QSFP+ modules are similar. This section uses an
SFP+ module as an example.
To replace a transceiver module:
1.
Put on an ESD wrist strap, making sure that the strap makes good skin contact and is correctly
grounded.
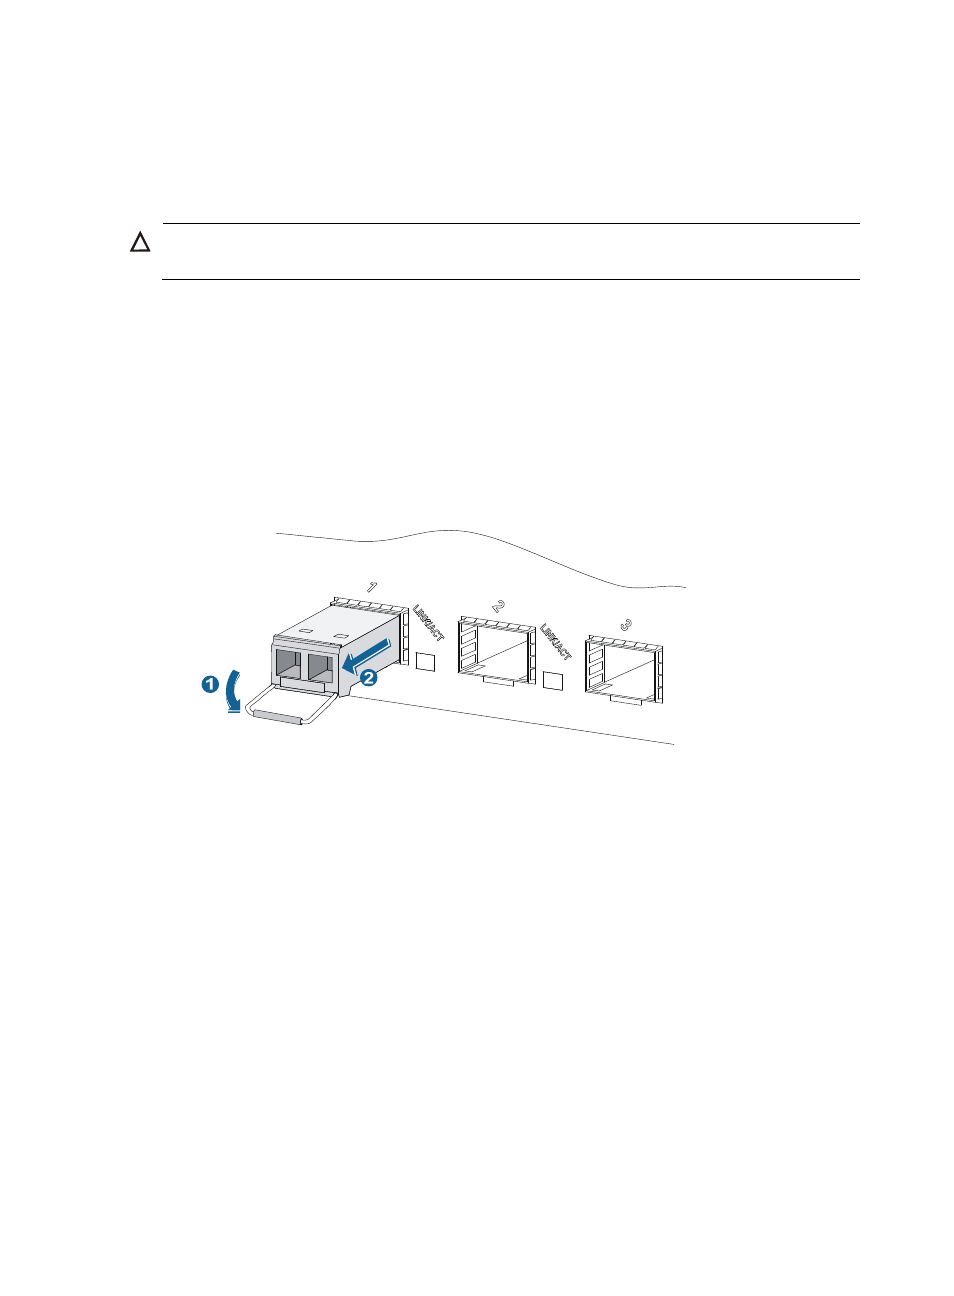
2.
Remove the optical fibers from the SFP+ module, pivot the clasp down to the horizontal position,
and then pull the SFP+ module out of the port, as shown in
.
Figure 74 Removing the SFP+ module
3.
Put the removed SFP+ module in an antistatic bag or its original shipping materials.
4.
Unpack the SFP+ module to be installed and make sure the clasp is closed.
5.
Remove the optical fiber, if any, from the SFP+ module before installing it.
6.
Gently insert the SFP+ module into the port until it fits in completely, as shown in
.
7.
Connect the optical fibers to the new SFP+ module.