Ter 9 or 10 – Grass Valley EDIUS Pro v.7.20 User Manual
Page 163
141
Capturing and Importing
EDIUS - Reference Manual
4 Set the reel name, if necessary.
To set a reel name, uncheck [UserBit is used as a Reel No.] and enter a reel name. You can also select previously
entered reel names from the list.
1
Note
• When the source has been captured in MPEG TS format, the information of the preset reel name will not be recorded
to the captured source file but to the project file. The information of the reel name set at capture will not be reflected
even if that source file is opened in another project file after EDIUS is restarted.
5 Play back the source to capture, and set the In and Out points.
When the In point is placed ahead of the Out point on the timeline, the text in that row is displayed in red. This area will
not be captured.
Setting the In and Out Points
3
•
The In point and duration can also be specified as the capture range. Specify the In point, then click the
timecode at [Dur] on the Player, enter the duration, and press [Enter] on the keyboard.
6 Click [Add to Batch Capture List] in the [Batch Capture] dialog box.
2
Alternative
• Click [Add to Batch Capture List] on the Player.
• Click the [Add to Batch Capture List] list button on the Player, and click [Video and Audio].
• Only the video part or audio part is captured when the [Add to Batch Capture List] list button on the Player is clicked
and [Video Only] or [Audio Only] is clicked.
• Adding to batch capture list:
[Ctrl] + [B]
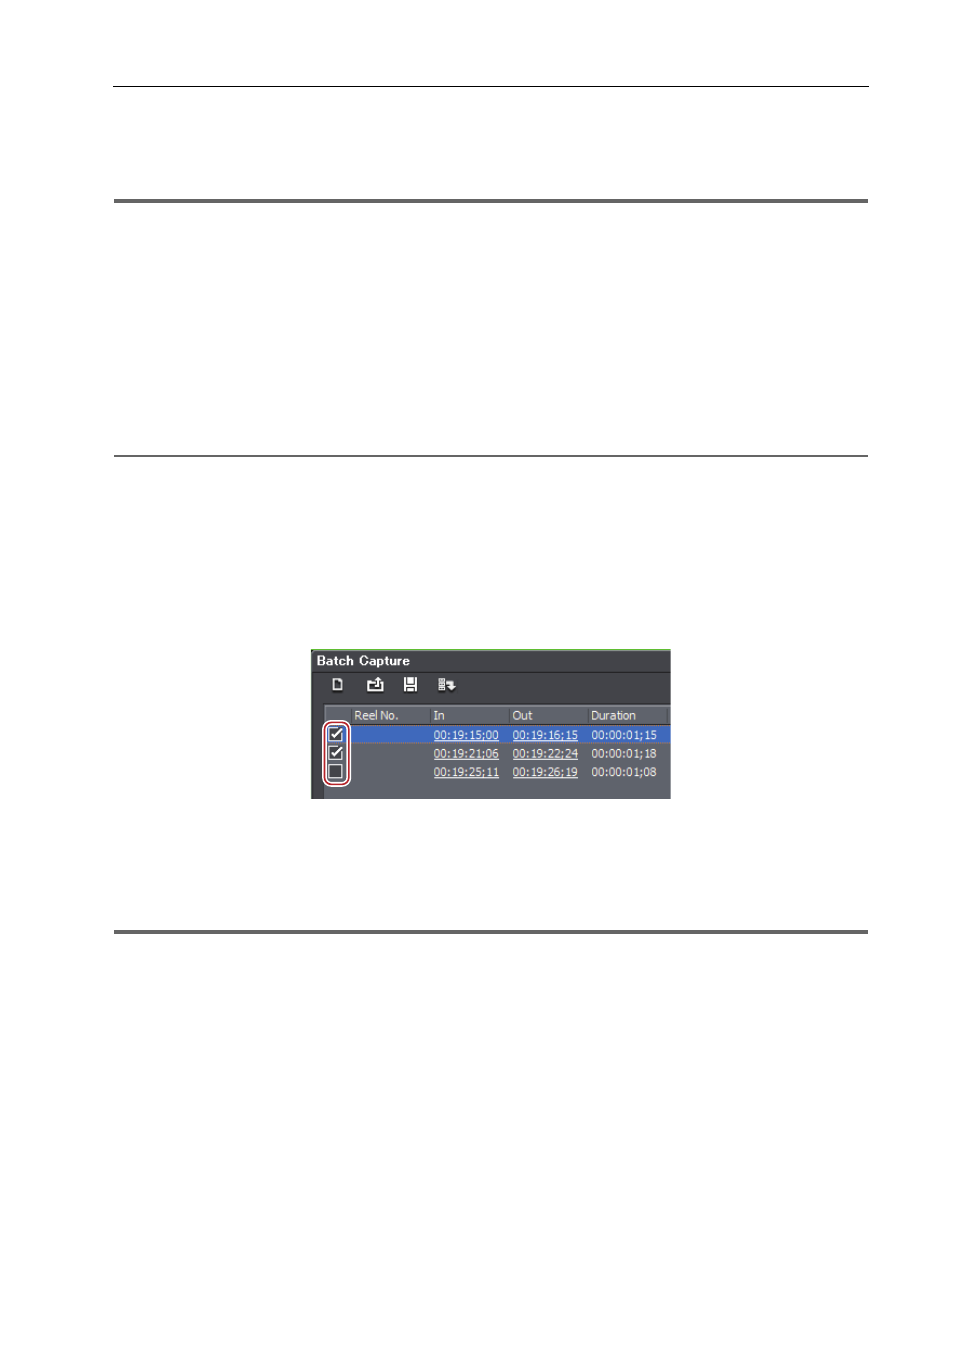
8 Turn on the check buttons for the sources to capture from the list in the [Batch Capture] dialog box.
The check buttons are turned on immediately after the sources are added to the list.
9 Click [Capture] in the [Batch Capture] dialog box.
If a reel name is not set in step 4, capturing starts and the progress is displayed in [Status] of the [Batch Capture] dialog
box. The captured clip is registered to the bin.
If you set a reel name in step 4, proceed to step 10.
1
Note
• When HDV is batch-captured in “MPEG TS” format, the result of [Status] sometimes ends not as 100% but as “101%”
or “102%”. This is normal operation due to the specifications for capturing MPEG by the GOP.
10 Insert a tape in your camera, and select the corresponding reel name from the [Please insert the tape, and
select the reel name.] list.
The time required for capturing is indicated next to the reel name.
11 Click [OK].
Capture of the source corresponding to the selected reel name starts, and the progress is displayed in [Status] of the
[Batch Capture] dialog box. The captured clip is registered to the bin.
If you set multiple reel names, repeat steps 10 to 11.