Applying default effects – Grass Valley EDIUS Pro v.7.20 User Manual
Page 354
Applying Effects
332
EDIUS - Reference Manual
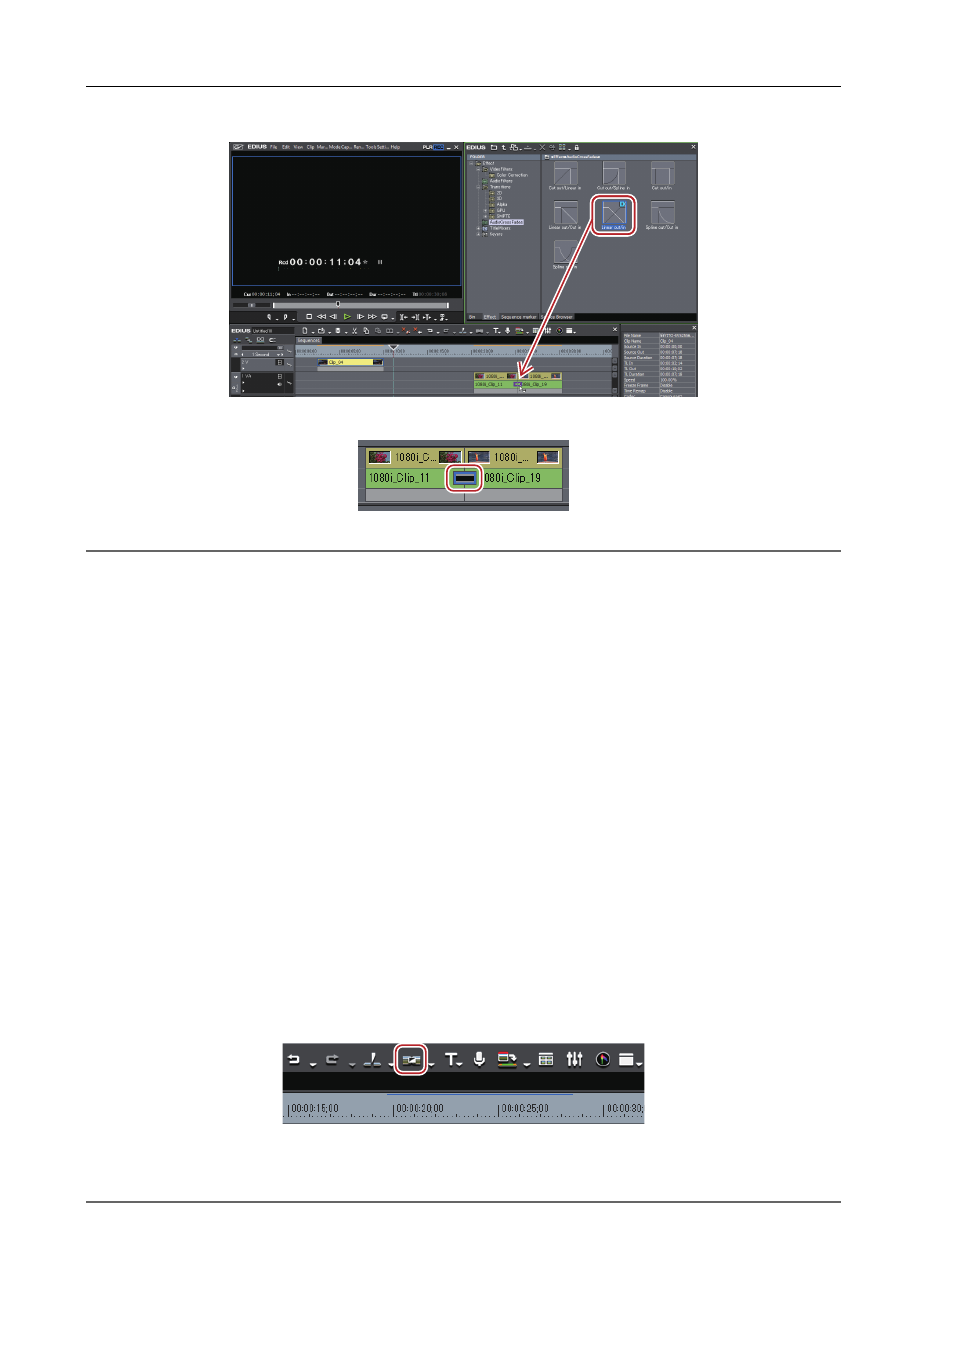
1 Select an audio cross fade in the [Effect] palette, and drag and drop it to the joint of clips.
The timeline display changes as shown below.
2
Alternative
• Select a clip on the timeline, and select an audio cross fade from the [Effect] palette. Click the [Add to Timeline] list
button and click an item. If you click [Add to Timeline] instead of the list button, the audio cross fade is applied to both
the In and Out points of the selected clip.
• Select a clip on the timeline. In the [Effect] palette, right-click an audio cross fade, and click [Add to Timeline]
→ an
item.
• Select an audio cross fade in the [Effect] palette, right-drag it to the clip on the timeline, and click [Add] or [Replace].
Click [Custom] to specify the duration and the position at which the audio cross fade is applied.
3
•
You can set the default transition not to be applied, when applying audio cross fade.
• In the extend mode, the clip border after setting the audio cross fade is displayed as a green line (cut point).
• An audio cross fade on the timeline can be applied to the joint of other clips by dragging and dropping.
Applying Default Effects
You can easily add effects by selecting clips on the timeline and clicking the button. In this case, effects set as default
are applied.
The default effects are set as shown below.
Transition: Dissolve
Audio cross fade: Linear
→ linear
Title mixer: Fade
1 Move the timeline cursor to the point to apply the effect.
2 Click [Set Default Transition] of the timeline.
The effect is applied to the position on the timeline cursor.
Select a clip and click the [Set Default Transition] list button to select the position where you apply the effect.
2
Alternative
• Default effect settings:
[Ctrl] + [P]