PLANET NAS-3410 User Manual
Page 11
Step 4: Insert the HDD tray back in the mobile rack. Make sure the lever of the mobile rack is
properly in place.
Step 5: Repeat Step 1 to Step 3 if necessary for the other HDD trays.
Step 6: Connect your NAS-3410 to the network by attach a LAN cable from the LAN port located
at the back of your NAS-3410. (At least one network connection is required)
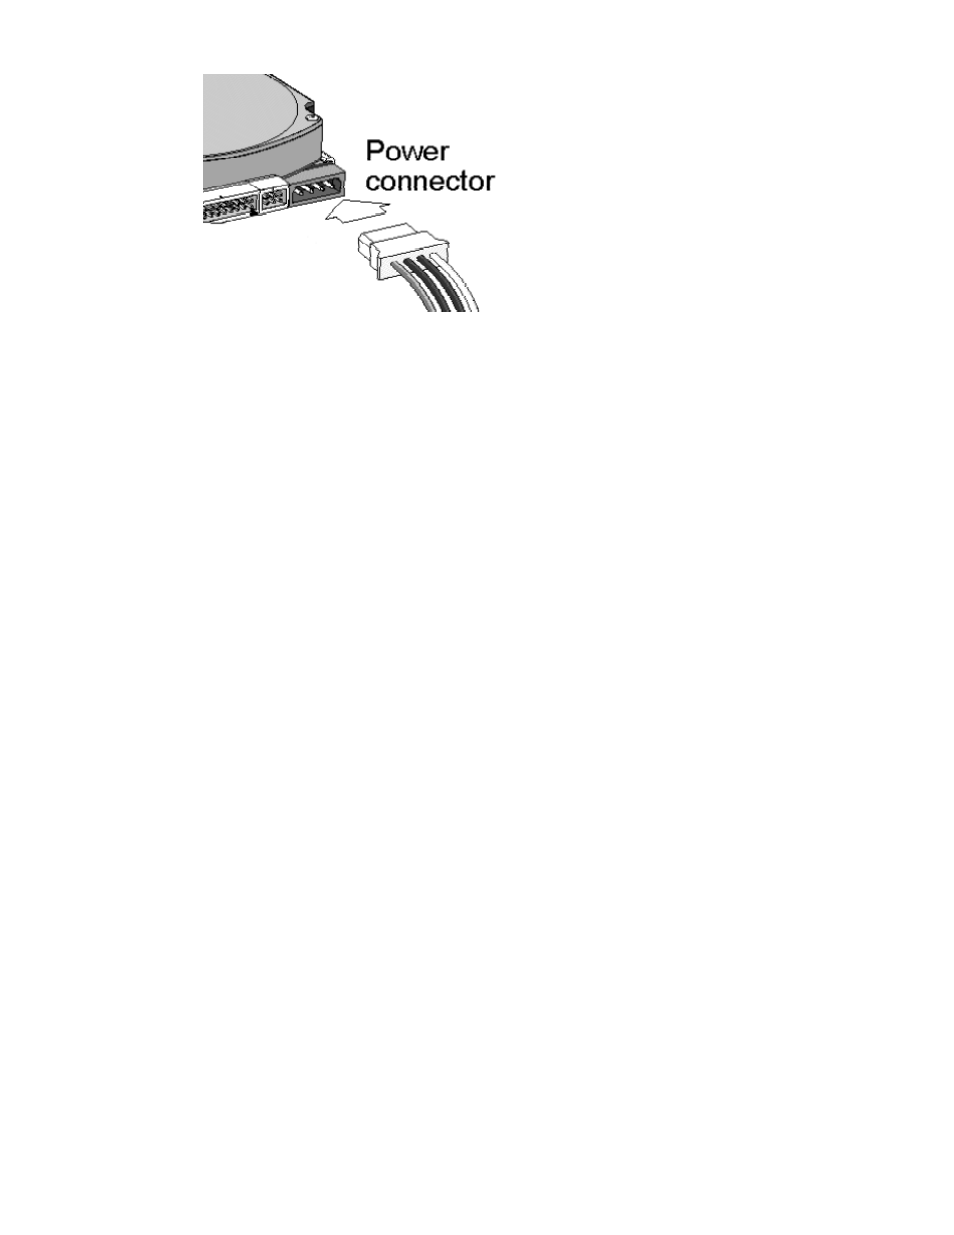
Step 7: Plug the power cord into the power connector on you NAS-3410.
Step 8: Make sure the power switch on the power supply is in ON position.
Step 9: Press the power button on the lower right hand corner of your NAS-3410.
Step 10: Wait for the server to boot up. The boot up process takes approximately 2 minutes and
the real-time status will be displayed on the front LCD panel.
More Info. About HDD Trays
The NAS-3410 has 4 hot-swappable HDD trays, which can be used to install 3.5” IDE hard drive
each. You don’t’ need to turn off the server when replacing a failed hard drive. The hard drive must
be 3.5” ATA66/100/133 IDE compliance. However, DO NOT use any other drive tray which is not
designed for NAS-3410, or a serious damage might be caused.
For best flexibility, the NAS-3410 is designed to fit most types of hard drive form various hard disk
drive vendors. But each of them might have slightly different mechanical dimension. We strongly
recommend applying hard drives with the same type or with the same dimension to NAS-3410.
5