3 using a tape library – PLANET NAS-3410 User Manual
Page 69
63
9.3 Using a Tape Library
First, set up the tape library so that it can be controlled by software. Please refer to the tape
library’s instruction manuals for details. Then, connect the tape library to the NAS server with a
SCSI cable. The NAS server supports up to two tape libraries.
The tape library support is an optional feature on NAS-3410.
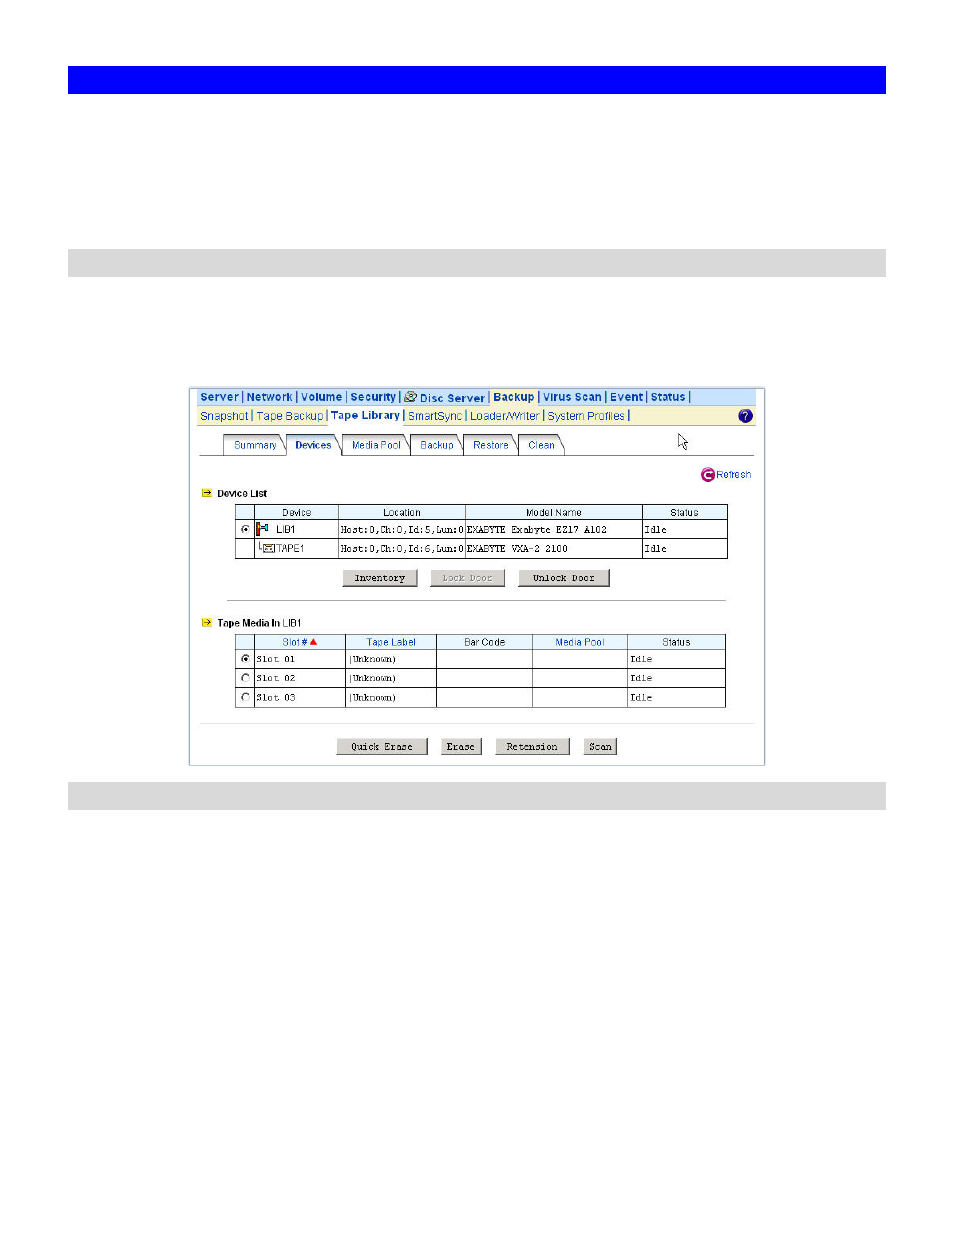
Managing Devices, Tapes and Tape Cleaning
When the NAS server starts up, it will initialize the tape library. It might take a while. To view the
status, please open the administration page and enter Backup
ÆTape LibraryÆDevices. When it
finishes the initialization, you will see a page as below.
Inserting and removing tape cartridges
The NAS server will initialize the tape library at start-up and lock the door. To insert or remove
tapes from the tape library with no cartridge access ports (CAP), please unlock the door first. Then
follow the tape library's instruction manuals to insert or remove tapes. Afterwards, lock the door
again so that the tape library can resume to work. It will start the inventory process automatically
to read in all media information after the door is locked.
For some tape libraries which have cartridge access ports (CAP), use the 'Import/Export' function
to insert or remove tapes from the tape library. To insert a tape, first place the tape in the CAP by
following the tape library's instruction manual. Use the 'Import' function to move the tape to an
empty slot. The NAS server will read the tape and add it to its inventory. To remove a tape, use the
'Export' function to move it to the CAP.