2 configure sources, Video, Livematte and crop – NewTek TriCaster 40 User Manual
Page 15: Configure sources
13
2.3.2 CONFIGURE SOURCES
Figure 9
TriCaster’s supports many different live audio and video source types.
Let’s consider how to configure these (see Section2.1 for more
information on connecting audio and video sources).
VIDEO
Generally, you choose settings for TriCaster inputs and outputs
in panels that you open by clicking conveniently located
Configure buttons, identified by a gear icon (Figure 9). These
buttons brighten when you move the mouse near them.
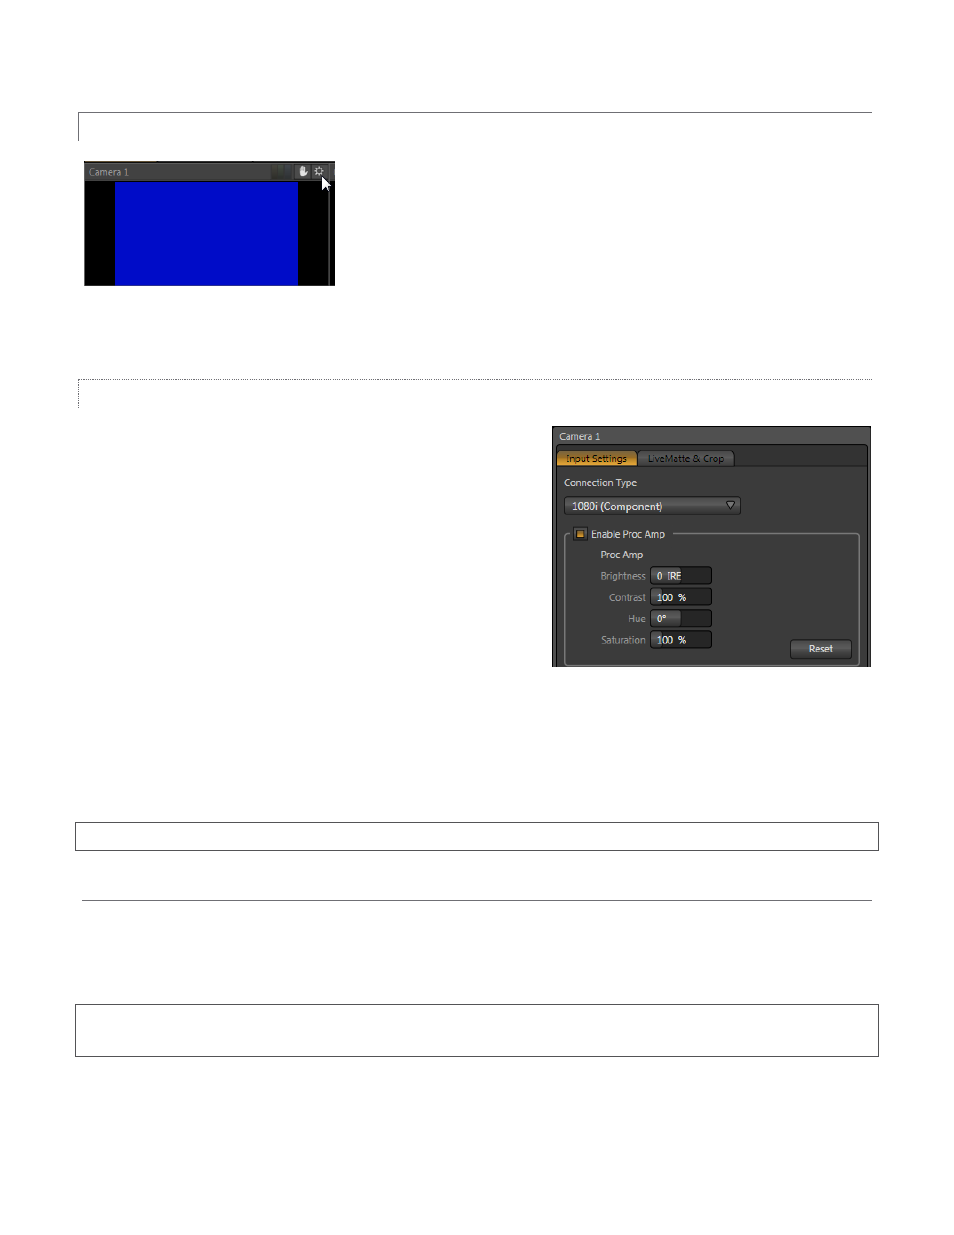
Move your mouse over the monitor for Camera 1 at upper left
on the Live Desktop. Notice the Configure button which appears
at right in the monitor’s titlebar. Click this button to open the
settings panel for Camera 1 (Figure 10).
Click the Connection Type menu to select the proper format for
the camera you connected to Input 1. (You can freely choose SD
or HD options in any session.)
Below this you’ll see Proc Amp controls that let you adjust the color characteristics of this source. Every
TriCaster video source has independent controls just like this. Of course internal sources, such as Media Players
do not require a Connection Type setting.
Hint: Network sources are selected right in their monitor’s titlebar, for quick access.
LIVEMATTE AND CROP
The Input Configuration panel has a second tabbed pane labeled LiveMatte and Crop. This tab contains settings
for TriCaster’s powerful realtime keying feature – LiveMatte. Every video source has similar controls and can
optionally be keyed, then displayed over other content.
Hint: Keyed sources are useful in the DSK (Down Stream Keyer) channels on the main Switcher or as layers in
Virtual Input compositions. These features are discussed in Chapter 3 .
Figure 10