2 getting started, 1 connections, Getting started – NewTek TriCaster 40 User Manual
Page 7: Connections
5
2
GETTING STARTED
This chapter will tell you how to connect, configure and register your new TriCaster™ live
production system. You’ll discover how to get both audio and video in and out of the
system, and to adapt both input and output to suit your production environment and
needs.
2.1 CONNECTIONS
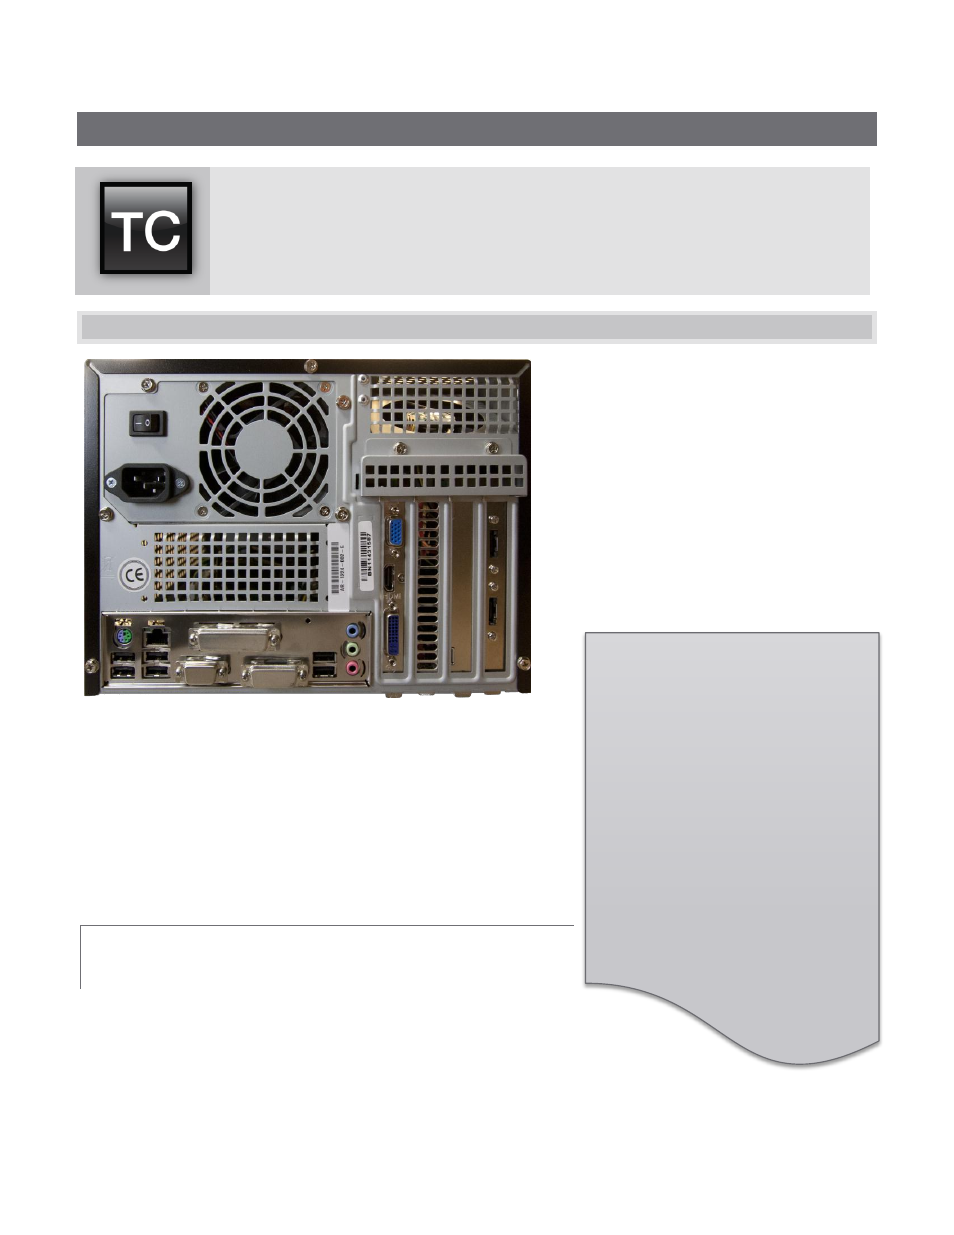
Figure 1
Begin by connecting the A/C power cord to the three-prong
connections on TriCaster’s backplate, and plug the other end into an
external power receptacle (see Hint below). Continue on to connect
the mouse and keyboard to USB ports.
Connect the monitor you plan to use for the interface to a port (DVI
or HDMI to suit your monitor) on TriCaster’s backplate.
TriCaster’s interface requires a minimum screen resolution
of 1600x1050 or 1600x1200.
As for any ‘mission critical’ system, consider connecting your TriCaster™ and
related gear using an uninterruptable power supply (UPS). Likewise, consider A/C
“power conditioning”, especially in situations where local power is unreliable or ‘noisy’.
A word about UPS devices:
‘Modified sine wave’ UPS devices are
popular due to low manufacturing
costs. However, such units should
generally be viewed as being of low
quality and possibly inadequate to
fully protect the system from
abnormal power events..
For a modest added cost, consider a
"pure sine wave" UPS. These units
can be relied on to supply very clean
power,
eliminating
potential
problems, and are recommended for
applications
demanding
high
reliability.