Virtual track basics – Teac MX-View Version 1.0b1 User Manual
Page 20
20
3-16
Virtual Track Basics
There are three types of tracks used in MX-View: Loaded tracks, Virtual tracks, and
Unloaded tracks. This section reviews Loaded and Virtual tracks.
Loaded tracks are “active” tracks that you can play and record onto, as well as
edit. These tracks are visible in the main MX-View window.
Virtual tracks are “inactive” tracks. They are visible tracks that can be edited.
However, you cannot playback or record onto these tracks.
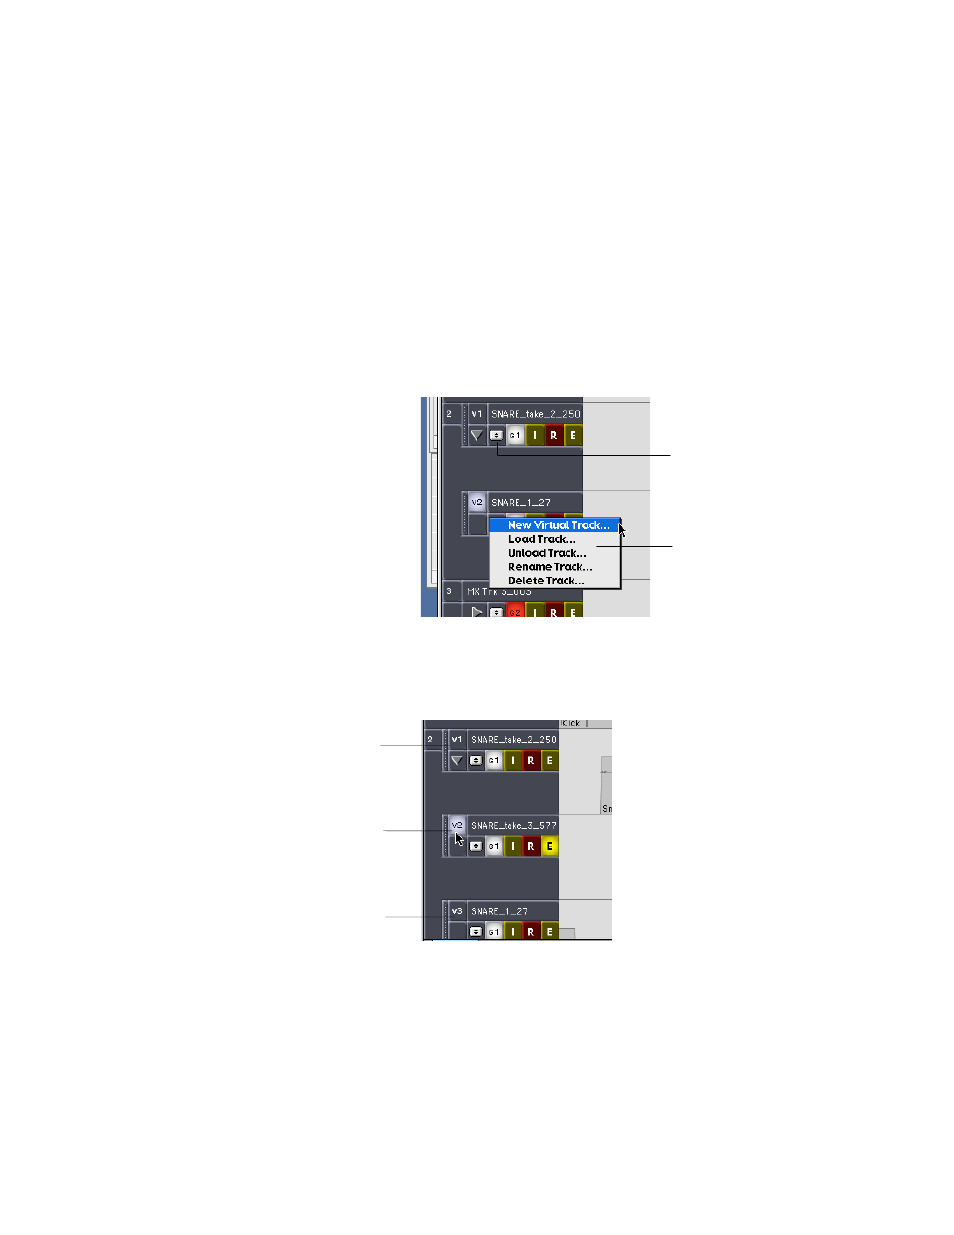
Creating a New Virtual Track:
To create a new Virtual track choose a track for which you wish to record an alternate
take. Access the Track drop down menu, as shown below, and select New Virtual Track.
Type in a new track name for the Virtual track and click on OK. The new Virtual track
will appear below.
Loading a Virtual Track
To switch playback and record abilities to a Virtual track, you must load, or “activate”,
the desired track. Clicking on the Active/Inactive track button, so that it appears lit, will
load, or activate, the track.
Virtual Track management is covered in detail in section 4-6 and Chapter 10.
Virtual track 1 is inactive. Audio
within this track can be viewed
and edited, but cannot be played
back or recorded on to.
Virtual track 3 is inactive. Audio
within this track can be viewed
and edited, but cannot be played
back or recorded on to.
Clicking on the Active/Inactive
track button caused Virtual track 2
to become active, or loaded. Audio
from this track is audible and can
be recorded on to.
Tracks Menu button
Track drop-
down menu