Chapter 10: tracks, Track menu, Creating a new virtual track – Teac MX-View Version 1.0b1 User Manual
Page 79
79
Chapter 10: Tracks
Chapter 10 covers Track management in depth, including unloading, loading, deleting and renaming tracks,
as well as using Virtual tracks. Note that definitions of Loaded tracks, Unloaded tracks, and Virtual tracks
are available in section 4-6 as well as page 35 of the MX-2424 Tutorial (Virtual Tracks).
10-1
Track
Menu
In order to perform any track-based function, you must first click on the Tracks Menu
button, displaying the track drop-down menu. This menu is available for any Virtual or
Loaded tracks.
The menu presents the options of creating a New Virtual Track, Loading a Track,
Unloading a Track, Renaming a Track and Deleting a Track.
10-2
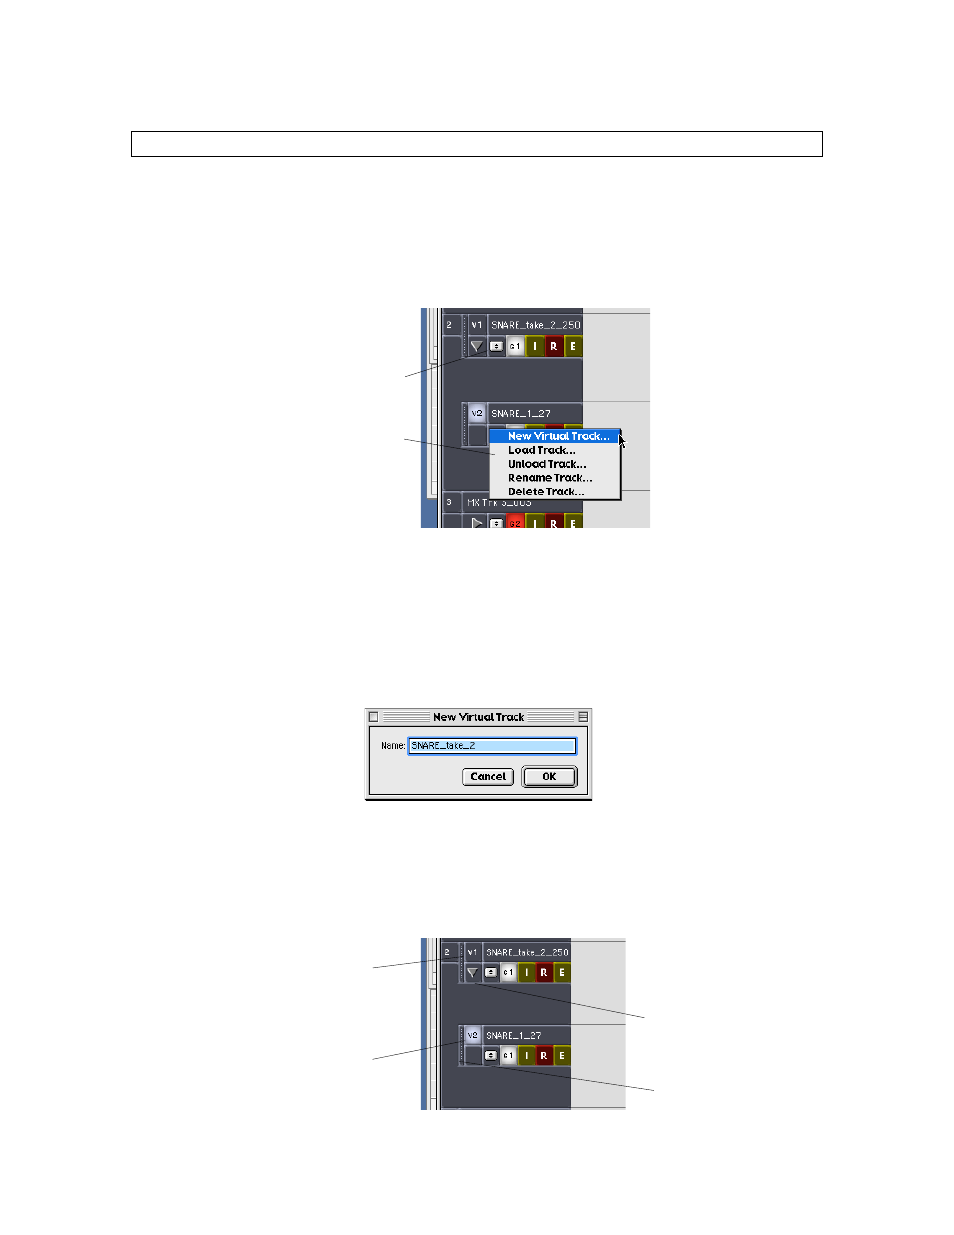
Creating a New Virtual Track
Access the Track drop down menu and select the “New Virtual Track” option. The
prompt box, as shown below, will appear, presenting the option to provide the new
Virtual track with a name. The default name will include the existing Track name
followed by the take number. Pressing “OK” will create a new Virtual track.
The new Virtual track will appear above the original track.
Activating Virtual Tracks
To switch between an active and inactive virtual track, simply click once on the desired
Active/Inactive Track Button, so that it appears highlighted. You may choose to hide all
virtual tracks by clicking the Hide/Show Virtual tracks button, as pointed out below.
Tracks Menu button
Track drop-
down menu
Inactive Virtual Track
Button: This track will not
play or record any audio.
You can still perform edits
on this track.
Active Virtual Track
Button: This track will
play or record audio.
Hide/Show Virtual
tracks button
Drag Handle