Shoot the time-lapse movie – Canon EOS 80D User Manual
Page 322

N
Shooting Time-lapse Movies
322
11
Shoot the time-lapse movie.
Press the shutter button halfway to
check the focus and exposure.
Press the shutter button completely to
start shooting the time-lapse movie.
AF will not work during time-lapse
movie shooting. The exposure setting
for the first shot will be applied to
subsequent shots.
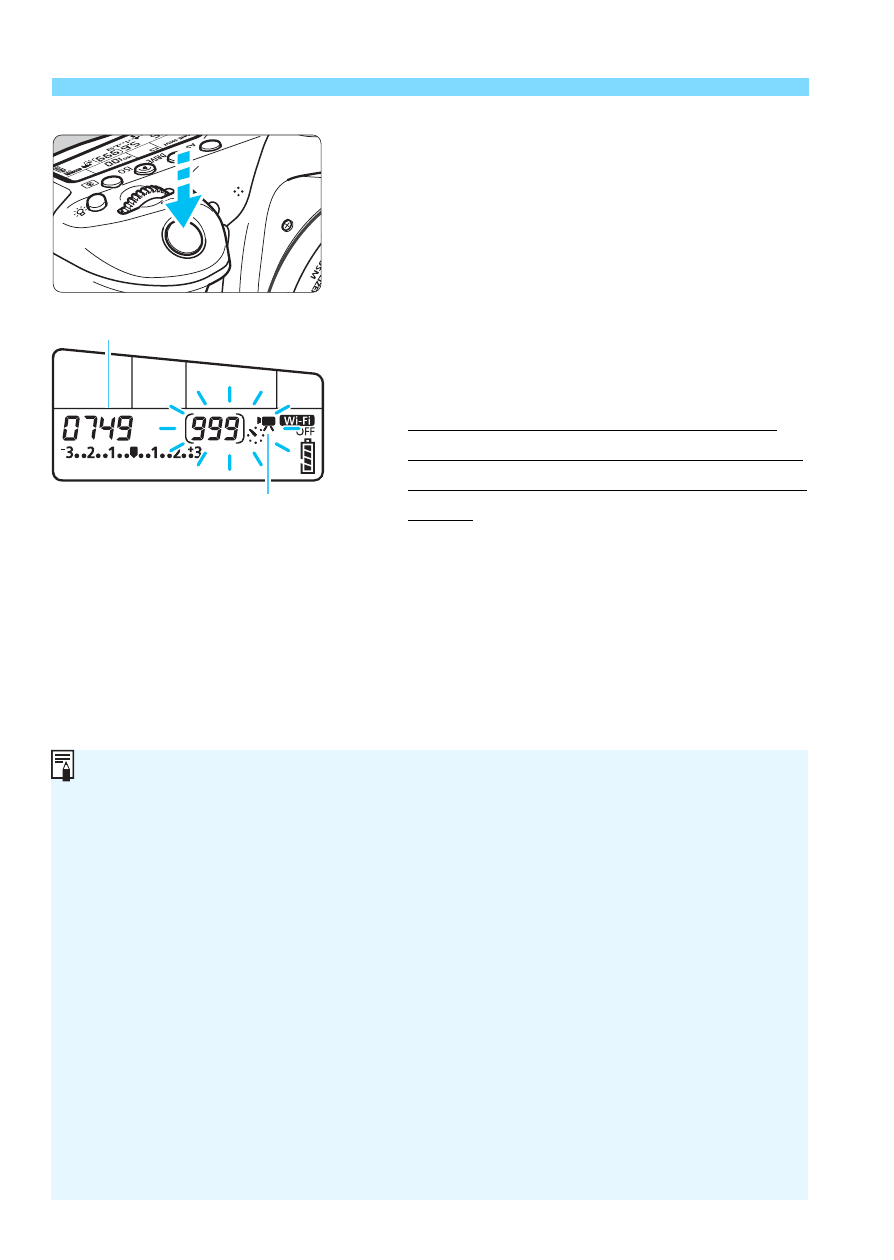
During time-lapse movie shooting,
nothing will be displayed on the LCD
monitor. <N> will blink on the LCD
panel.
Since the electronic shutter is used
for shooting, the reflex mirror and
shutter make no mechanical sound
during time-lapse movie shooting.
When the set number of shots are
taken, the time-lapse movie shooting
will stop and be automatically canceled.
Time-lapse movie
Shots remaining
Using a tripod is recommended.
Taking test shots is recommended.
To cancel the time-lapse movie shooting before it is completed, either
press the shutter button completely or press the <0> button ([Disable]
is set). The time-lapse movie shot so far will be recorded on the card.
You can play back the shot time-lapse movie with this camera the same
way that you play back normal movies.
If the time required for shooting is more than 24 hours but not more than
48, “2 days” will be indicated. If three or more days are required, the
number of days will be indicated in 24-hour increments.
Even if the time-lapse movie’s playback time is less than 1 sec., a movie
file will still be created. For [Playback time], “00:00:00” will be displayed.
If the shooting time is long, using DC Coupler DR-E6 (sold separately)
and AC Adapter AC-E6 (sold separately) is recommended.
When shooting in Basic Zone modes, the scene icon for the scene
detected by the camera is displayed on the upper left of the screen (p.260).