Step 3: connecting the fm/ am aerials, Step 3: connecting the fm/am aerials – Sony DAR-RD100 User Manual
Page 17
17
GB
H
ook
up
s and
Se
tti
n
gs
Notes
• Use screws that are suitable for the wall material and
strength. As a plaster board wall is especially fragile,
attach the screws securely to a beam and fasten them to
the wall. Install the speakers on a vertical, flat wall
where reinforcement is applied.
• Contact a screw shop or installer regarding the wall
material or screws to be used.
• Sony is not responsible for accident or damage caused
by improper installation, insufficient wall strength or
improper screw installation, natural calamity, etc.
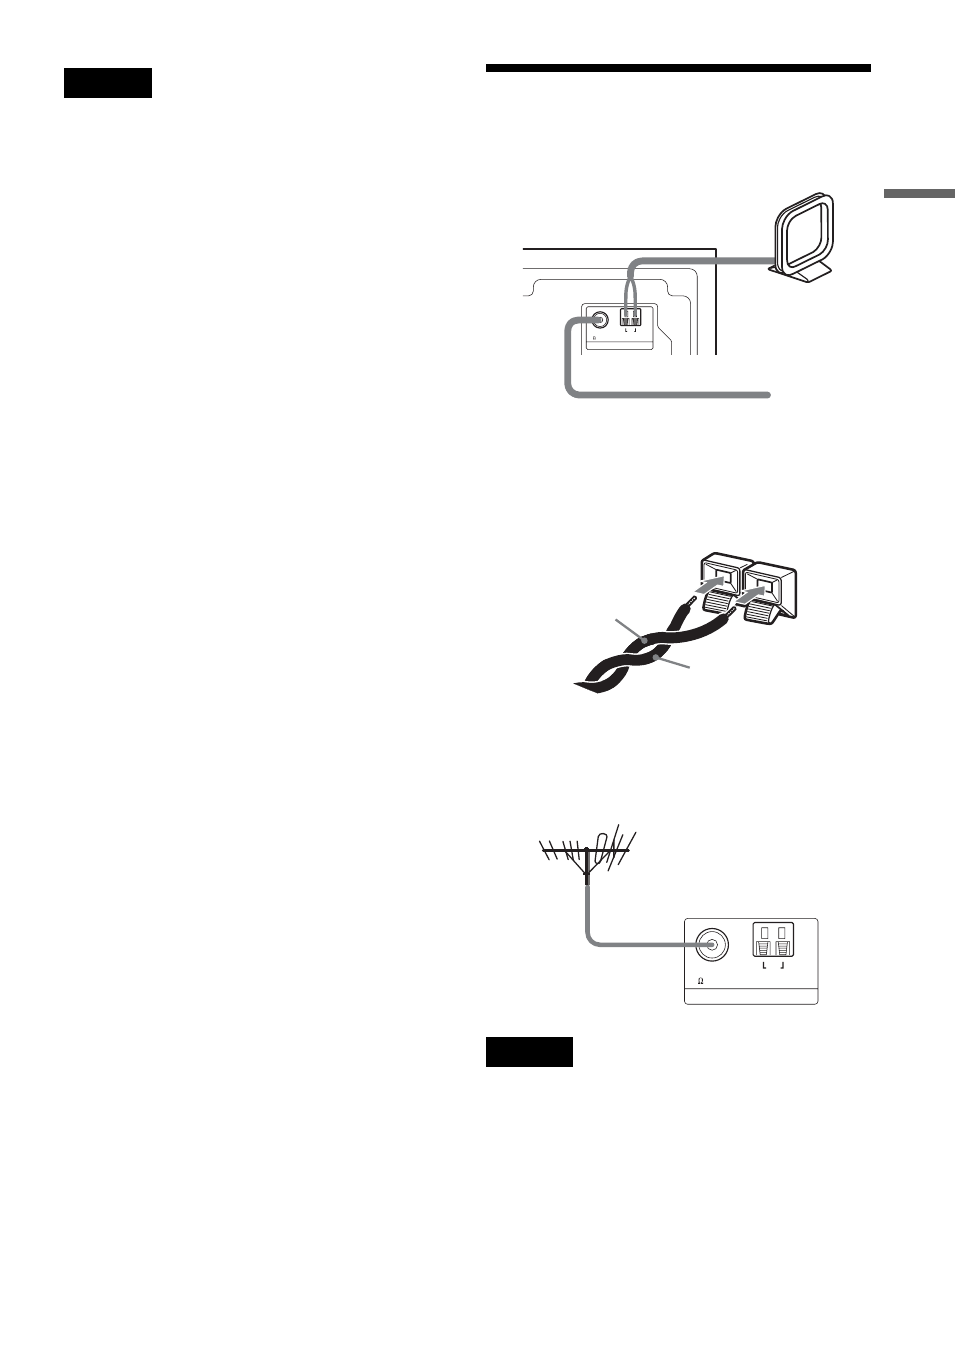
Step 3: Connecting the FM/
AM Aerials
z
Hints
• When connecting the AM loop aerial, cord (A) or cord
(B) can be connected to either terminal.
• If you have poor FM reception, use a 75-ohm coaxial
cable (not supplied) to connect the system to an
outdoor FM aerial as shown below.
Notes
• To prevent noise pickup, keep the AM loop aerial away
from the system and other equipment.
• Be sure to fully extend the FM wire aerial.
• After connecting the FM wire aerial, keep it as
horizontal as possible.
AERIAL
AM
FM
75 COAXIAL
AM loop aerial
(supplied)
Subwoofer
FM wire aerial (supplied)
A
B
AERIAL
AM
FM
75 COAXIAL
Outdoor FM aerial
(not supplied)
Subwoofer