Dubbing from a dv/digital8 format tape to a dvd, Hookups – Sony DAR-RD100 User Manual
Page 71
71
GB
D
V
Du
bbi
ng
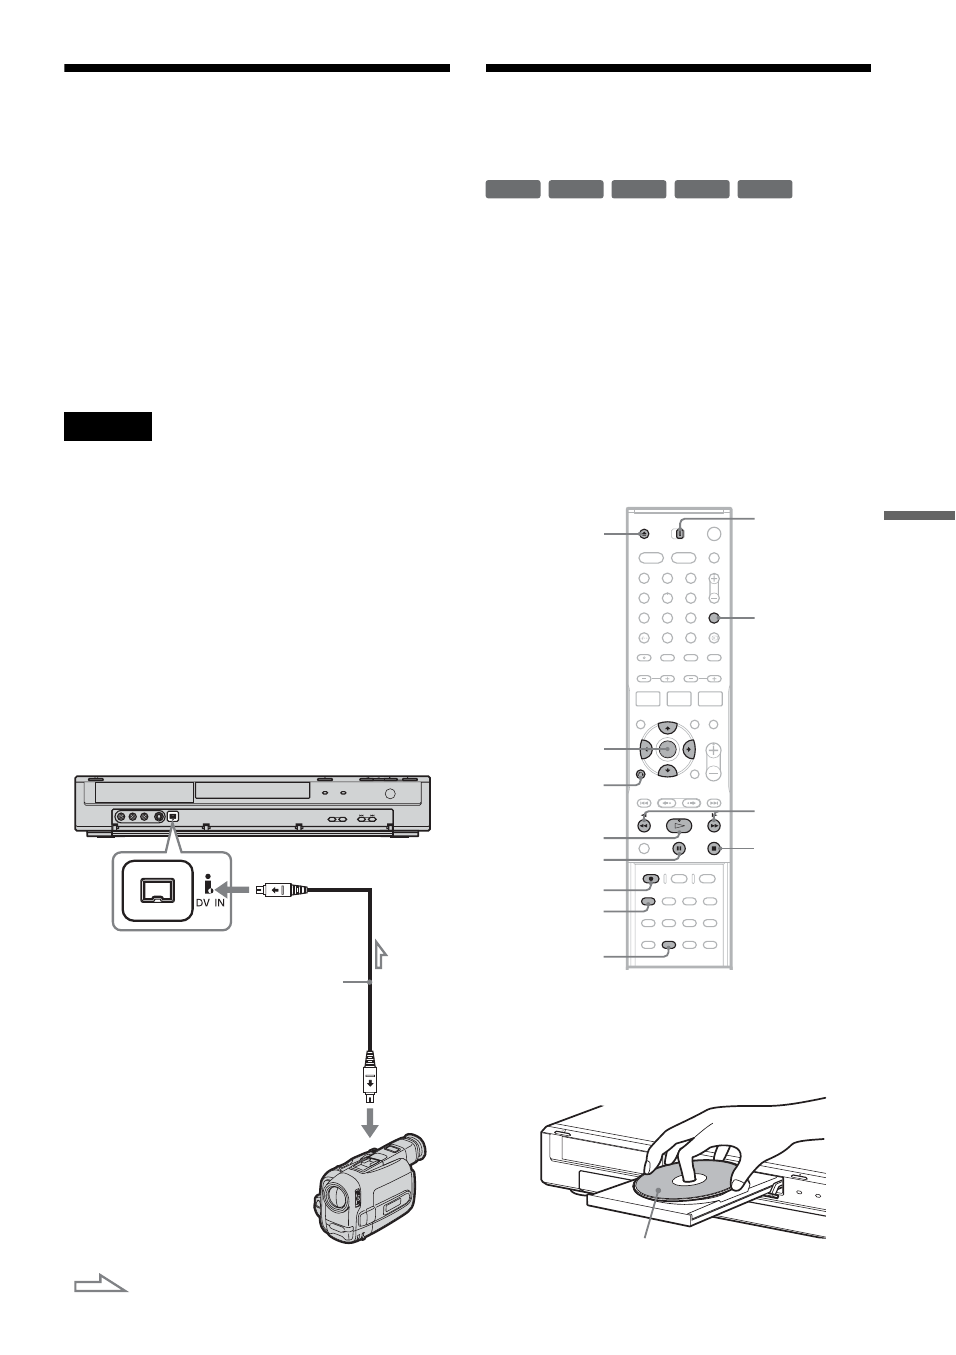
Connecting a Digital Video
Camera to the DV IN Jack
You can connect a digital video camera to the DV
IN jack on the recorder to record or edit from a
DV/Digital8 format tape. Operation is
straightforward because the recorder will fast
forward and rewind the tape for you – you do not
need to operate your digital video camera. Do the
following to start using the “DV Edit” functions of
this recorder.
See also the instruction manual supplied with the
digital video camera before connecting.
Notes
• The DV IN jack is for input only. It will not output
signals.
• You cannot use the DV IN jack when:
– your digital video camera does not work with this
recorder. Connect the camera to the LINE IN jack
and follow the instructions of “Recording From
Connected Equipment” (page 49).
– the input signal is not in DVC-SD format. Do not
connect a MICRO MV format digital video camera
even if it has an i.LINK jack.
– the images on the tape contain copy protection
signals, which limit recording.
• If you want to play the disc on other DVD equipment,
finalize the disc (page 39).
Hookups
Dubbing From a DV/Digital8
Format Tape to a DVD
You can record a DV/Digital8 format tape onto a
disc. The recorder controls the digital video
camera. You can fast forward, rewind, and stop
the tape to select a scene using the recorder’s
remote control.
◆
How chapters are created
The dubbed contents become one title, and the title
is divided into chapters. The recorder divides the
title into chapters according to the setting in [Rec
Setting] Setup (5, 10, or 15-minute intervals, or
does not divide at all) (page 83).
1
Press
Z
(open/close), and place a
recordable disc on the tray.
Make sure that the disc has enough free space
to record the contents of your tape.
DVD recorder
to DV IN
i.LINK cable
(not supplied)
DV output
Digital video camera
: Signal flow
-RW
VR
-RW
Video
+
RW
+
R
-
R
1
2
3
4
6
7
8
9
0
5
REC MODE
Z
INPUT
SELECT
<
/
M
/
m
/
,
,
ENTER
X
x
z
REC
O
RETURN
SET UP
H
m
/
M
AMP/DVD
switch
Labelled side facing up
,
continued