3 switching instrument on/off, 4 field accuracy check (acoustic calibration) – Casella CEL CEL-368 User Manual
Page 47
For example, the C6593/1 Cable (1 m) plugs into a cigar lighter socket
and can be used to power the instrument from an ordinary car battery.
5.3
Switching Instrument ON/OFF
1.
Switch the instrument ON and OFF by pressing
.
Immediately the noise meter is switched ON, it performs an auto-
matic sequence of self-verification tests while displaying the soft-
ware version number. After this sequence, the current status of
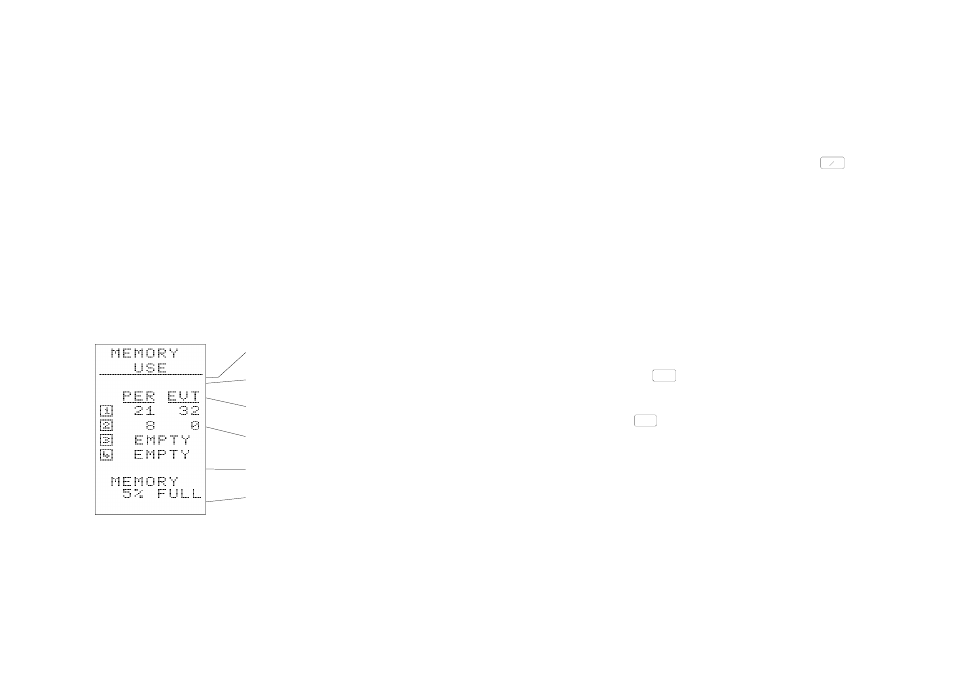
the data stores is indicated briefly
Then the user is offered the choice of recalibrating (i.e performing
a field accuracy check - see Section 5.4) or continuing to use
the existing calibration settings.
5.4
Field Accuracy Check
(Acoustic Calibration)
1.
Either: Press
to use the existing
calibration level and proceed directly to the SETUP menu.
Or: Press
to perform a field
accuracy check (acoustic calibration) and follow the instructions
given on the display.
Acoustic calibration is normally
performed with a CEL-284/2
Acoustic Calibrator (IEC 942 Class 1L) or a CEL-282 Acoustic
Calibrator IEC 942 Class 2L).
2.
With the CEL-268 and CEL-
284/2, carefully fit the calibrator over the end of the micro-
phone (Figure 7), making sure it is correctly seated against the
shoulder in the calibrator cavity then proceed to step 5.
ON
OFF
EXIT
STOP
CAL
Period Data
Number of Stored Periods
Event Data
Number of Stored Events
Cumulative Store Identity
Amount of Memory Used
CEL-268/368 Operator's Handbook - Page 43