CONTA-CLIP CONTA-Sign 4.3 User Manual
Page 39
11. Firmware update of the plotter
11. Firmwareupdate des Plotters
11. Firmware update of the plotter
With this option you are able to update the existing firmware of the plotter.
It is necessary e.g. if you are using a EMS-2 plotter already, purchased in 2005
or earlier and now wanted to use the engraving feature.
In order to download a new version, please follow the steps as described:
Start the program CONTA Sign CS and switch on the plotter. Make sure the plotter is
connected with the interface cable to the PC and the interface is selected correctly
(see point 3).
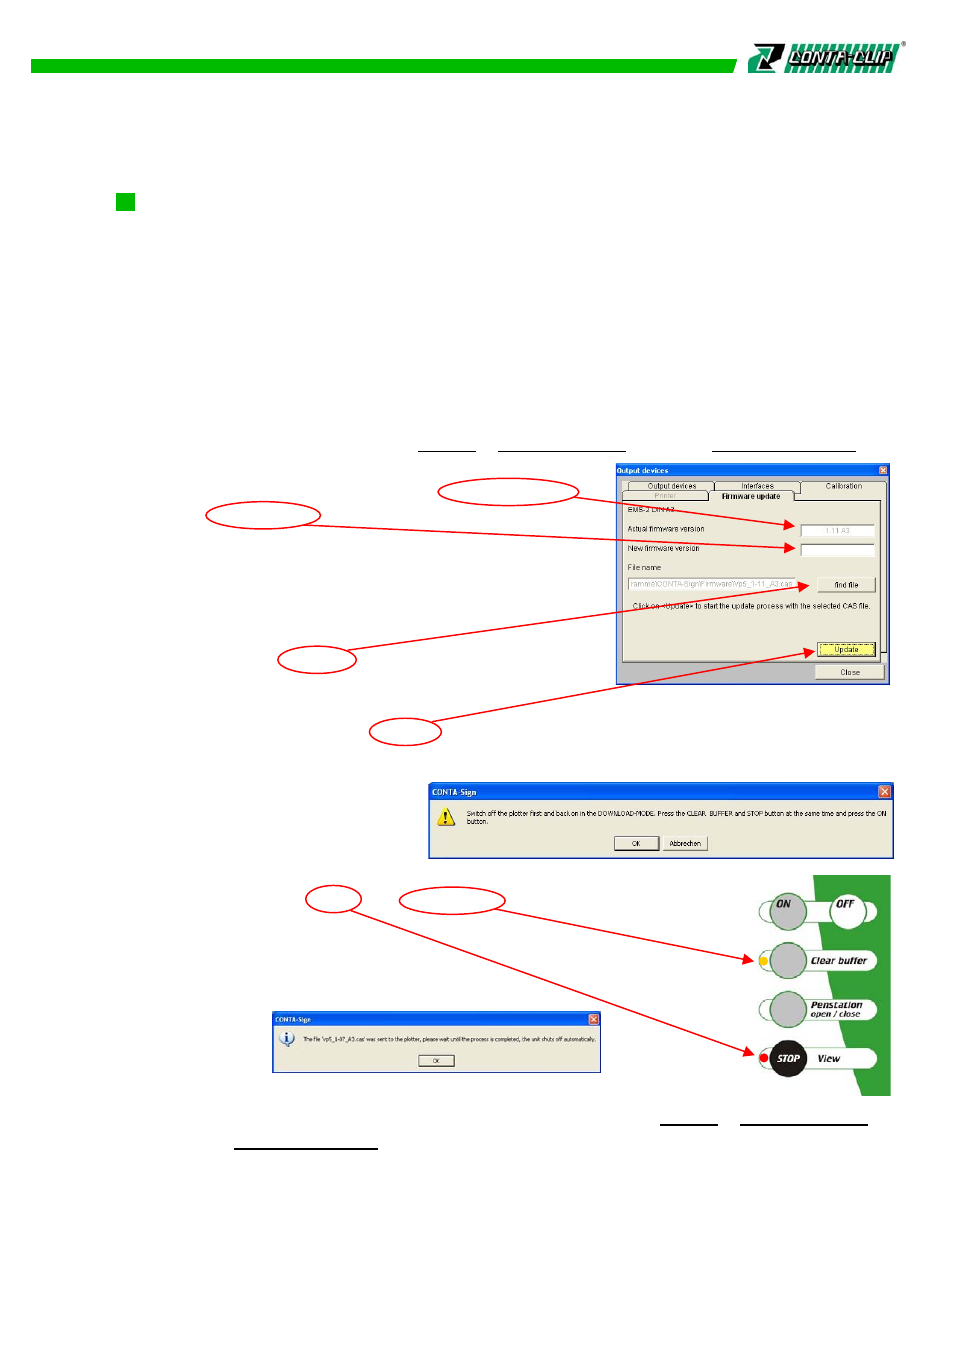
Choose from the main menu > Output > Output devices the tab > Firmware update.
The upcoming window shows the actual firmware in
nos. A later version of the firmware is shown in the
field below with a higher no.
Now you can update to the next level of the firmware.
If the later version is not in the pre-selected folder,
please use the find file button to search for in
another folder.
With a click on the button Update a new message window opens up.
You are asked to switch the plotter into the download mode.
In order to do so, turn off the
plotter, hold down the button
Clear buffer and the button STOP together and press ON again.
The control LEDs STOP and Clear buffer are on.
Confirm the setting with the OK button and the update process
starts. A new message opens up telling you the plotter will turn off
automatically after completion. Confirm with the OK button.
In order to check if the new firmware is stored correctly in the plotter,
turn on the plotter again and choose from the main menu > Output > Output devices
the tab > Firmware update. In the field “Actual firmware version” should now be the no.
of the latest version.
38