CONTA-CLIP CONTA-Sign 4.3 User Manual
Page 41
11. Firmware update of the plotter
11. Firmwareupdate des Plotters
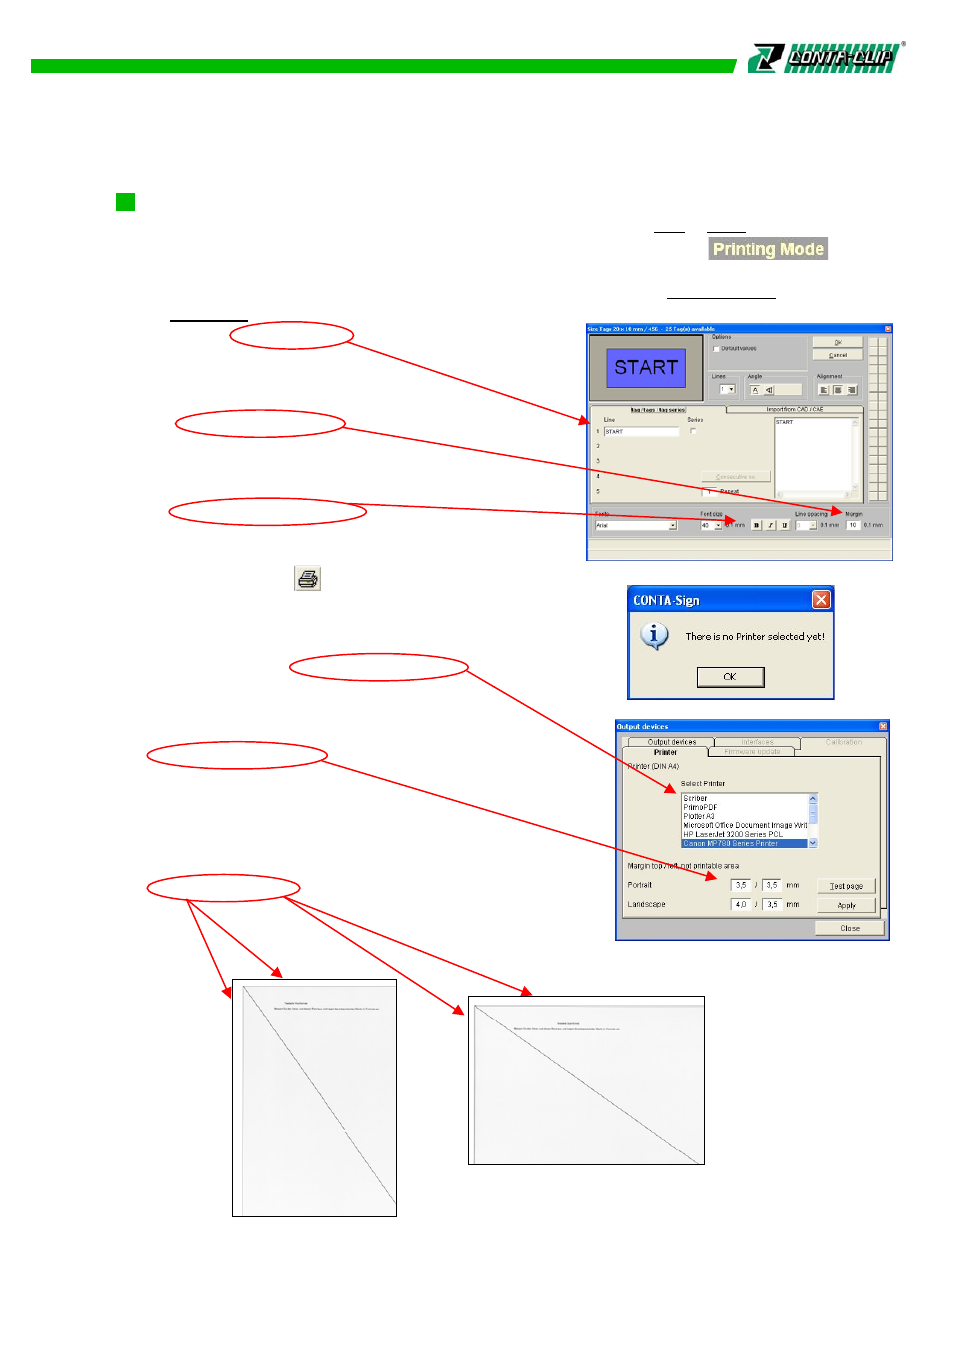
12.2 Printing on standard Office Printer
Please select first the output device from the main menu > File > New.
In the upper left corner of the screen you will find the information.
The designed labels are available for labeling in the folder > User defined under
> Producer (manufacturer).
Enter the labeling data in the editing window as
usual. The data can be changed and modified as
described in chapter 5.4 to 5.6.
By selecting a margin, a fixed distance within the
label can be set, making sure the print is always
within the label area.
In addition the text can be manipulated for printing
in Bold, Italic, Underline, clicking OK transfers the
data to the label.
After all entries are completed,
click on the icon Print / Plot / Engrave.
A message window opens up with the information to
select first a system printer, clicking OK opens the
window with the available printer list.
Please select the Office Printer you like to use for the
printout.
In addition you need to enter the data of the
non printable areas from the top and left in both of the
formats, portrait and landscape.
Click on Test page in order to print the two pages
for you to take the measurements from the
top and left side, enter the data and click on Apply.
The data are stored for the selected printer and the
print window opens accordingly.
40