CONTA-CLIP CONTA-Sign 4.3 User Manual
Page 4
1. System Requirements
Pentium II PC (200 MHz or higher)
64 MB RAM
CD-ROM drive
VGA graphics adapter and monitor (256 colors, resolution 640 x 480)
Operating system: Windows 98, ME, NT, 2000, XP, Vista (32bit)
Mouse
2. Software Installation
First close all other applications. Insert the “CONTA Sign CS” CD into the CD-ROM
drive of your PC. Installation will start automatically. Please follow the on-screen
instructions. If the auto-start feature has been switched off on your PC, please start the
set-up program by double-clicking.
When the installation is complete, connect the plotter to the PC with the parallel
interface cable or USB -cable and switch the plotter on.
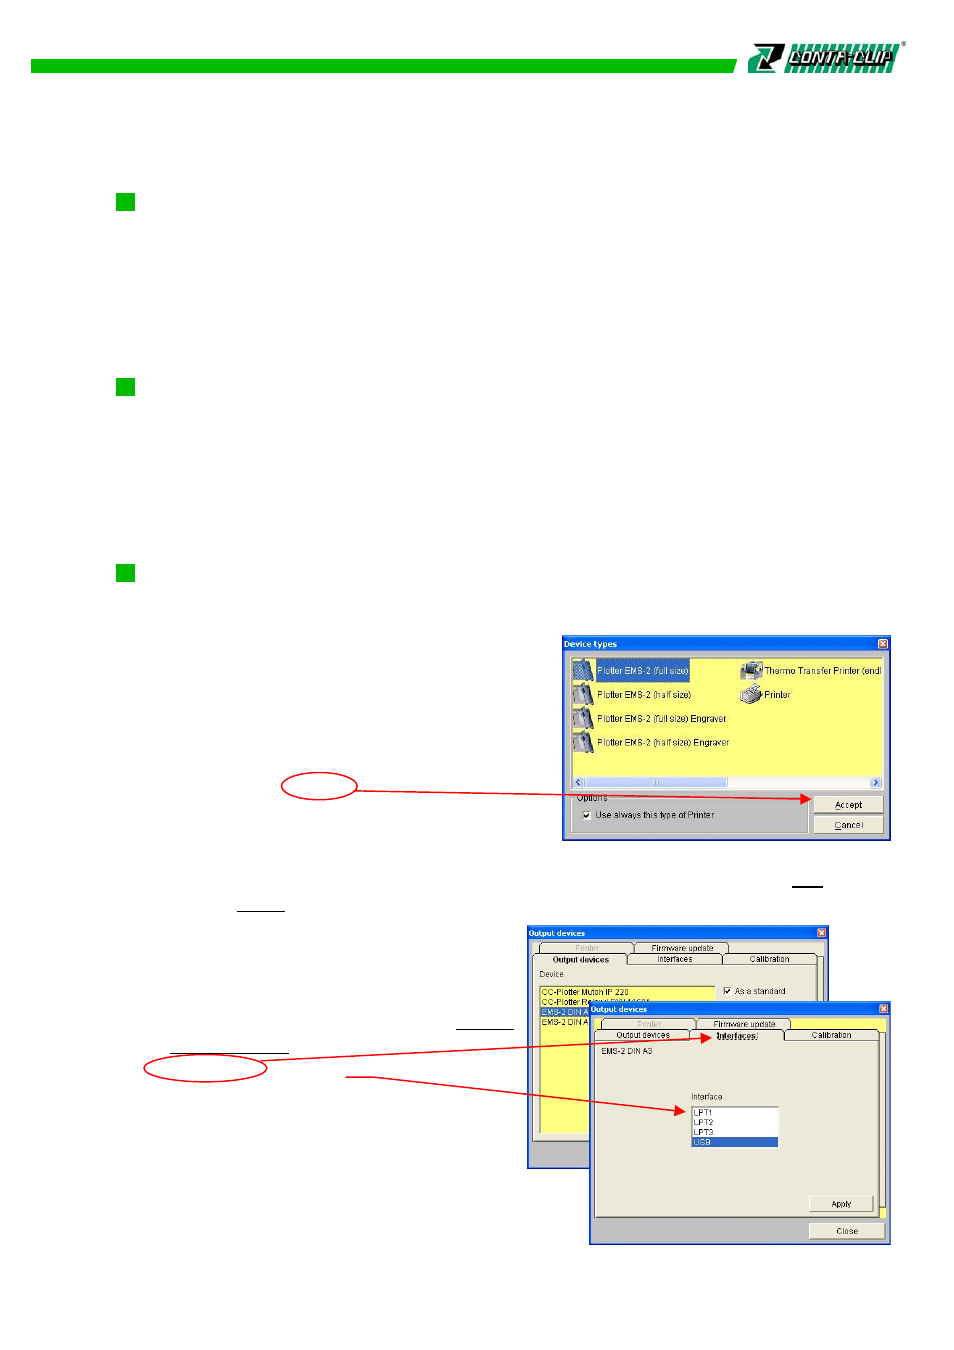
3. Selecting the Output Device and Changing Settings
Now start the CONTA Sign CS program by a double click on the symbol located on
the desktop. Before working with the software, you must first install the plotter you
intend to use. To do this, select the output
device in the window. As example, if you are
using the
EMS-2 select the output device and check the
clickbox as Use always this type of Printer.
You will not be asked any more in the future.
With the button Accept the setting will be
saved and the window be closed.
If you like to connect another output device in
the future, like the EMS-2 (half size) Engraver, endless Thermal-Transfer Printer or an
Office Printer, you can always get back to the window from the Menu bar > File and
choose > New. The EMS-2 is default set as standard output device, connected
through the USB.
In addition, the EMS-2 has a parallel port,
to be used with the CONTA Sign CS. For
using you need to change the output to
parallel, go to the main menu bar > Output
> Output device and check the
Interface tab. Confirm LPT1 as the new
interface port and click on Apply.
Connect the parallel cable on both ends
and switch on the EMS-2, the software will
recognize the plotter accordingly.
3