Test box calibration facts, Calibrating test box reference microphone – Audioscan Verifit 2 User Manual
Page 95
Verifit
®
User's Guide Version 4.2 © June 2015
Click on
to save your selections.
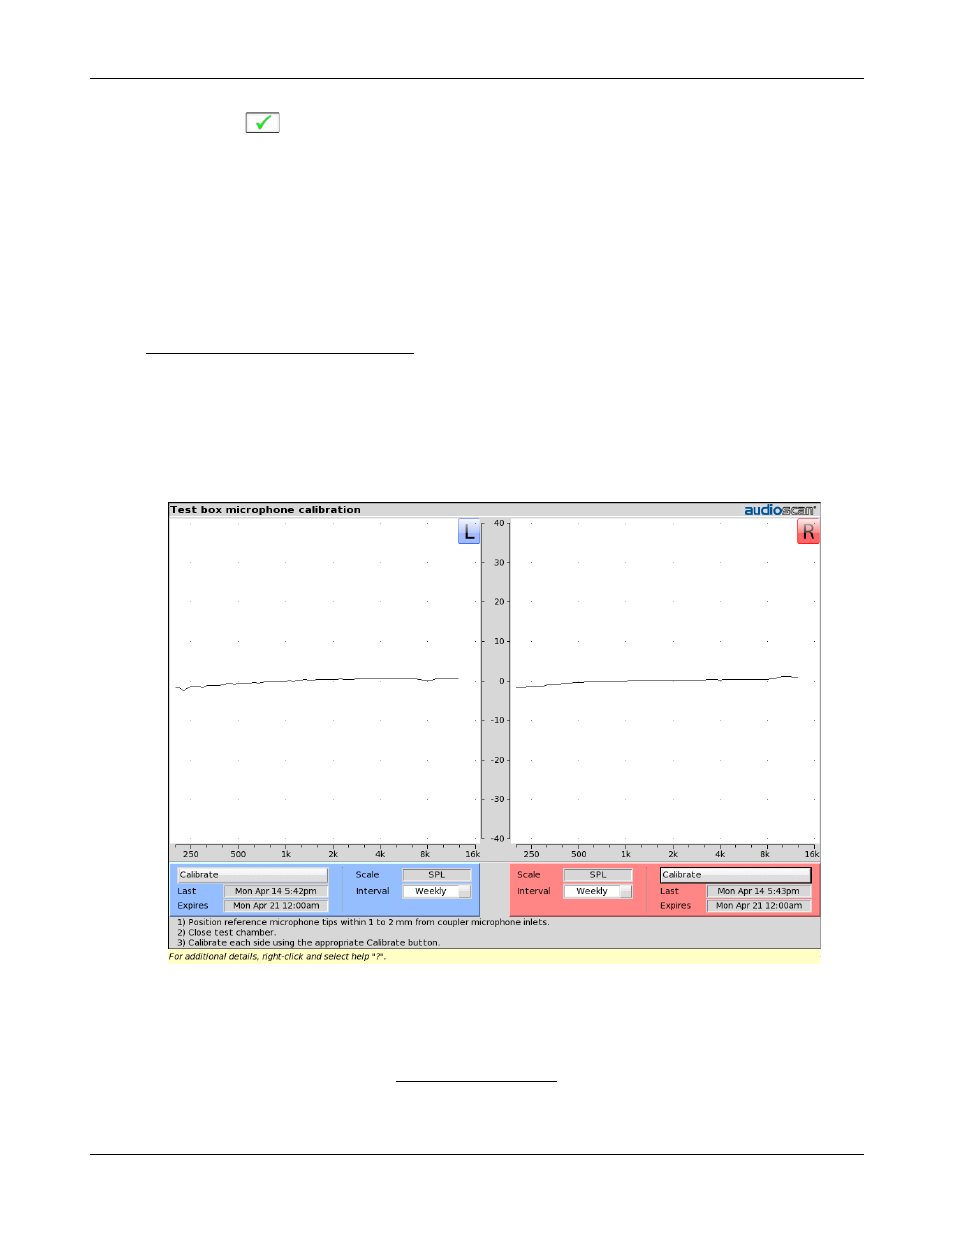
Test box calibration facts
Test box microphone calibration establishes a correction curve for each uncalibrated test box reference
microphone by comparison with the factory calibrated coupler microphone. It may be performed as often as
desired but will be invalidated at 12 am the following day or at 12 am the following Monday, depending on the
choice of Daily or Weekly calibration interval. After the calibration has expired, the message window will turn
blue and you will be prompted to calibrate whenever you attempt a test that uses the test box microphones.
Your calibration curve should be similar to the one shown but may be at a different level. It should remain stable
over time. Irregularities in the calibration curve may be the result of not properly aligning the microphones. See
Calibrating test box reference microphone.
Calibrating test box reference microphone
Remove any coupler from the coupler microphone before calibration.
1. Position the test box reference microphones with their openings concentric with the binaural coupler
microphone openings and about 1 – 2 mm from as shown below.
2. Close and seal the test chamber.
3. Right-click the mouse and click [Calibration] under Test box.
4. Click [Daily] or [Weekly] to select the calibration interval.
5. Click [Calibrate] for each side. See Test box calibration facts
It is recommended that you print a copy of the initial calibration curve and compare it with your daily or weekly
95