Positioning hi for binaural/wideband tests – Audioscan Verifit 2 User Manual
Page 97
Verifit
®
User's Guide Version 4.2 © June 2015
When connecting the couplers onto the binaural coupler microphone, it is important that they produce a good
acoustic seal. Ensure each coupler is fully inserted in the retention slot. To remove, push the red or blue levers
while pulling up on the coupler.
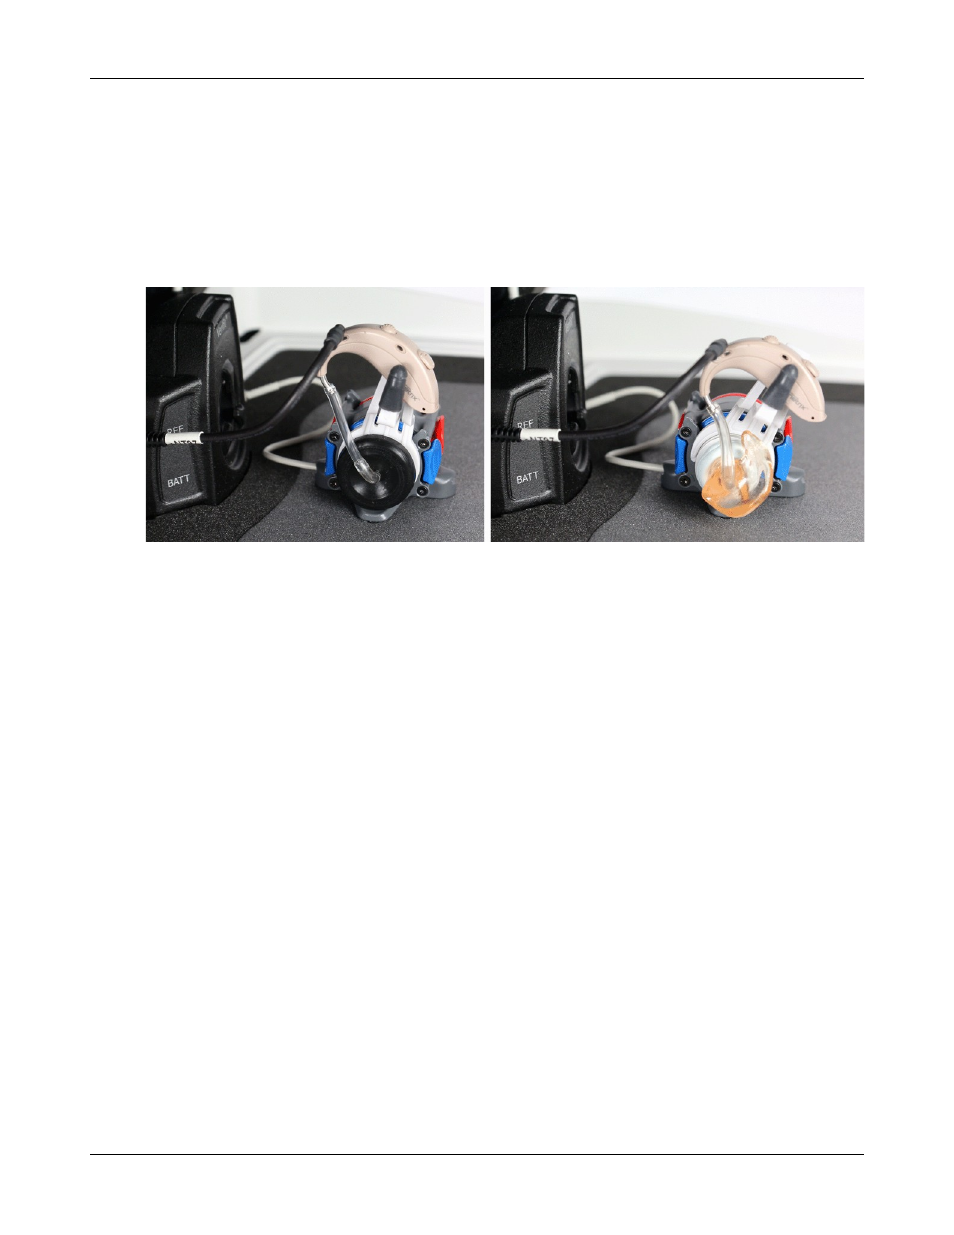
BTE instruments are coupled to the 0.4cc coupler using the earmold and putty or using the provided earmold
substitues (HA-4) coupled to TRIC adapters. When the earmold is used, ensure the eartip is flush with the inside
of the coupler opening. Putty should not extend into the coupler cavity or block the sound outlet of the mold.
Vents should be sealed at the lateral end. It is very important that the instrument be well-sealed to the coupler.
Use the hearing instrument stabilizers to prop the BTE body in the vertical, as-worn position.
Custom instruments are sealed to the 0.4cc coupler with putty so that the end of the eartip is flush with the
inside of the coupler opening. Putty should not extend into the coupler cavity or block the sound outlet of the
instrument. Vents should be sealed at the faceplate end. It is very important that the instrument be well-sealed to
the coupler.
Open fit instruments may not be fit in the test-box.
RITE (Receiver in the ear) instruments which are fit with an occluded canal (e.g. with a micro-mold or
occluding dome) are coupled to the 0.4cc coupler using the TRIC adapter. For particularly large receivers,
insertion is easiest with the TRIC adapter not yet mounted on the coupler. Fold the TRIC adapter in half to open
the hole temporarily to ease insertion of larger receivers.
Excess low frequency output is usually due to open vents or a poor seal to the coupler.
For health reasons, hearing instruments should be clean before putty is applied and putty should be replaced
frequently.
Positioning HI for binaural/wideband tests
1. The hearing instrument should be coupled to the 0.4cc coupler with a battery installed. See Coupling the
hearing instrument for binaural/wideband tests
2. Place the binaural coupler microphone in the center of the test chamber so that the magnetic positioning aids
hold it directly over the crossbar.
3. Connect the instrument and coupler to the coupler microphone on the appropriate side so that the
microphone opening(s) of the instrument are facing forward, toward the main test box speaker.
4. Rotate the coupler and instrument so the angle approximates that of the instrument as worn on the client's
ear.
5. Position the test box reference microphone on the appropriate side as close as possible to the (front-facing)
97