Lynx Studio Hilo Reference A/D D/A Converter System - Owner's Manual with LT-USB User Manual
Page 39
Page 35
3.4.8.9 Routing tutorial
These powerful routing features are probably best demonstrated with a real-world scenario. Let’s pretend that the Hilo
is being used for a recording session, where a keyboard part is being overdubbed on an existing project. The pre-
recorded tracks are streaming through the USB Play 1&2 channels in the computer.
For cable connections, the keyboard signal is coming in LINE INPUTS 1&2. The recording engineer is listening to
the MONITOR OUTPUTS feeding speakers in the control room. The performer is listening to headphones plugged
into Hilo’s PHONES jack.
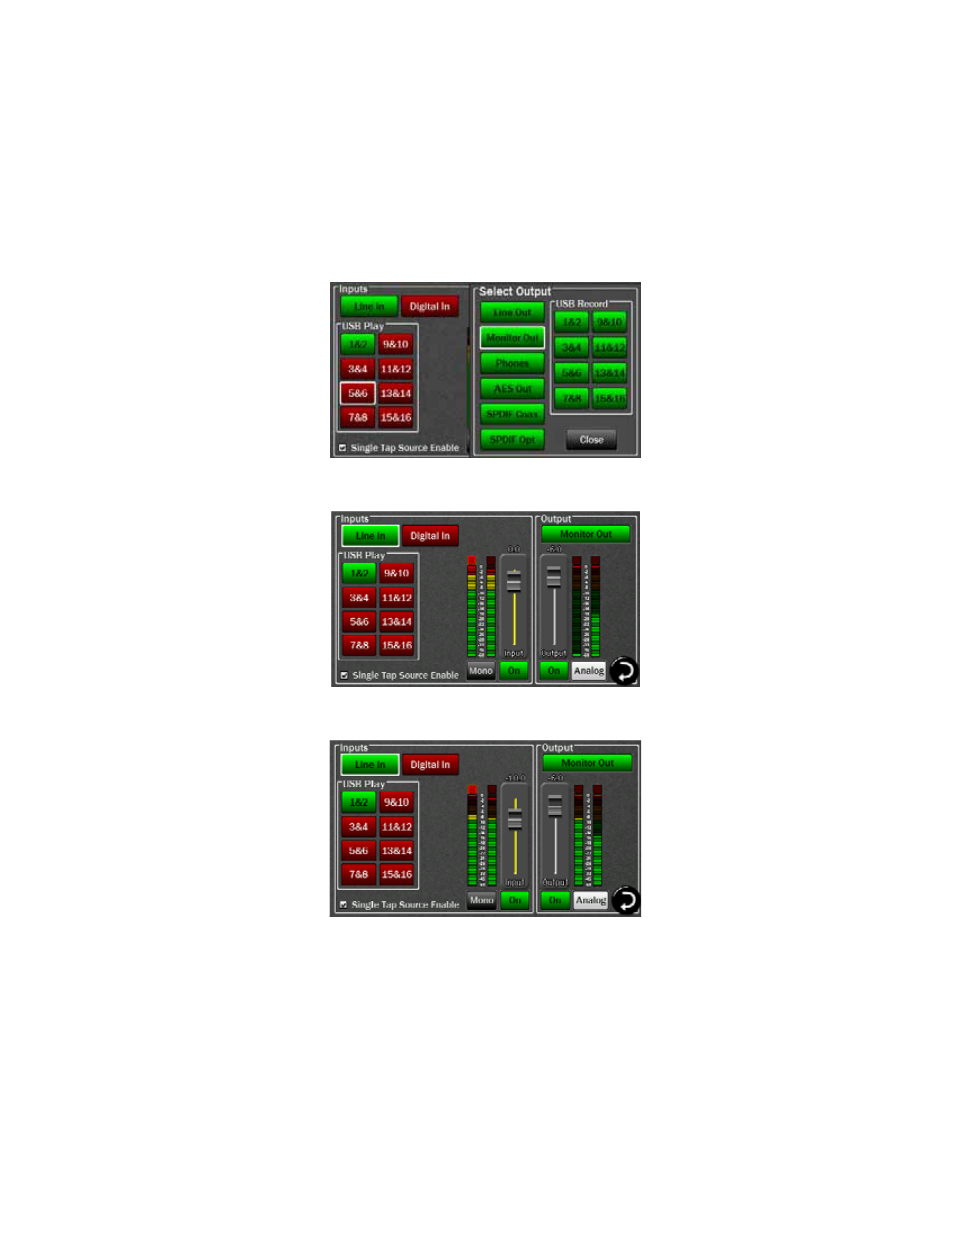
Let’s start by setting levels for the recording engineer. Start by selecting “Monitor Out” as the active Output:
We already have signal from USB Play 1&2 carrying the streams from the computer. Now let’s add Line In as a source
so there is the new keyboard parts along with the existing tracks.
The keyboard level is a bit hot compared to the mix. Let’s attenuate the Line In signal by 10dB.