Installing the printer driver on windows vista, Turn the printer’s main power switch off – Rena Envelope Imager CS User Manual
Page 13
SECTION 2
INSTALLING THE PRINTER
Installing the Printer Driver on Windows Vista
®
Please be sure to follow the procedure as described below.
1. Place the “CS Driver CD”, supplied with the printer, in your CD-ROM drive.
Note: Vista
®
compatible drivers are included on the “CS Driver CD” V2.5 or higher. Earlier CD
versions do not contain Vista
®
compatible drivers. Please access our web site to obtain the most
recent printer drivers
.
2. Turn the printer’s Main Power switch OFF.
3. Connect the printer to the computer via the
port you wish to use (USB or Parallel) and
then turn the printer ON.
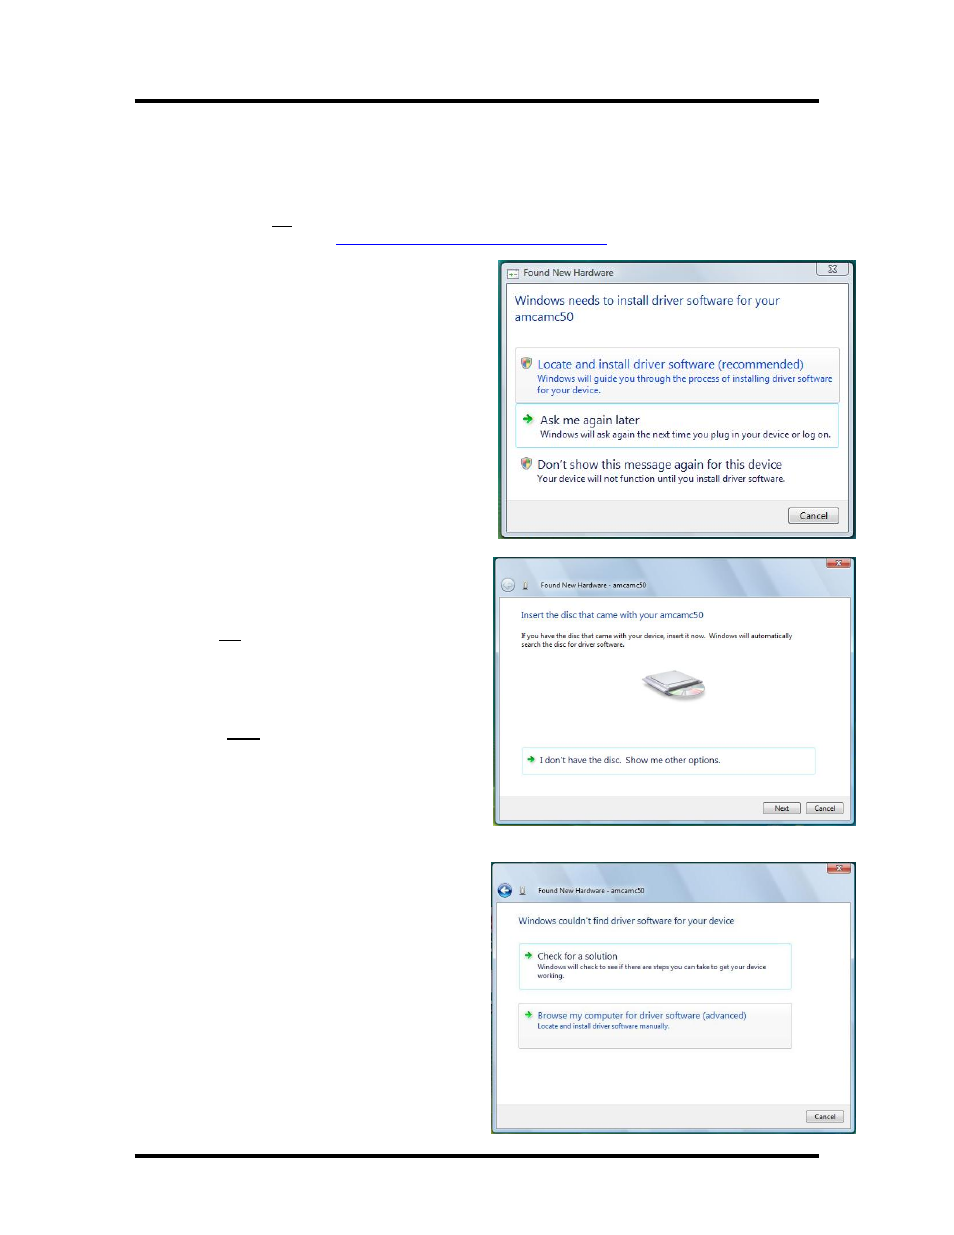
After a little while, the “Found New
Hardware” window will open on the
computer screen.
Click on the selection “Locate and install
driver software (recommended)”.
If the message box, “Windows needs your
permission to continue” should appear,
Click on “Continue”.
4. After the system searches for the driver (be
patient, this may take a few minutes), you
will be prompted with “Insert the disc that
came with your amcamc50”.
Do not click Next.
Even though you have a disk with drivers on it,
inserted in the CD ROM drive, Windows Vista
will not be able to automatically locate the drivers
on this CD and the install will fail if you click on
Next.
You must Click on the selection “I don’t
have the disk. Show me other options.”
5. When prompted with the “Windows
couldn’t find driver software for your
device”.
Click on “Browse my computer for driver
software (advanced)”.
9