Rena Envelope Imager CS User Manual
Page 24
SECTION 3
OPERATING THE ENVELOPE IMAGER CS
Printing on a #10 Envelope (Portrait), using MS-Word
If you are using a #10 envelope; the envelope should be run portrait, flap first, with the 9.5 inch wide side
touching the separators. This is the fastest way to run a #10 envelope.
If you need to print the entire 9.5” length of the envelope, please see the procedure on the next page.
1. Click on File, Print and make sure the Envelope Imager CS (AMC50) has been selected as your
printer.
Click on the Properties button.
Under the heading “Paper options” “Size is:”, select “No. 10 envelope” from the pull down list.
Click on OK to close the Properties window.
Then click on Close to close the Print dialog box.
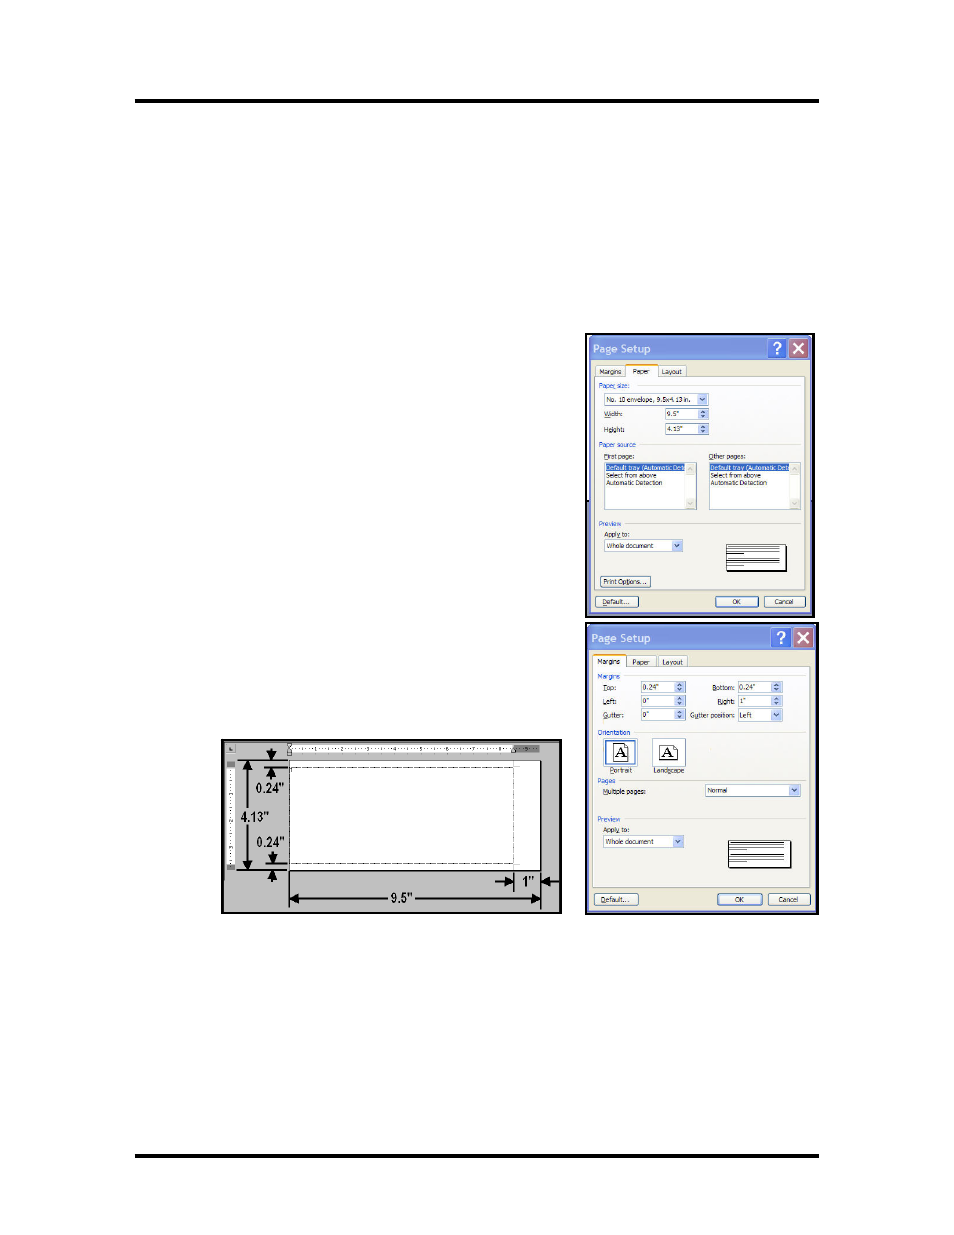
2. Click on File, Page Setup.
Click on the Paper tab and set the page size to the “No. 10
envelope”.
3. Click on the Margins tab.
Make sure the Orientation is set to Portrait.
Then set the margins that you want to use for the layout.
Note: The minimum top and bottom margin is 0.24”. The
minimum left margin is 0”and the minimum right margin is
1”, as shown below. Close the window by clicking OK.
4. Insert and position the data where you want it on the page.
5.
Click on File, Print. Select the range of data and or number of copies you want to print, and then
click OK.
For more information about changes that can be made in the driver, please see the “Printer Driver
Properties” section of this manual.
20