Rena Envelope Imager CS User Manual
Page 25
SECTION 3
OPERATING THE ENVELOPE IMAGER CS
Printing the entire 9.5 inch length of a #10 Envelope (Landscape), using MS-Word
Normally a #10 envelope would be fed and printed in portrait orientation (flap first), as described on the
previous page. However; if you need to print the entire 9.5 inch length of the #10 envelope you will need to
feed and print in the landscape orientation. The printing speed will be greatly reduced because you will be
running the envelope in the long direction.
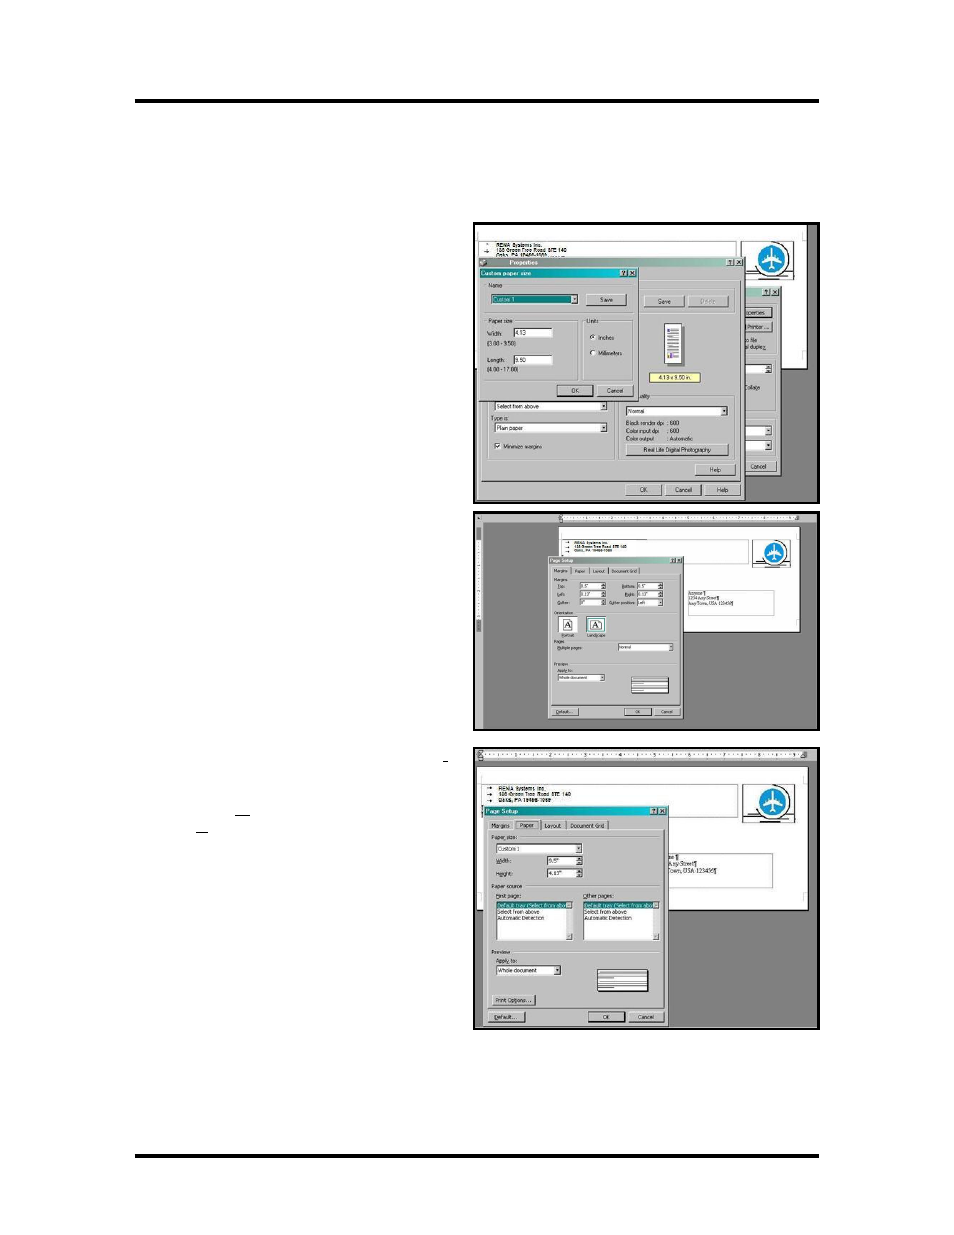
1. The first step is to set the page size in the
Envelope Imager CS (AMC50) Printer
Driver. Go to Print from the File menu
and make sure the Envelope Imager CS
(AMC50) printer is selected. Click on
Properties. In the Properties window
select one of the “Custom” numbers (in
this example we will use “Custom 1”),
then click on the “Custom…” button.
Under the Page size, set the Width at 4.13
inches and the Length at 9.5 inches, then
click on Save.
Click OK to close the “Custom paper
size” window. Click on OK to close the
“Properties” window. Click on Close, to
close the “Print” window.
2. Set up your layout page by going to File,
Page Setup in MS Word. Click on the
Margins tab. Select Landscape for paper
orientation.
Set the top and bottom margins to zero, or
to your preferred margins. The left and
right margins can be set to a minimum of
0.13 inches.
3.
Click on the Paper Tab. Select the Paper
Size as “Custom 1” (or whatever Custom
# you set in the first step). Verify that the
paper Width is 9.5 inches and the paper
Height is 4.13 inches. Then click on the
OK button to close the Page Setup
window.
NOTE: You must use a custom size to
get the correct orientation of the envelope.
Do not use the standard #10 envelope
selection.
4. Position the data where you want it on the
page.
5. Click on File, Print, Select the range of
data and or number of copies you want to print, and then click OK.
For more information about changes that can be made in the driver, please see the “Printer Driver
Properties” section of this manual.
21