Plugging in the printer, Caution, Use the power supply packed with the printer – Rena Envelope Imager CS User Manual
Page 9: Do not use outlets controlled by wall switches, Connecting to the computer
SECTION 2
INSTALLING THE PRINTER
Plugging in the Printer
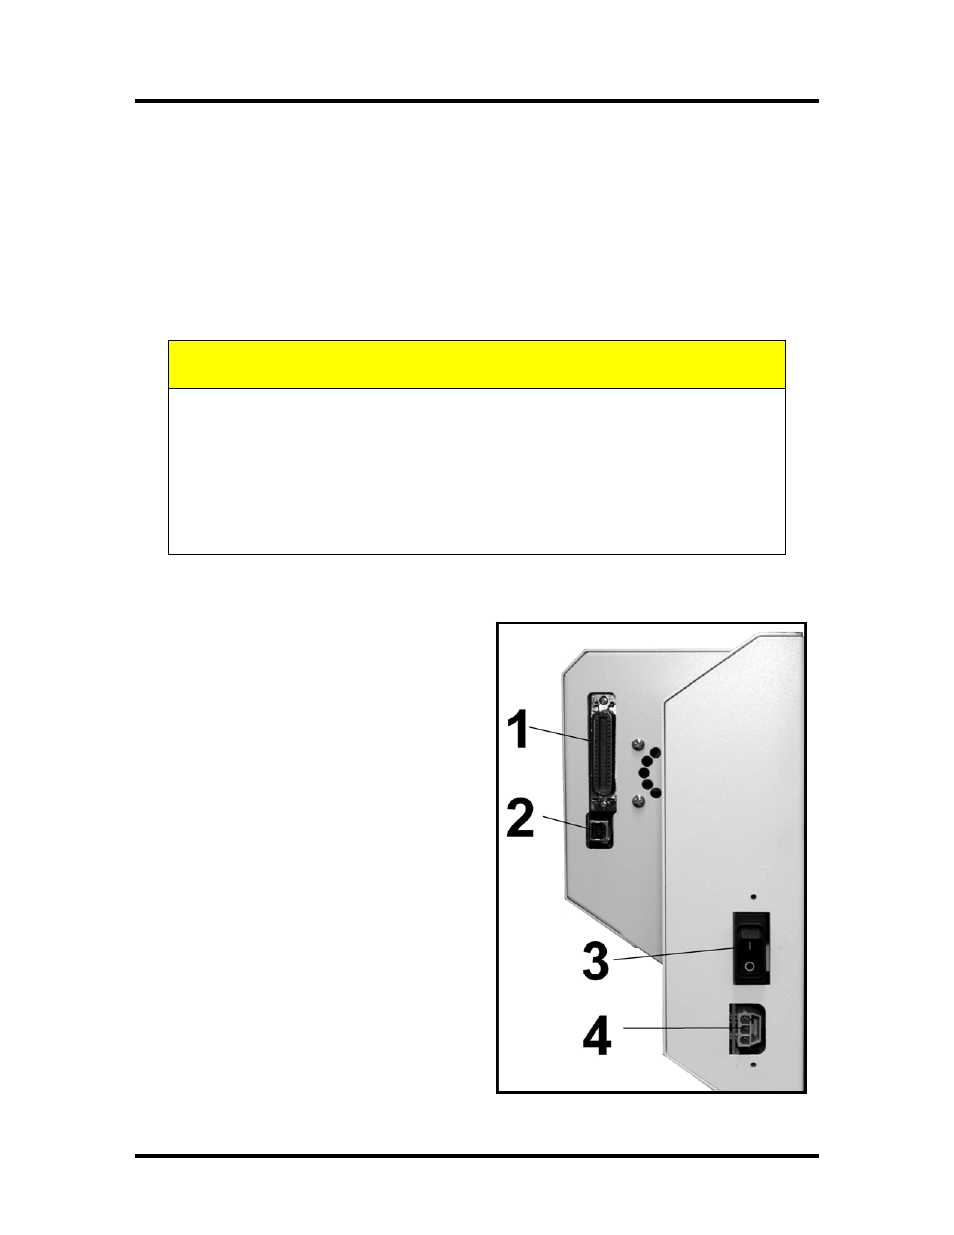
1. Make sure that the Main Power Switch [3], is in the OFF position.
2. Connect the power cord from the power pack to the connector [4] at the rear of
the Printer.
3.
Plug the power cord into the power pack and then plug the other end into a 115-
220 Volt AC, 50/60 Hz. Grounded outlet. A surge protector is recommended.
4. The Main Power Switch [3] can be turned on after you attach the power cord to
the Power Receptacle [4]
CAUTION
USE THE POWER SUPPLY PACKED WITH THE PRINTER.
DO NOT USE AN ADAPTER PLUG OR EXTENSION CORD TO
CONNECT THE PRINTER TO THE WALL RECEPTACLE.
DO NOT USE OUTLETS CONTROLLED BY WALL SWITCHES.
DO NOT USE AN OUTLET THAT SHARES THE SAME CIRCUIT WITH
LARGE ELECTRICAL MACHINES OR APPLIANCES.
Connecting to the Computer
Important: Before connecting the printer to
the computer, for the first time; please be
sure to follow the instructions for “Installing
the Printer Drivers”.
Power the printer off before
connecting/disconnecting the Parallel cable.
The Printer has both a USB [2] and a Parallel
Port [1] connection. The two ports are
located one above the other as shown.
USB Users: Plug the USB cable from your
computer, into the printer’s USB Port.
Parallel Users: Plug the parallel printer cable
from your computer into the printer’s Parallel
Port and latch the two locking clips.
5