Airlink RTW026 User Manual
Page 56
Wireless Broadband Router User’s Manual
46
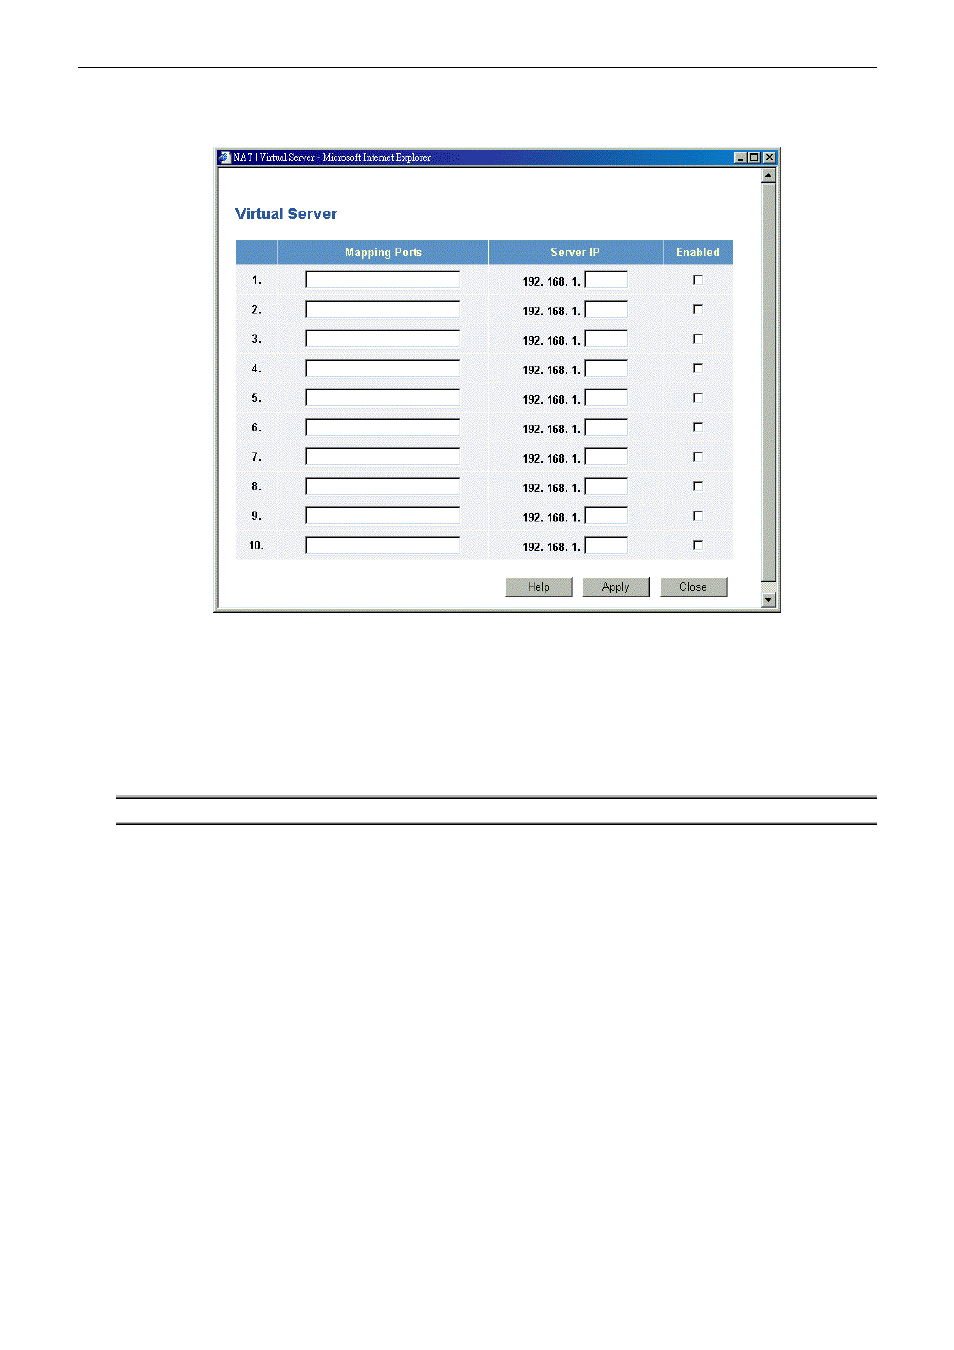
Virtual Server Screen
This screen can be reached by clicking the Configuration button on the Virtual Server item from NAT web page.
Mapping Port:
Enter the port number which the server software is configured to use.
Server IP:
Enter the IP address for the server.
Enabled:
Use this check box to enable or disable this Virtual Server as required.
Apply:
Save the data on the screen and apply the data after restarting the router.
Cancel:
The “Cancel” button will discard any data you have entered and reload the file from the
Router.
Note:For each entry, the computer must be running the appropriate server software.
Defining your own Virtual Servers
If the type of server that you wish to use is not listed on the Virtual Server screen, you can define and manage your
own servers:
1.
Type in the required data as described above.
2. Click
Apply.
3.
The new server will now appear on the list.
IP addresses can be automatically redirected to local servers configured with private IP addresses. In other words,
depending on the requested service (TCP/UDP port number), the router redirects the external service request to the
appropriate server (located at another internal IP address).
Connecting to the Virtual Servers
Once configured, anyone on the Internet can connect to your Virtual Servers. They must use the Internet IP Address
(the IP Address allocated to you by your ISP.) For example,
Http://203.70.212.52
Ftp://203.70.212.52
It is more convenient if you are using a Static IP Address from your ISP, rather than Dynamic. However, you can use
the Dynamic DNS feature to allow users to connect to your Virtual Server through a URL, rather than an IP Address.