Video operations, Switching the video, About the operation mode for video transitions – Roland V-60HD Multi-Format HD Video Switcher and UVC-01 USB Video Capture Kit User Manual
Page 16: Switching using the pgm/pst mode, P. 16, Setting the operation mode, Pgm/pst mode, A/b mode
16
Video Operations
Switching the Video
This switches the video that is input into the V-60HD and performs final output.
About the Operation Mode for Video Transitions
There are two operation modes for switching the video on the
PGM/A bus and PST/B bus: the “PGM/PST mode” and the “A/B mode.”
By factory default, the operation mode is set to the PGM/PST mode.
PGM/PST mode
The video on the PGM/A bus is always the final output. The video
on the PST/B bus is preset video (the video to be output next).
Operating the video fader or the [CUT] or [AUTO] button makes
the final video output and the preset video change places.
A/B mode
When the video fader is operated, the video at the bus position
toward which the video fader is flipped always becomes the final
output.
When the [CUT] or [AUTO] button is operated, the video on the
PGM/A bus and the video on the PST/B bus become the final
output in alternation.
MEMO
Video on the AUX bus is switched by operating the AUX/
MEMORY buttons.
For details, refer to “Switching AUX Output” (p. 18).
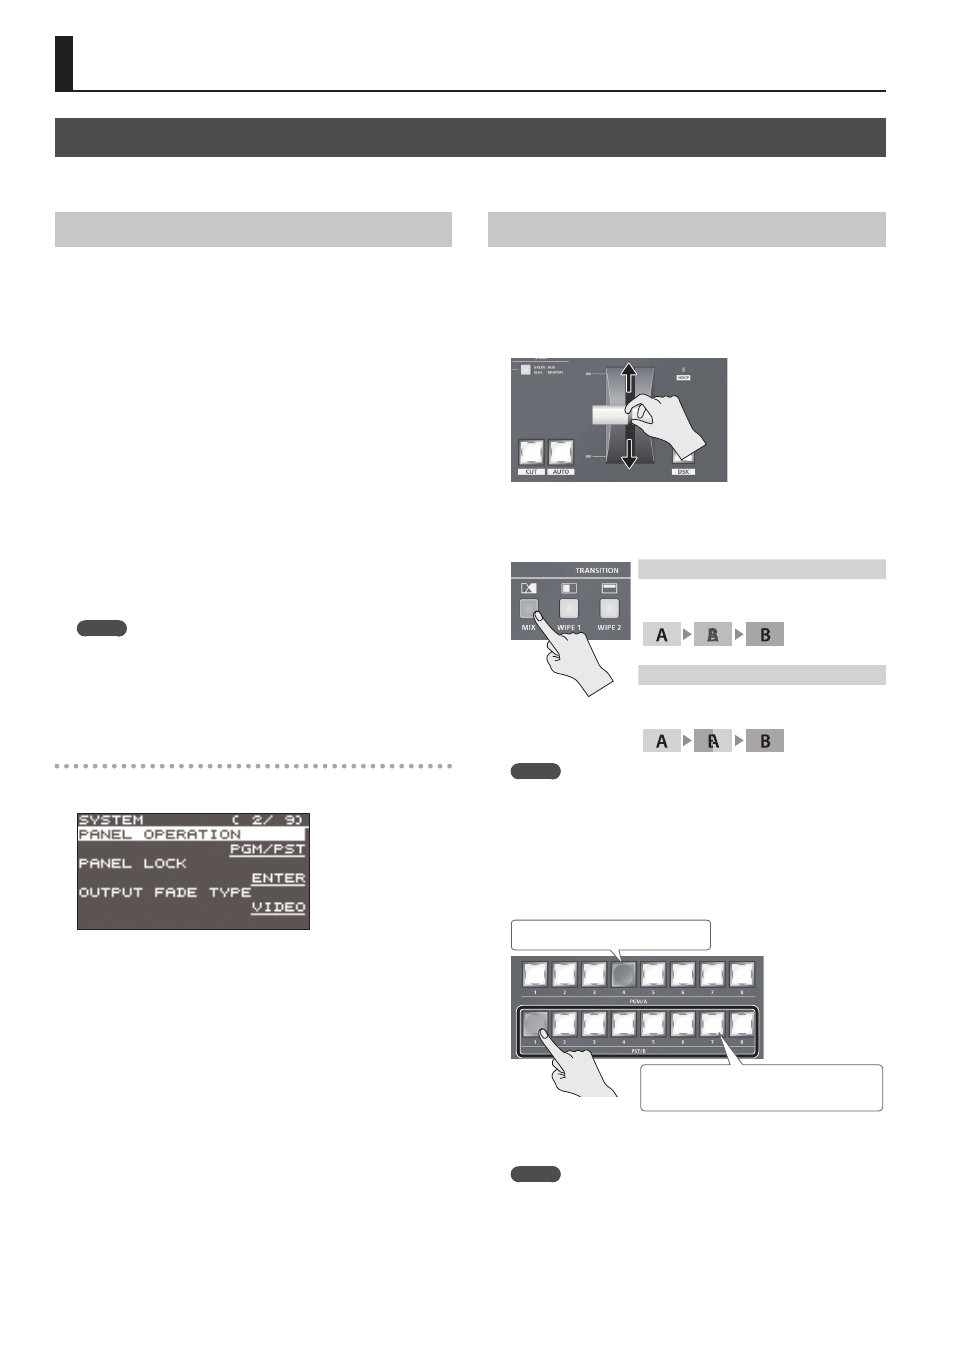
Setting the operation mode
1.
Select the [MENU] button
0
“SYSTEM”
0
“PANEL OPERATION.”
2.
Use the [VALUE] knob to select “PGM/PST” or “A/B” and set
the operation mode.
3.
Press the [VALUE] knob to apply the setting.
4.
Press the [MENU] button to quit the menu.
Switching Using the PGM/PST Mode
The video on the PGM/A bus is always the final output. You use
the PST/B bus to select the preset video (the video to output next)
to verify it and then switch the video.
1.
Flip the video fader all the way upward or downward.
2.
Press one of the [WIPE 1], [WIPE 2], or [MIX] button to select
the transition effect.
The selected button lights up.
Mix ([MIX] button)
The two pictures are blended together as the
video is switched.
Wipe ([WIPE 1] and [WIPE 2] buttons)
In this transition, the original video is broken
into by the next video.
MEMO
You can change the transition pattern used for a wipe or mix
transition. Select the [MENU] button
0
“TRANSITION”
0
“MIX
TYPE,” “WIPE 1 TYPE,” or “WIPE 2 TYPE” to make the setting.
For a list of transition-pattern types, refer to “Transition Effects
3.
Press a cross-point button for the PST/B bus and select the
preset video (the video to be output next).
Lighted in red: Final output video
Lighted in green: Preset video (the video to
be output next)
The preset video appears in the PVW section of the multi-view
monitor.
MEMO
You use channels 7 and 8 to output a still image or a
monochrome picture (background color) (p. 18).