Video composition operations, Compositing using picture-in-picture (pinp), P. 21 – Roland V-60HD Multi-Format HD Video Switcher and UVC-01 USB Video Capture Kit User Manual
Page 21: Making detailed settings for the inset screen
21
This composites video. The V-60HD has three built-in types of composition.
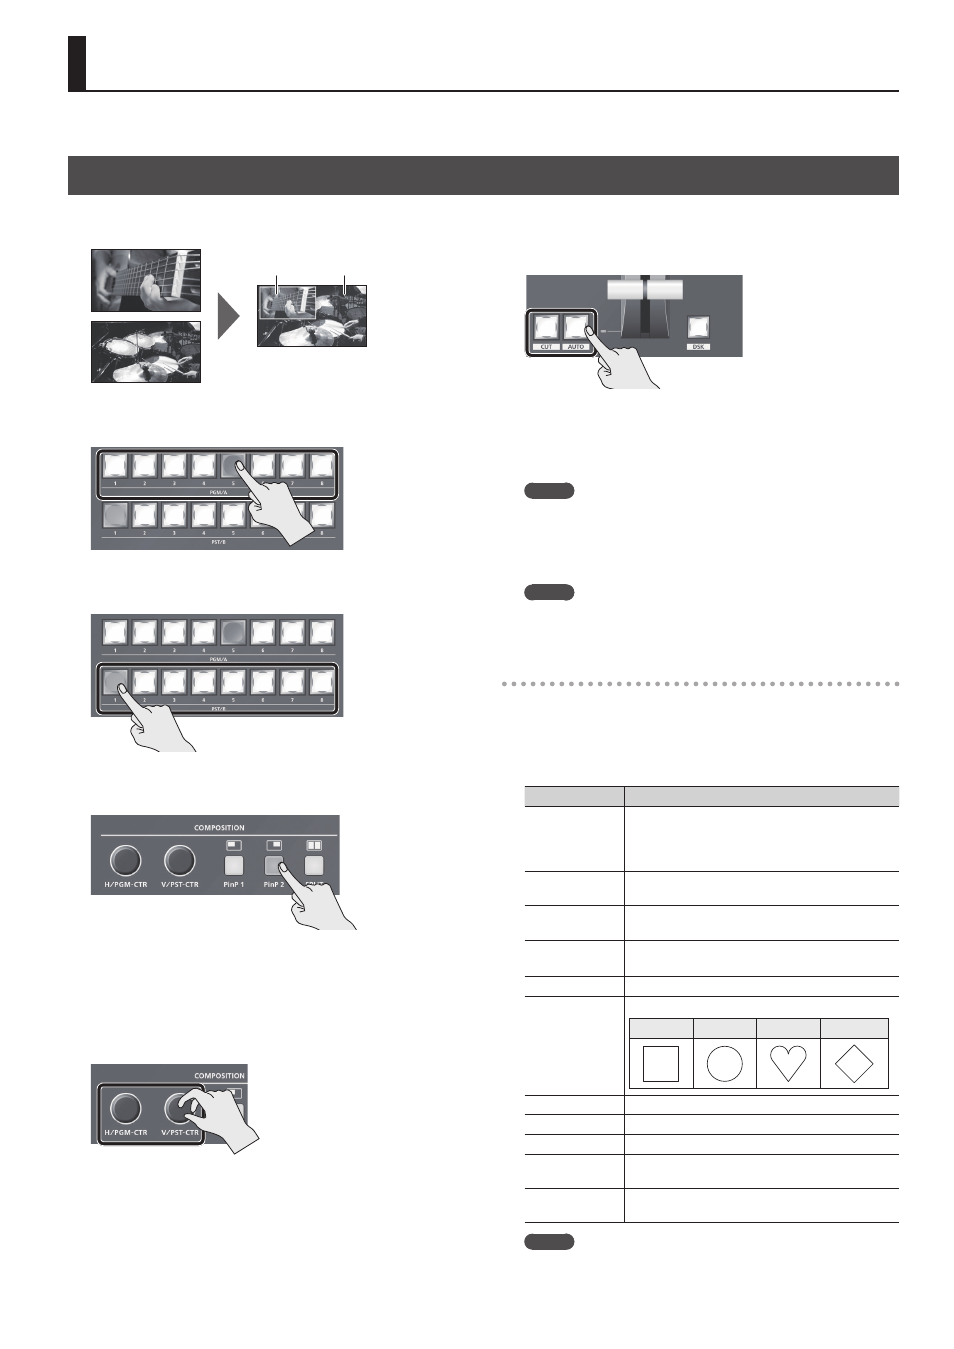
Compositing Using Picture-in-Picture (PinP)
This composites video in an inset screen over a background video. This section describes operations when in the PGM/PST mode (p. 16).
Background video
Inset screen
1.
Press a cross-point button for the PGM/A bus to select the
video you want to make the background video.
2.
Press a cross-point button for the PST/B bus to select the
video you want to make the inset screen.
3.
Press the [PinP 1] or [PinP 2] button to turn on video
compositing (making the button light up).
The selected button lights up in green and the inset screen
appears in the PVW section of the multi-view monitor, allowing
you to check the inset screen’s location and size.
At this stage, the final output has not yet been changed.
4.
Use the [H/PGM-CTR] and [V/PST-CTR] knobs to adjust the
display position of the inset screen.
[H/PGM-CTR] knob
This adjusts the inset screen’s display
position horizontally.
[V/PST-CTR] knob
This adjusts the inset screen’s display
position vertically.
5.
Press the [AUTO] or [CUT] button.
The inset screen is composited onto the background video and
the result is sent to final output. The [PinP 1] (or [PinP 2]) button
and the cross-point button for the PST/B bus light up in red.
Pressing the [AUTO] or [CUT] button a second time makes the
inset screen disappear.
MEMO
You can also display or hide the inset screen by operating the
video fader.
6.
To turn off video composition, press the lighted [PinP 1] or
[PinP 2] button.
MEMO
The video transition-time setting is applied as the fade time when
you use the [AUTO] button to display or hide the inset screen.
Making detailed settings for the inset screen
You can use the [PinP 1] and [PinP 2] buttons to make settings
for the size and location of individual inset screens, and to make
setting such as for the width of borders added to the inset screens.
Select the [MENU] button
0
“COMPOSITION”
0
“PinP 1” or “PinP 2,”
then make the settings for the menu items shown below.
Menu item
Explanation
SIZE
This sets the size.
For the inset screen, you select a horizontal width
of 1/2, 1/3, or 1/4 as the horizontal width of the
background video.
POSITION H
This adjusts the display position in the horizontal
direction.
POSITION V
This adjusts the display position in the vertical
direction.
BORDER COLOR
This specifies the color of the border.
Setting this to “SOFT EDGE” blurs the edge.
BORDER WIDTH
This adjusts the border width.
SHAPE
This specifies the shape.
SQUARE
CIRCLE
HEART
DIAMOND
ASPECT
This specifies the aspect ratio.
CROPPING H
This adjusts the frame size in the horizontal direction.
CROPPING V
This adjusts the frame size in the vertical direction.
VIEW POSITION H
This adjusts the display position of the video
within the inset screen in the horizontal direction.
VIEW POSITION V
This adjusts the display position of the video
within the inset screen in the vertical direction.
MEMO
You can hold down a cross-point button and turn the
[H/PGM-CTR] knob or [V/PST-CTR] knob as a shortcut for
“CROPPING” or “VIEW POSITION.”
Video Composition Operations