Outputting aux-bus audio, Assigning the aux bus, Sending audio to the aux bus – Roland V-60HD Multi-Format HD Video Switcher and UVC-01 USB Video Capture Kit User Manual
Page 26: Setting the character of the sound, Audio operations
26
Audio Operations
Outputting AUX-bus Audio
The V-60HD has two types audio buses: MASTER OUTPUT and AUX. You can assign a desired bus to each output connector.
Audio bus
Explanation
MASTER
OUTPUT
All input audio is mixed and output (master output).
AUX
This mixes and outputs only the input audio that is sent
to the AUX bus. This allows you to output audio that is
different than the master output.
For example, in a live event, you might output a mix of
all audio inputs, while separately outputting a mix of
only specific audio inputs (the AUX bus) for recording or
streaming.
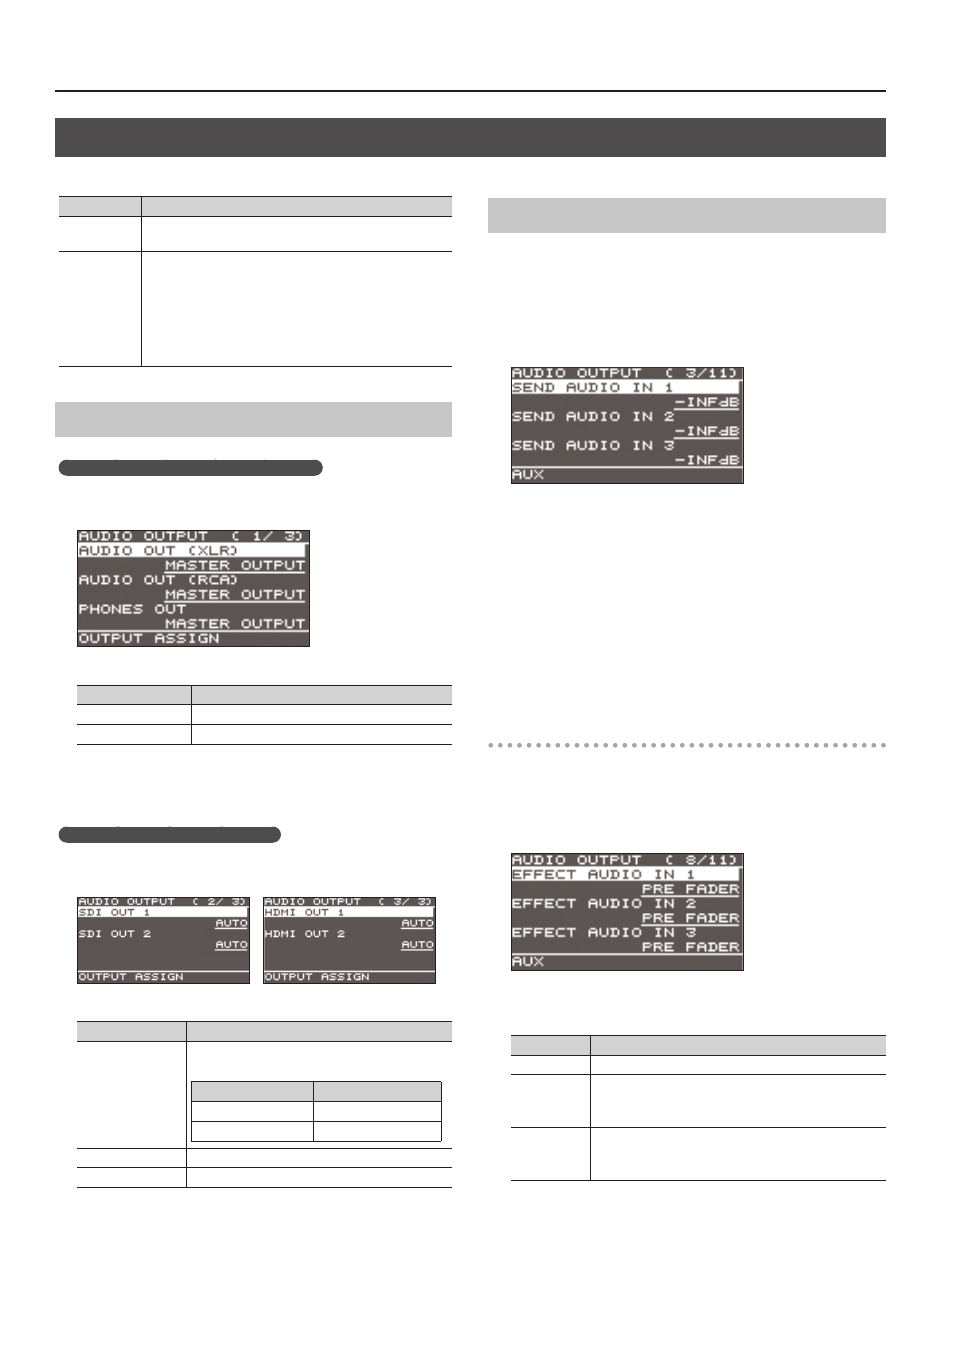
Assigning the AUX Bus
AUDIO OUT (XLR, RCA) jacks, PHONES jack
1.
[MENU] button
0
“AUDIO OUTPUT”
0
“OUTPUT ASSIGN”
0
select the output jack.
2.
Use the [VALUE] knob to select “AUX.”
Value
Explanation
MASTER OUTPUT
Output the audio of the MASTER OUTPUT bus.
AUX
Output the audio of the AUX bus.
3.
Press the [VALUE] knob to apply the setting.
4.
Press the [MENU] button to close the menu.
SDI OUT and HDMI OUT connectors
1.
[MENU] button
0
“AUDIO OUTPUT”
0
“OUTPUT ASSIGN”
0
select the output connector.
2.
Use the [VALUE] knob to select “AUX” or “AUTO.”
Value
Explanation
AUTO
The audio bus automatically switches according
to the video bus assignment (p. 15).
Video bus
Audio bus
Others besides AUX
MASTER OUTPUT
AUX
AUX
MASTER OUTPUT
Output the audio of the MASTER OUTPUT bus.
AUX
Output the audio of the AUX bus.
3.
Press the [VALUE] knob to apply the setting.
4.
Press the [MENU] button to close the menu.
Sending Audio to the AUX Bus
* To adjust the volume level of audio on the AUX bus, select the
[MENU] button
0
“AUDIO OUTPUT”
0
“AUX”
0
adjust “AUX
LEVEL.”
1.
[MENU] button
0
“AUDIO OUTPUT”
0
“AUX”
0
select
“SEND AUDIO IN 1” through “SEND HDMI IN 6.”
* You can select HDMI IN and SDI IN by setting “SEND SDI/HDMI
IN” to “MANUAL.”
When this is set to “AUTO,” the audio is automatically sent to the
AUX bus in tandem with the AUX bus video selection.
2.
Use the [VALUE] knob to adjust the amount that is sent to
the AUX bus, and press the [VALUE] knob.
3.
Press the [VALUE] knob to apply the setting.
4.
Press the [MENU] button to close the menu.
Setting the character of the sound
You can select whether to send either the original audio or the audio
processed with effects to the AUX bus.
1.
[MENU] button
0
“AUDIO OUTPUT”
0
“AUX”
0
select
“EFFECT AUDIO IN 1” through “EFFECT HDMI IN 6.”
2.
Use the [VALUE] knob to select “DRY,” “PRE FADE,” or “POST
FADER,” and press the [VALUE] knob.
Value
Explanation
DRY
Sends the source audio with no effects applied.
PRE FADER
Sends the effect-applied audio.
The send volume is constant, regardless of the
volume (INPUT LEVEL).
POST FADER
Sends the effect-applied audio.
The send volume can be changed by adjusting the
volume (INPUT LEVEL).
3.
Press the [VALUE] knob to apply the setting.
4.
Press the [MENU] button to close the menu.