Compositing video with picture-in-picture (pinp), Video operations – Roland V-8HD HDMI Video Switcher User Manual
Page 19
19
Video Operations
Here we explain the procedure for compositing video using “PinP
1.” You can also composite video using the same procedure using
“PinP 2.”
1 .
Press a Cross-point A or B [1]–[8] button to select
the video you want to make the background video.
2 .
Press the [MODE] button to select “PinP1 SOURCE.”
3 .
Press a PinP SOURCE [1]–[8] button to select the
video you want to make the inset screen.
4 .
Press the PinP 1 [PVW] button to preview-output
the video of the inset screen.
The PinP 1 [PVW] button lights up in green and the inset screen
appears in the PVW section of the monitor, allowing you to check
the inset screen’s location and size.
At this stage, the final output has not yet been changed.
5 .
Use the PinP 1 [POSITION H] and [POSITION V] knobs
to adjust the display position of the inset screen.
Knob
Explanation
[POSITION H]
Adjusts the inset screen’s display position
horizontally.
Turn while pressing:
Adjusts the size of the inset screen.
[POSITION V]
Adjusts the inset screen’s display position
vertically.
Turn while pressing:
Adjusts the zoom of the video shown in the
inset screen.
6 .
Press the PinP 1 [ON] button to turn on PinP
compositing (lit).
The PinP 1 [ON] button lights up in red, and the inset screen is
composited onto the background video and the result is sent to
final output.
7 .
To turn off PinP compositing, press the PinP 1 [ON]
button once again.
MEMO
5
By long-pressing the PinP 1 (2) [PVW] button, you can access
the mode for selecting the inset screen without having to press
the [MODE] button and then select “PinP1 SOURCE” or “PinP2
SOURCE.”
While pressing the PinP 1 (2) [PVW] button, press a PinP SOURCE
[1]–[8] button to select the video that you want to use as the inset
screen.
5
The fade time over which the inset screen appears or disappears
when you press the [ON] button is specified by the setting of the
TRANSITION TIME menu item “PinP 1 TIME” or “PinP 2 TIME.”
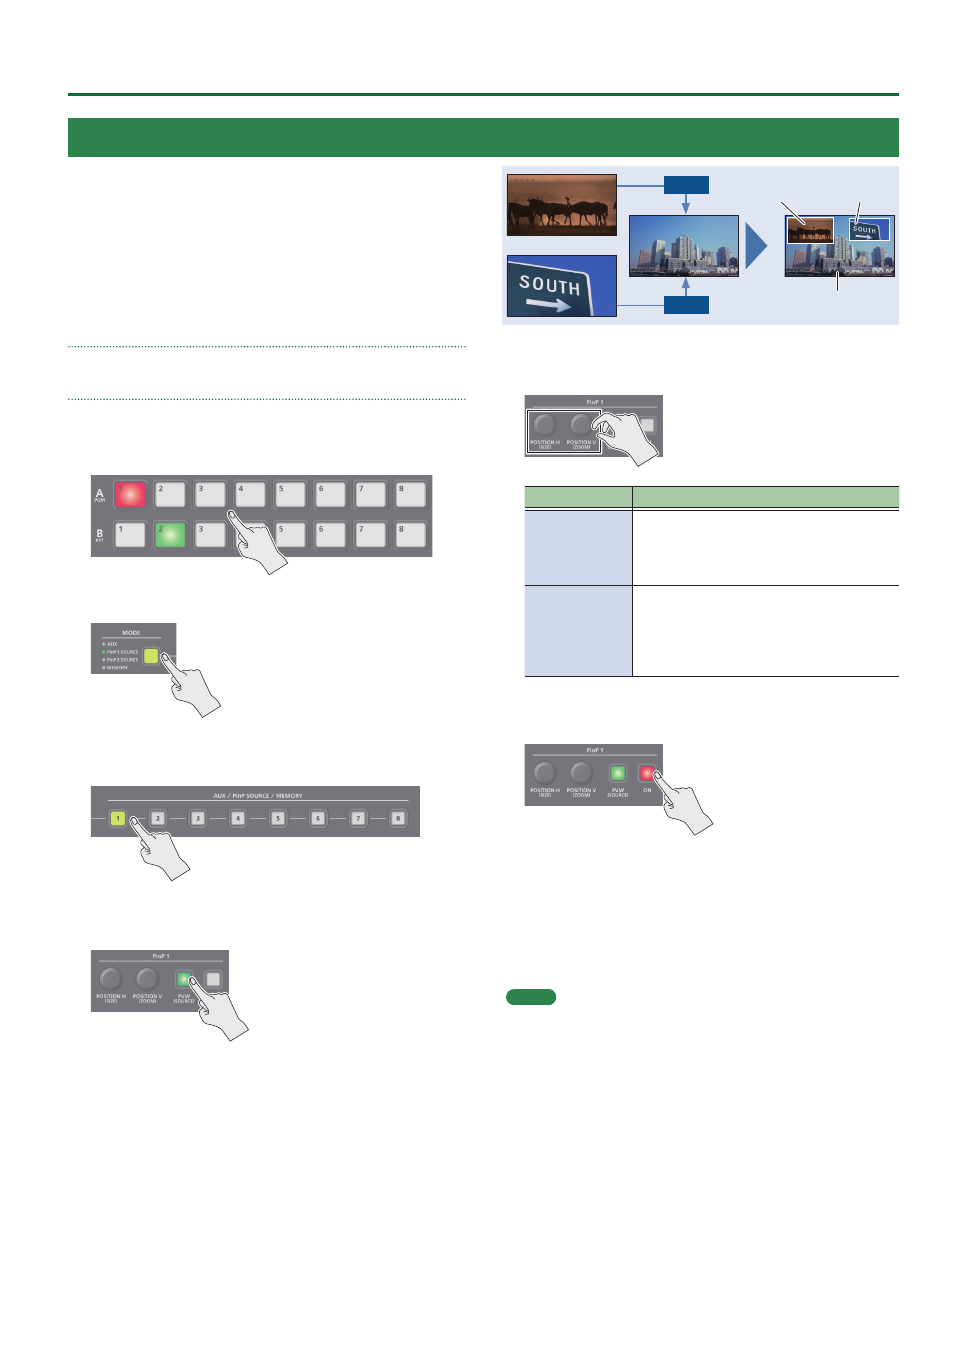
Compositing Video with Picture-in-Picture (PinP)
Here’s how to composite an inset screen (a small separate screen)
onto the background video.
You can use PinP 1 and PinP 2 simultaneously to composite two inset
screens.
Background video
Inset screen 1
(PinP 1)
PinP 1
PinP 2
Inset screen 2
(PinP 2)