Importing a still image from a usb flash drive, Assigning still images to channel 1–8, Supported still-image formats and resolutions – Roland V-8HD HDMI Video Switcher User Manual
Page 27: Importing a still image, Video operations
27
Video Operations
Importing a Still Image from a USB Flash Drive
This imports into the unit a still image saved on a USB flash drive.
Supported still-image formats and resolutions
Format
Bitmap (.bmp), 24-bit color, uncompressed
PNG (.png), 24-bit color
* α-channel is not supported.
Resolution
In conformity with system format (p. 8)
File name
No more than 28 single-byte alphanumeric characters
* Be sure to append the “.bmp” or “.png” file extension.
Importing a still image
NOTE
5
Large-size still-image files might take some time to import.
5
When you’re using a USB flash drive for the first time, be sure to
format it on the V-8HD (p. 39).
5
Depending on the USB flash drive, recognition of the flash drive
might take some time.
1 .
Save the still image in the root directory of the USB
flash drive.
2 .
Connect the USB flash drive containing the saved
still image to the USB MEMORY port.
3 .
Press the [MENU] button
0
”STILL IMAGE”
0
select
“LOAD FROM USB MEMORY,” and press the [VALUE]
knob.
4 .
Turn the [VALUE] knob to select the still image
save-destination (STILL 1–8), and then press the
[VALUE] knob.
A “ * ” symbol is displayed for memory where a still image is
already saved.
5 .
Press the [VALUE] knob.
The names of the files on the USB flash drive are displayed on this
screen.
6 .
Select the still image file you want to import, and
press the [VALUE] knob.
A confirmation message appears.
* If you decide to cancel, press the [EXIT] button.
7 .
Turn the [VALUE] knob to select “YES,” and press the
[VALUE] knob.
The still image is imported into the unit.
8 .
Press the [MENU] button to quit the menu.
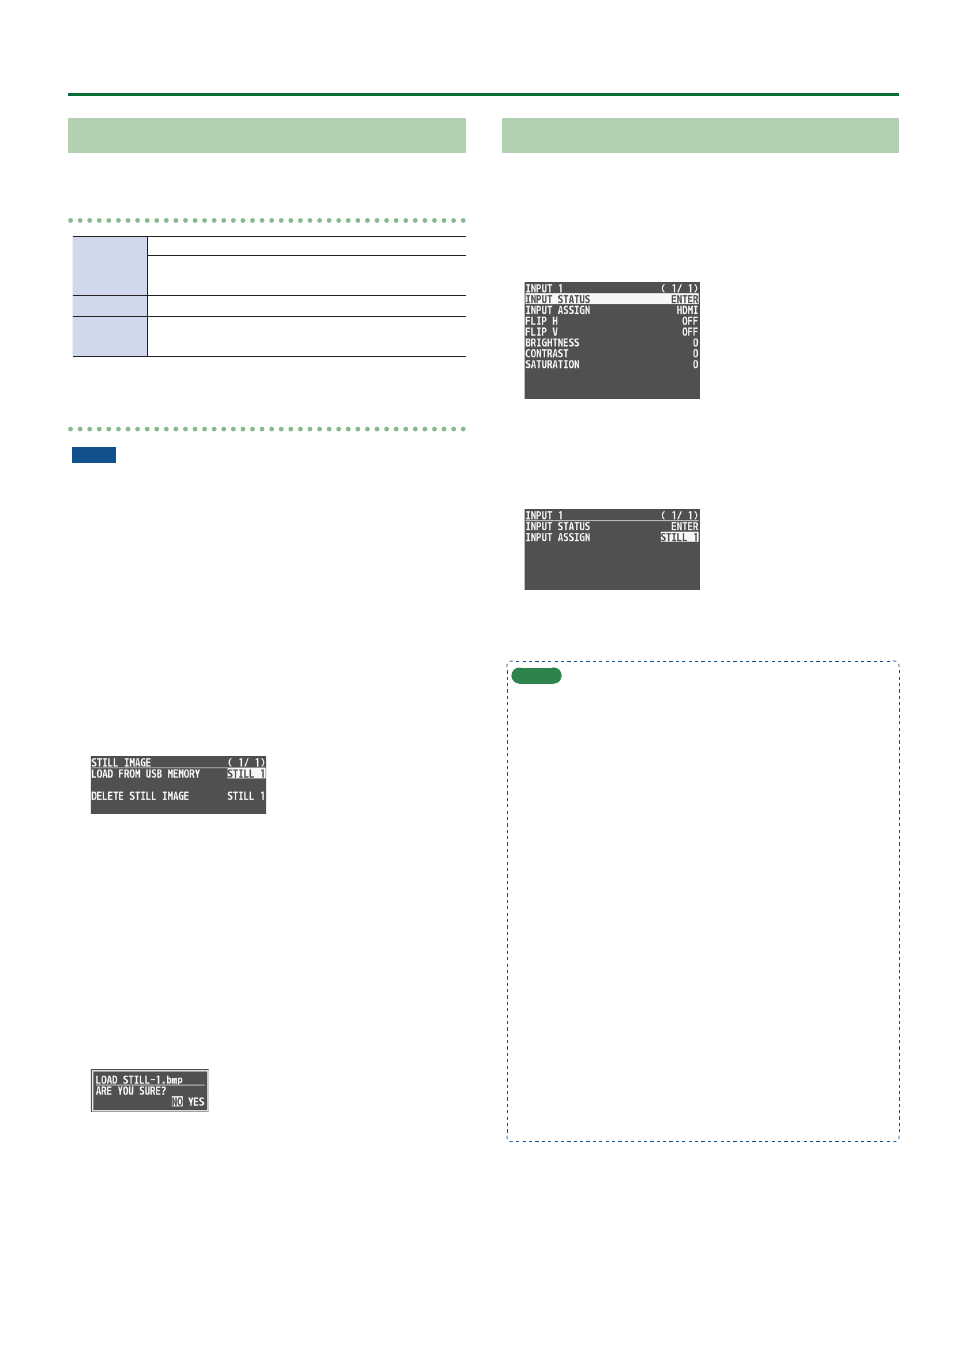
Assigning Still Images to Channel 1–8
Here’s how a still image saved in this unit (STILL 1–8) can be assigned
to channels 1–8.
1 .
Press the [MENU] button
0
”VIDEO INPUT”
0
select “INPUT 1”–“INPUT 8 (SCALER),” and press the
[VALUE] knob.
2 .
Turn the [VALUE] knob to select “INPUT ASSIGN,”
and press the [VALUE] knob.
3 .
Turn the [VALUE] knob to select “STILL 1”–“STILL 8,”
and press the [VALUE] knob.
4 .
Press the [MENU] button to quit the menu.
MEMO
5
By holding down the [EXIT] button and pressing a Cross-point
A or B [1]–[8] button, you can switch between still images STILL
1–8 and select the still image that is assigned to the channel
whose button you pressed.
5
You can use the USER [1] or [2] button to output the specified
still image.
This lets you directly output a still image to PGM and PVW
without assigning it to a channel.
For details on this setting, refer to “Assigning the Functions of
the USER [1] [2] Buttons” (p. 42).
5
You can use the [OUTPUT FADE] knob to output a specified still
image.
This lets you directly output a still image to PGM and PVW
without assigning it to a channel.
For details on this setting, refer to “Specifying the function of
the [OUTPUT FADE] knob” (p. 29).
5
You can use a footswitch or expression pedal to output a
specified still image. This lets you directly output a still image to
PGM and PVW without assigning it to a channel.
For details on this setting, refer to the following.
– “Using a Footswitch” (p. 40)