Turning the power on/off, Using the menus, Turning the power on – Roland V-8HD HDMI Video Switcher User Manual
Page 7: Turning the power off, Panel descriptions
7
Panel Descriptions
Turning the Power On/Off
* Before turning the unit on/off, always be sure to turn the volume
down. Even with the volume turned down, you might hear some
sound when switching the unit on/off. However, this is normal and
does not indicate a malfunction.
Turning the power on
1 .
Make sure all devices are turned off.
2 .
Turn on the [POWER] switch on the V-8HD to turn
on the power.
3 .
Turn on the power to the source devices.
Turn on the power to video cameras or other source equipment
connected to input connectors on the V-8HD.
4 .
Turn on the power to the output devices.
Turn on the power to projectors or other devices connected to
output connectors on the V-8HD.
Turning the power off
1 .
Turn off the power in the sequence of first the
output equipment, and then the sources.
2 .
Turn off the [POWER] switch on the V-8HD to turn
off the power.
About the Auto Off function
The power to the V-8HD turns off automatically when all of the
following states persist for 240 minutes (Auto Off function).
5
No operation performed on the V-8HD
5
No audio or video input
5
No equipment is connected to the OUTPUT connectors
If you do not want the power to be turned off automatically,
disengage the Auto Off function. Press the [MENU] button
0
“SYSTEM”
0
set “AUTO OFF” to “OFF.”
* Unsaved data is lost when the power turns off. Before turning
the power off, save the data that you want to keep.
* To restore power, turn the power on again.
Using the Menus
This explains how to display menus and make settings for video and
for the V-8HD itself.
* The menu is also appears on the display connected to the OUTPUT
3 connector.
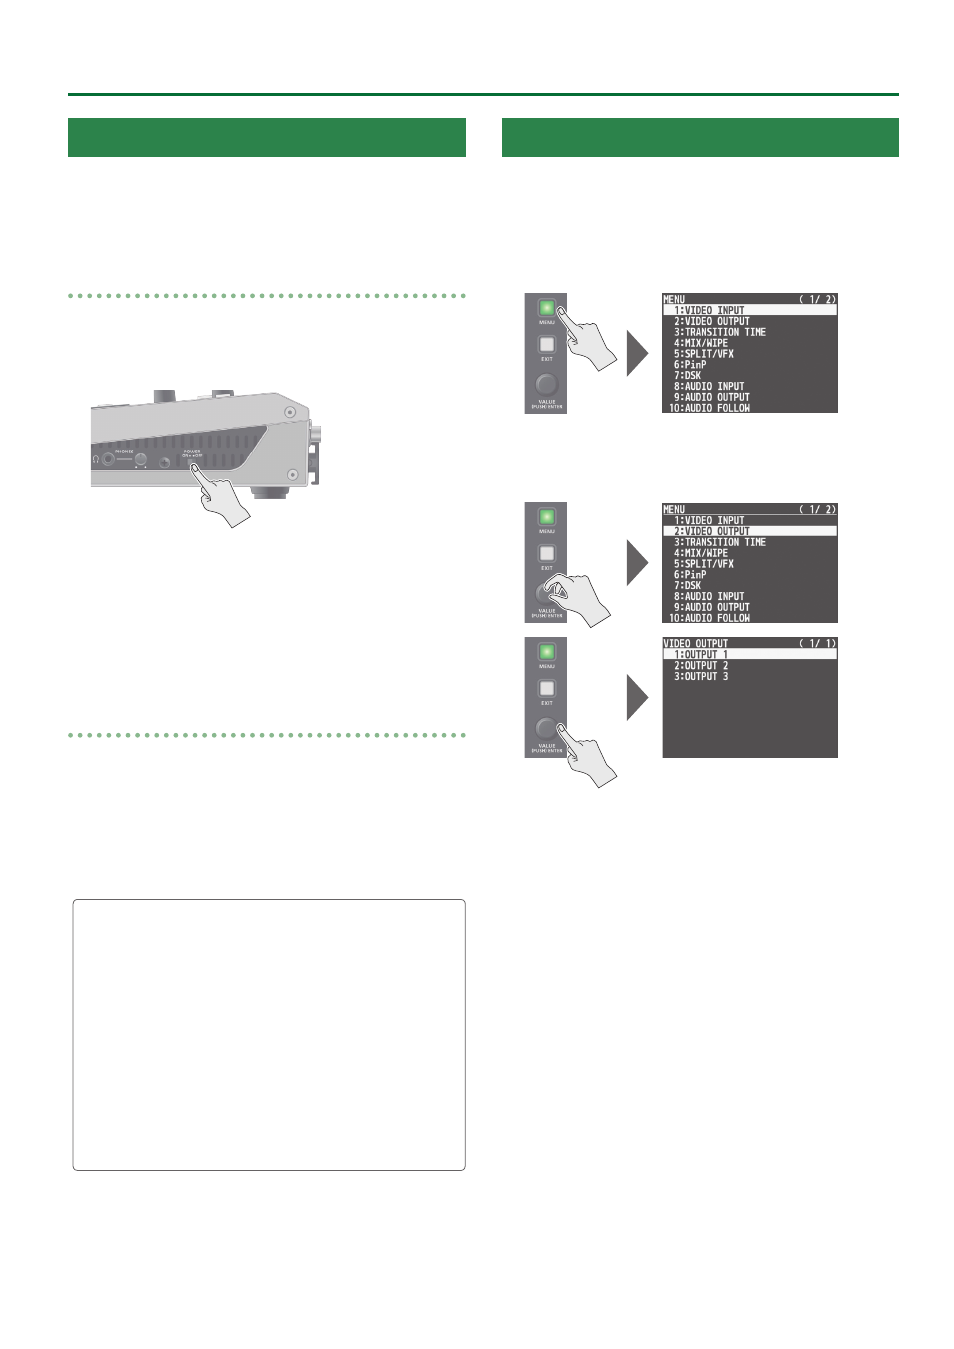
1 .
Press the [MENU] button to display the menu.
The [MENU] button lights up, the menu categories are displayed.
2 .
Turn the [VALUE] knob to select a category, and
press the [VALUE] knob to confirm.
The menu for the selected category is displayed.
3 .
Turn the [VALUE] knob to select a menu item, then
press the [VALUE] knob to confirm.
The cursor moves to the setting value.
5
If the menu item is located at a deeper level, repeat step 3.
5
Pressing the [EXIT] button moves you back one level higher.
4 .
Turn the [VALUE] knob to change the value of the
setting.
5
By turning the [VALUE] knob while pressing it, you can change the
value more greatly.
5
Pressing and holding the [VALUE] knob returns the current menu
item you’re setting to its default value.
5 .
Press the [VALUE] knob to apply the setting.
The cursor returns to the menu item.
6 .
Press the [MENU] button to quit the menu.