Add the next t-sub cabinet, Rig the cabling, Check the assembly – d&b T-Series User Manual
Page 24: Derig the array
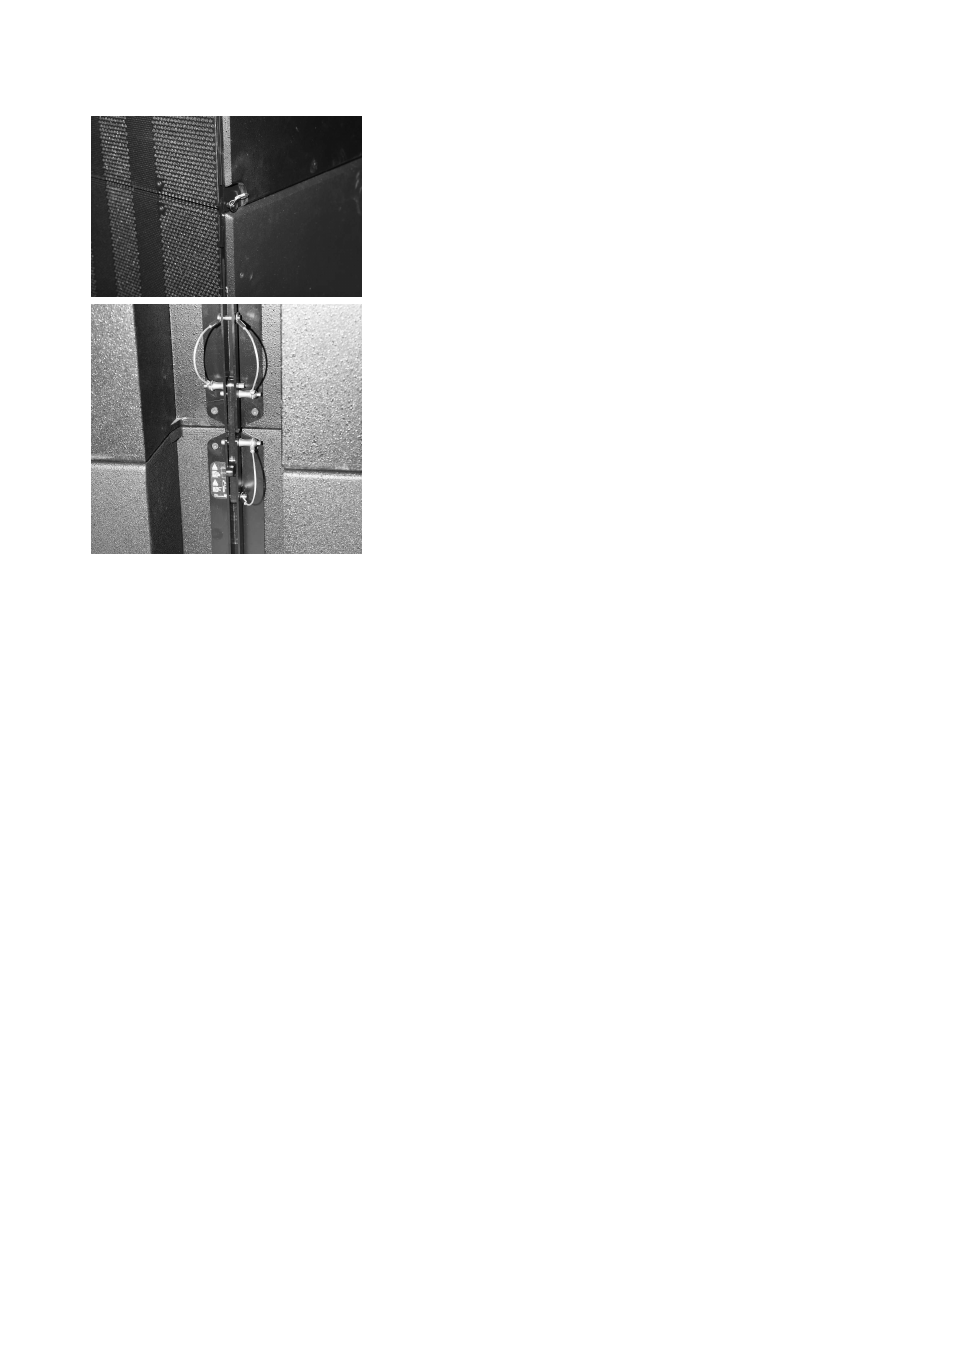
4. Add the next T-SUB cabinet
- Lift the assembly to a suitable height to add the next cabinet.
- Place the next T-SUB on the ground.
- Lower the assembly onto the cabinet until the rubber feet fit into the
recessed areas on the top panel of the bottom cabinet.
- Release the Locking pins at the front of the upper cabinet.
- Slide out the Front links of the bottom cabinet.
- Insert the Locking pins for the Front links on both sides.
- Release the Locking pins on the rear rigging strand of the upper
cabinet and the Locking pin of the Rear link of the bottom cabinet.
- Slide out the Rear link up to its stop position into the rigging strand of
the upper cabinet.
- Insert the Locking pin for the Rear link.
- Insert the two Locking pins on the rear rigging strand of the upper
cabinet.
- To add further cabinets, proceed in the same manner until the
assembly is completed.
5. Rig the cabling
- Connect the flying cables and link cables according to the number of
amplifier channels and cabinets used.
- Attach the cable pick depending on the chosen type of suspension
(Single or Dual pickpoint operation setup) as described in section 3.3
Suspension of the Flying frame on page 15.
6. Check the assembly
- Before hoisting the array to its operating position recheck the actual
status of the assembly according to the checklist given in section 5.
Checklist for the assembly of T-Series arrays on page 38.
7. Derig the array
- To lower the array and dismantle it, follow the assembly instructions
in reverse order. The same safety instructions apply.
T-Series Rigging manual
(1.1 EN)
Page 24 of 44