Set vertical aiming of the first t10 cabinet, Add further t10 cabinets – d&b T-Series User Manual
Page 33
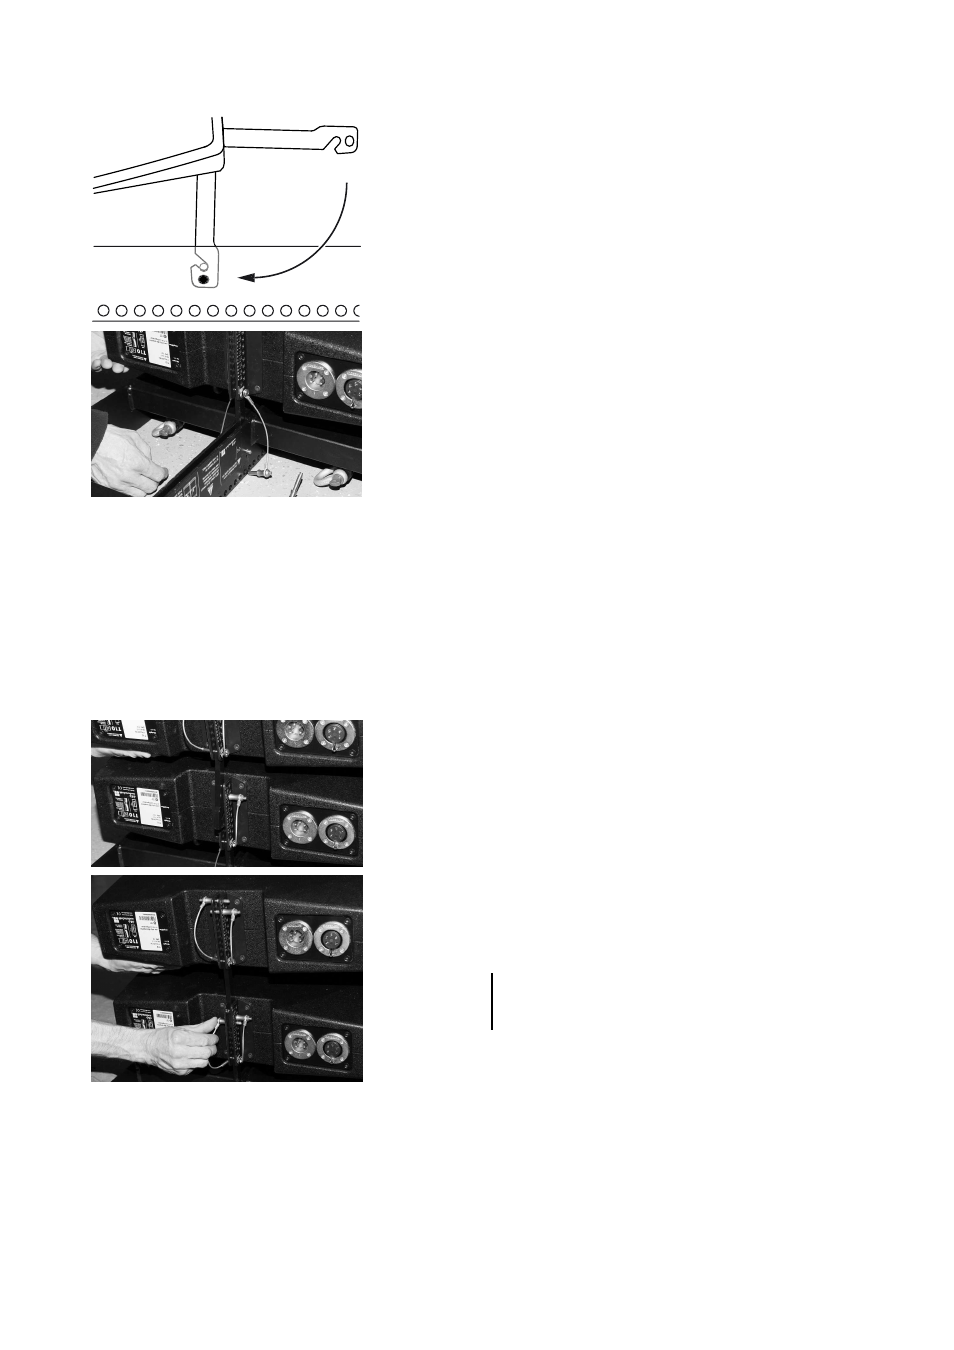
4. Set vertical aiming of the first T10 cabinet
0°
-2°
The two supporting holes on the Flying frame's center bar allow the first
T10 cabinet to be set to a fixed vertical aiming of –2° or 0°.
In this case the hole (drill) of the cabinet's Splay link is used.
Using the upper hole of the supporting holes allows for a vertical aiming
of –2° the bottom hole for 0°.
- Fold out and insert the Splay link of the cabinet into the track of the
center bar of the frame and align the hole of the Splay link with the
desired supporting hole of the frame.
- Insert one of the frame's Locking pins to fix the Splay link in place.
- The second Locking pin is not required and should be stored in the
remaining hole.
5. Add further T10 cabinets
- Preselect the desired splay angle on the rear rigging strand of the
bottom cabinet.
- Release the Locking pins at the front of the bottom cabinet.
- Prepare the next cabinet.
- With the Front links facing downwards attach the cabinet to the slots
at the front of the bottom cabinet.
- Insert and lock the Locking pins of the Front links on both sides.
- Fold out the Splay link of the cabinet and connect it to the cabinet
below as follows:
- Lower the back of the cabinet until the Splay link hooks over
the preset Locking pin.
- Raise the back of the cabinet until the Splay link is
completely hooked into the Locking pin.
- Insert the second Locking pin (safety pin) to fix the desired
splay angle.
To attach further T10 cabinets, proceed in the same manner until the
assembly is completed.
Note:
The two Locking pins at the top cabinet of the stack are
not used. They should be stored in two of the remaining
holes on the rear rigging strand.
T-Series Rigging manual
(1.1 EN)
Page 33 of 44