Zoning: edit user dialog box, Figure 28. zoning: edit user dialog box, Edit user dialog box – MultiDyne ACI-2058 User Manual
Page 111
Chapter 6: Ports/Blades
A54-3000-100 A
72
A
PCON
, Inc.
6.4.5.2.
Edit User dialog box
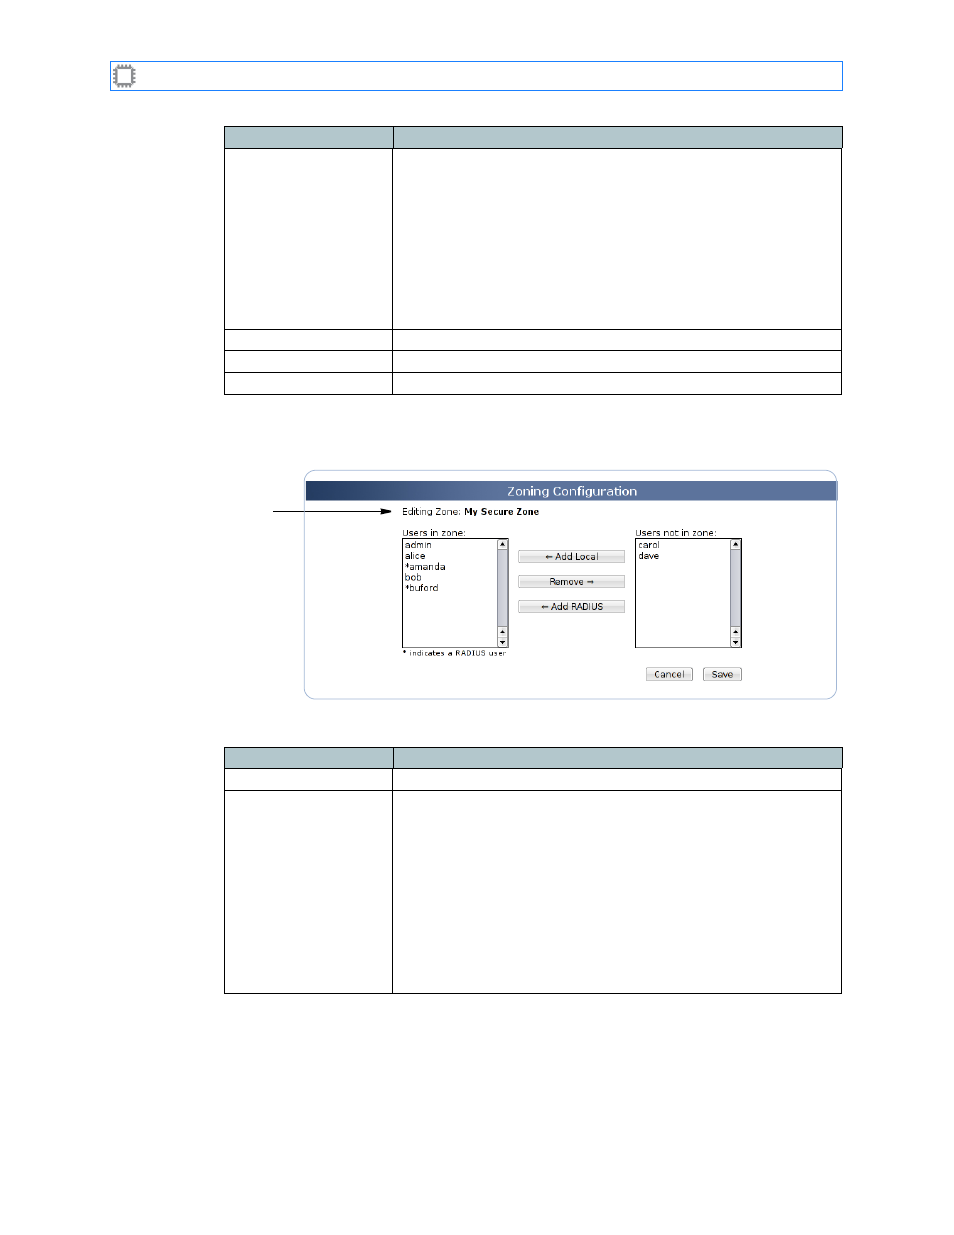
Figure 28. Zoning: Edit User Dialog Box
Zone
The dialog box includes these options:
Zone details
Hovering your cursor over a port displays the following lock
information for that port:
• Port number: Port name: Identifies the port assignment.
PortNumber is the number assigned to the port and PortName is
the name you specify. If you do not specify a port name,
Unnamed displays.
For information about naming ports,
• Belongs to zone(s): The zone to which this port is assigned. If
no name is specified a port name, (none) displays.
Toggle
Checks or unchecks all ports on the selected blade.
Cancel button
Exits the Edit Ports screen without saving changes.
Save button
Clicking this button saves and implements your changes.
Field
Description
Field
Description
Zone
The zone you selected on the
screen.
Users in zone:
Lists users assigned to the specified zone. RADIUS and
TACACS+ users are identified with an asterisk.
To add a user to this zone:
1. Select user(s) in the Users not in zone list. You can click to
select a single user, hold down the Alt button while clicking to
add multiple users, or hold down the Shift button while clicking
to add a range of users.
2. Click the <== Add button. The selected user names move to the
Users in zone list.
Note: The
admin
user is automatically added to all zones.