Using manual mastering, Using the mastering equalizer, 9 – mixdown and mastering – Teac DP-008EX User Manual
Page 66
66
TASCAM DP-008EX
9 – Mixdown and mastering
Using manual mastering
Follow these procedures to master a track manually
1. Activate manual mastering mode.
When the
MASTERING
mode selection screen is
open, press the F4 [MANUAL] button to activate
manual mastering mode.
After a
Mastering!
pop-up message appears,
the
MASTERING
screen opens.
NOTE
If there is no stereo master track, a
No Master
Trk
pop-up message appears and you will not be
able to switch to
MASTERING
mode.
2. Use the mastering tools to adjust the track.
Press the F1 [EQ] button, F2 [COMP] button or F3
[NORM] button to open the desired tool screen.
There is a screen for the equalizer (MASTERING
EQ), the compressor (MASTERING COMP), and the
normalizer (NORMALIZE screen).
In addition, you can choose either a multiband or
single-band compressor from the library.
When using a multiband compressor, the
MASTERING COMP
screen parameters include
LOW BAND
,
MID BAND
and
HIGH BAND
frequency ranges.
Make settings on each of the tool screens. (For
details, see the following “Using the mastering
compressor”, “Using the mastering equalizer” and
“Normalizing master tracks” sections.)
When the unit is in mastering mode, you can use
the Play (7), Stop (8), m [RTZ] and , [LRP]
transport buttons, so you can set the tools while
listening to the track playing back.
3. Re-recording with the mastering effects.
After setting the mastering tools, press the Play
(7) button while pressing and holding the
Record (0) button to start re-recording the
stereo master track with the master effects.
During recording, the Record (0) indicator lights.
Recording always starts from the beginning
of the song (00h00m00s00f) regardless of the
current playback position.
When in
MASTERING
mode, recording overwrites
the stereo master track.
NOTE
If the unit is stopped in the middle of recording, a
stereo master track to that point will be created.
4. Checking the results.
Turn the equalizer and compressor off and then
play back the recording to check the results of
using the mastering effects.
You can undo and redo at this point, so you can
compare the sound before and after using the
mastering effects.
8
If you are not satisfied
Undo to restore the stereo master track to how it
was before applying the mastering effects, and then
repeat these procedures from step 1.
NOTE
You cannot undo or redo in
AUTO MASTERING
mode. Switch to
MULTI TRACK
or
MIXDOWN
mode
to undo or redo.
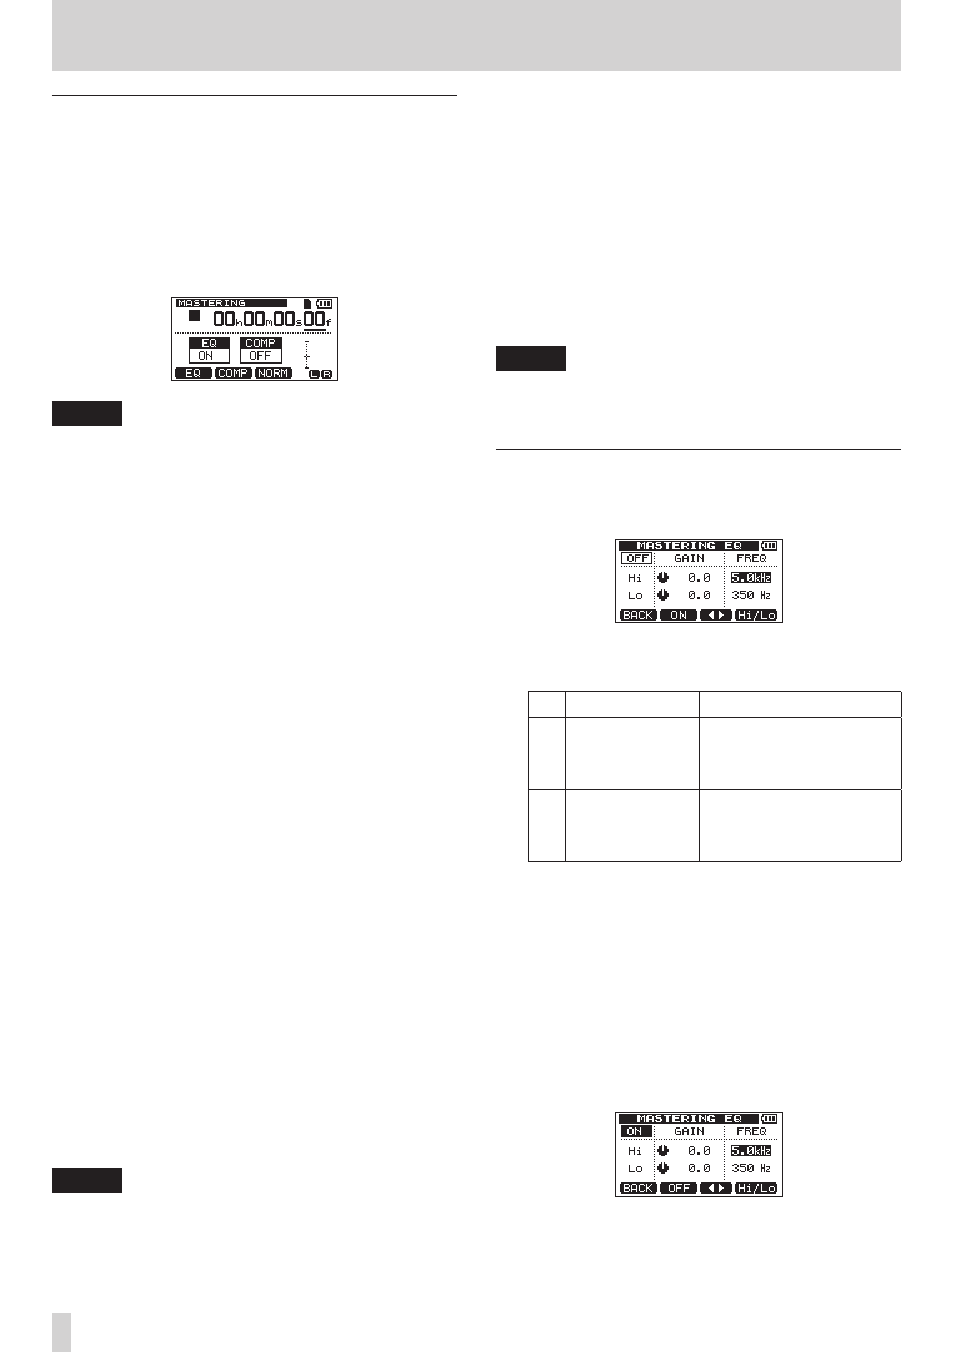
Using the mastering equalizer
1. When in
MASTERING
mode, press the F1 [EQ]
button to open the
MASTERING EQ
screen.
2. Set the mastering equalizer, which has the
following parameters.
GAIN
FREQ
Hi
High range gain
value: ±12dB
(default: 0.0dB)
High frequency range
value: 1.7kHz – 18kHz
(default: 5kHz)
Lo
Low range gain
value: ±12dB
(default: 0.0dB)
Low frequency range
value: 32Hz – 1.6kHz
(default: 350Hz)
Use the F3 [gt] button to switch between
GAIN and FREQ.
Use the F4 [Hi/Lo] button to select (highlight)
Hi
or
Lo
.
Use the data wheel to set the item selected using
the F3 [gt] and F4 [Hi/Lo] buttons.
At the top left of the
MASTERING EQ
screen, an
indicator shows whether the mastering equalizer
is ON or OFF. When OFF, press the F2 [ON] button
to turn it ON. When ON, press the F2 [OFF] button
to turn it OFF.