6h creating a full bleed print, Mac (pre die cut stock only) – Primera LX610 Color Label Printer with Plotter & Cutter User Manual
Page 112
112
6H Creating a Full Bleed Print
–
Mac (Pre Die Cut Stock Only)
If you are having trouble making the image cover the entire label, first make sure the image is
printing at least as big as the label size you have selected. Increase the selected page size by .03
inches on the width and .03 inches on the height to create an over bleed.
Note:
Make sure under scaling options to select ‘Fit to Page’ in the print dialogue box if printing
from Illustrator.
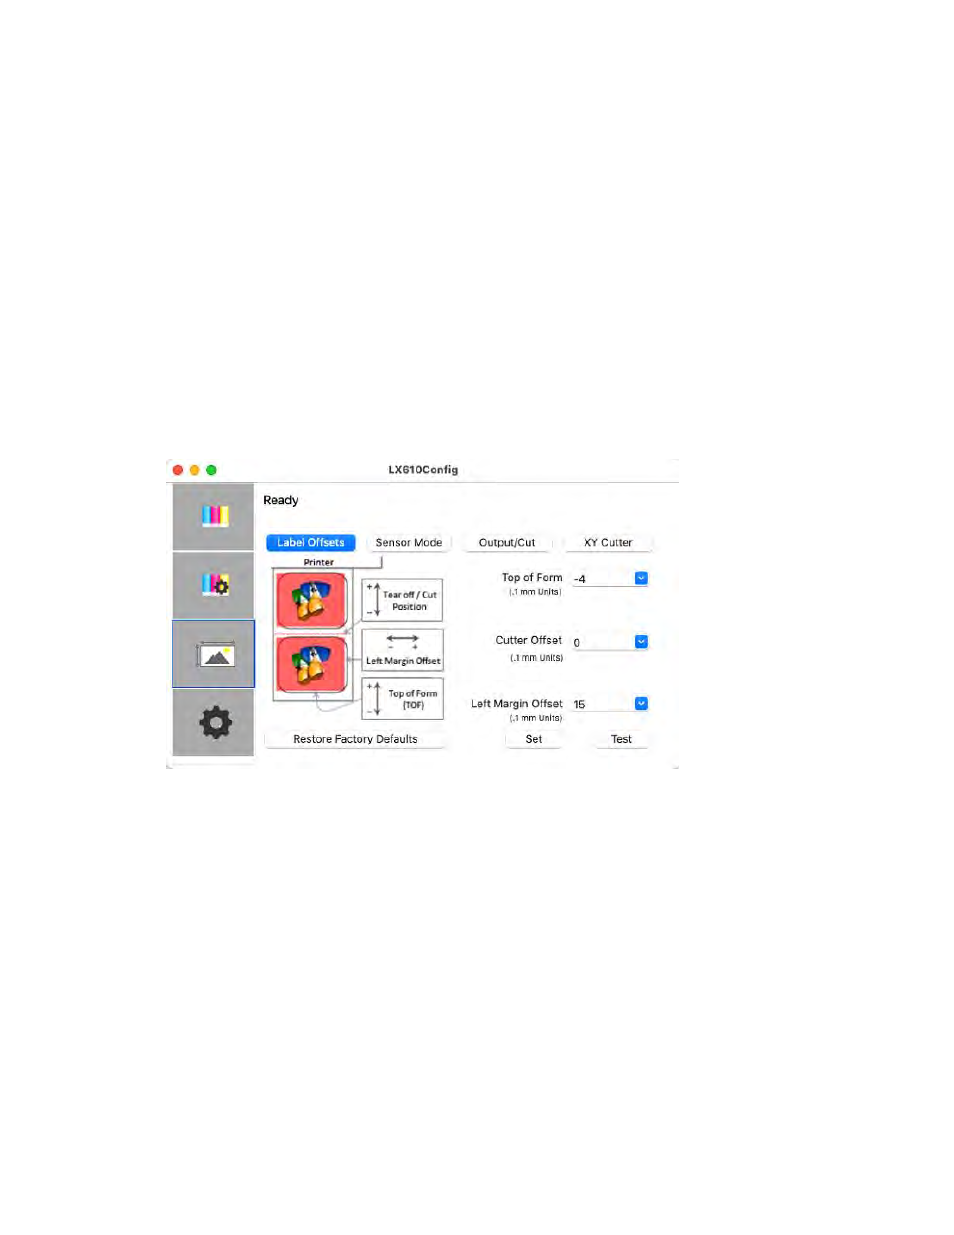
Left Margin Offset.
You must decrease the Left Margin Offset to center the over bleed
on the label. If you over bleed by .03 inches, you will need to decrease the Left Margin
Offset by 4. This will center the page size increase so there is an over bleed on both the
left and right sides.
TOF.
Increase the Top of Form by 4. This will cause the printer to start printing before
the label and ensure a fully printed label.
Note:
It is best to over bleed as little as possible to avoid excess ink on the label backing. Also, over
bleeding too much will cause the printer to skip labels. This is because the printer stops
printing too late to sense the next label.
Note:
This section only
applies to Pre Die-Cut Stock.
For an explanation of stock
types, please see section 2A.