4 view properties, 1 the grid class views, View properties -4 5.4.1 – Cadac SAM User Manual
Page 44: The grid class views -4
5-4
Configuring the Sound Automation Manager
Sound Automation Manager
Revision SAM2005-2
817
9LHZ#3URSHUWLHV
81714
7KH#*ULG#FODVV#9LHZV
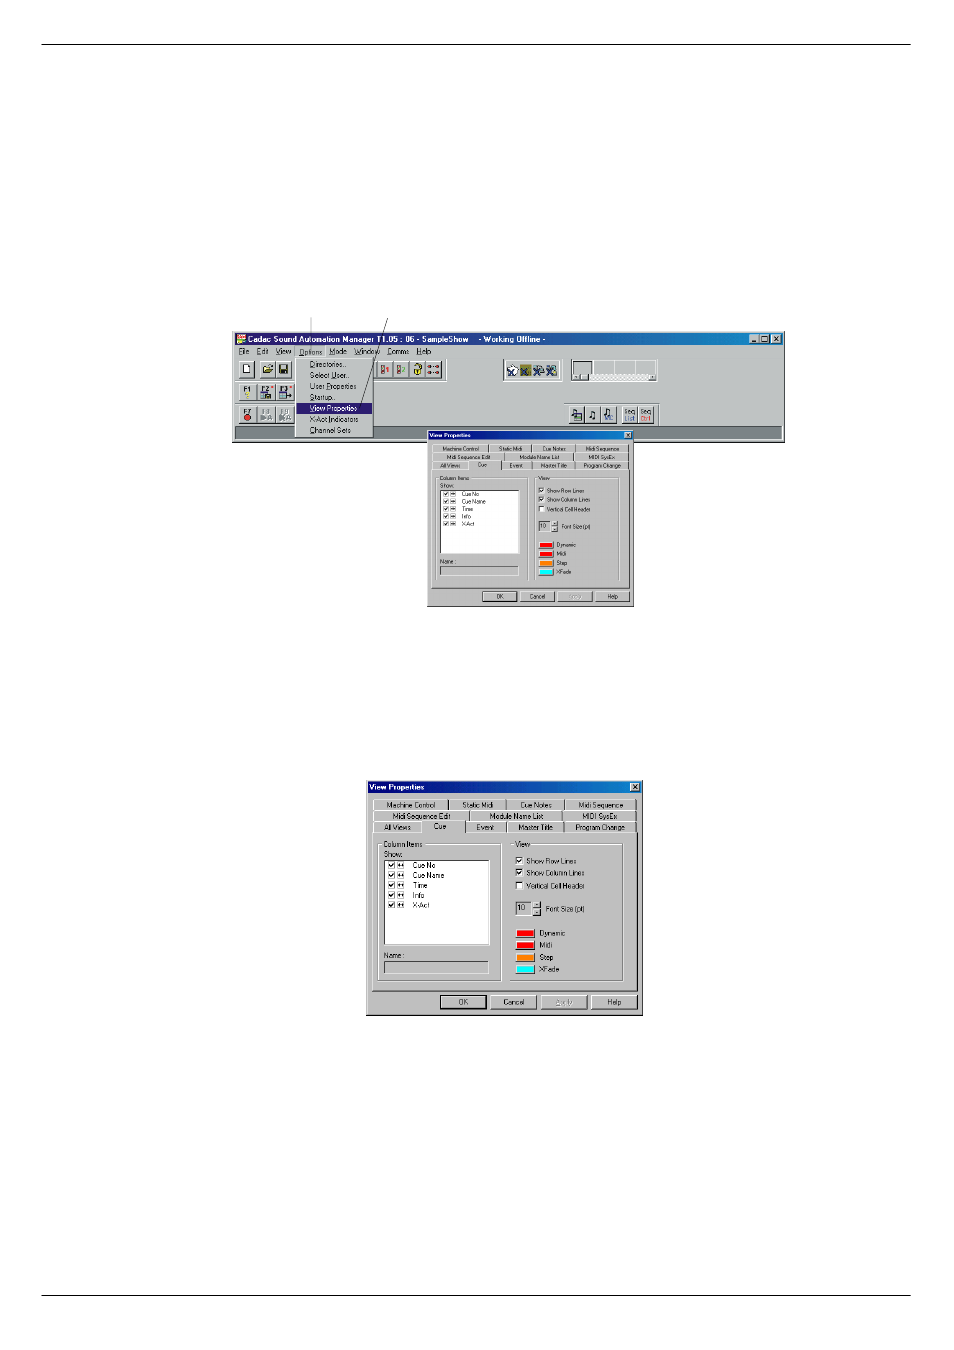
You can configure the way SAM displays information on the screen. In the Options
menu, click on View Properties to open a new window that shows various parame-
ters you can change. By clicking on the tab labelled All Views, you can set the com-
mon properties for all windows. Each window then has its own tab that may be
clicked so that additional features can be controlled.
The views displayed in this manner are referred to as the Grid Class Views and
comprise those child windows that display their data in rows and columns. Each row
and column in the Grid Class Views have a “header tile”.
The child window row header shows the cue number and the column header shows
a suitable name which describes the data in the column. In many cases this data is
editable as part of the show file. Editing is done using the Options->View Properties
menu selection, which calls up the View Properties dialog box. The dialog box can
also be accessed by right-clicking over the column header and then select Properties
from the pop-up menu.
The left-hand area of the dialog box gives you control over the columns and the way
they are shown. You can make columns invisible by unticking the relevant box. The
next box enables you to change the column width and the text is shown in the column
header. The column width can also be changed by right-clicking in the header box,
then choose Column Width from the pop-up menu followed by entering the size in
the associated window. To set the width for multiple columns, click a column to select
it, then use Ctrl-click or Shift-click to add any other columns you want to resize.
Right-click on each column and set the size as previously described.
If you click once on a row in this area it will be highlighted and its name can be edited
in the box at the bottom.(Where editing makes no sense, this area is greyed out).
&OLFN#2SWLRQV
&OLFN#9LHZ#SURSHUWLHV
FIG 5-4. Change View properties.
FIG 5-5. Dialog box layout
&RQWURO#FROXPQV#DQG#WKH
ZD\#WKH\#DUH#GLVSOD\HG
2SWLRQV2&RORXUV#VSHFLILF
WR#RQH#ZLQGRZ