Replace the power cord (200–240 v csa), Replace the power cord (200–240 v csa) -5, Powermax – Hypertherm Powermax45 Service Manual User Manual
Page 109: Component replacement, Service manual 6-5
component replacement
powermax
45
Service Manual
6-5
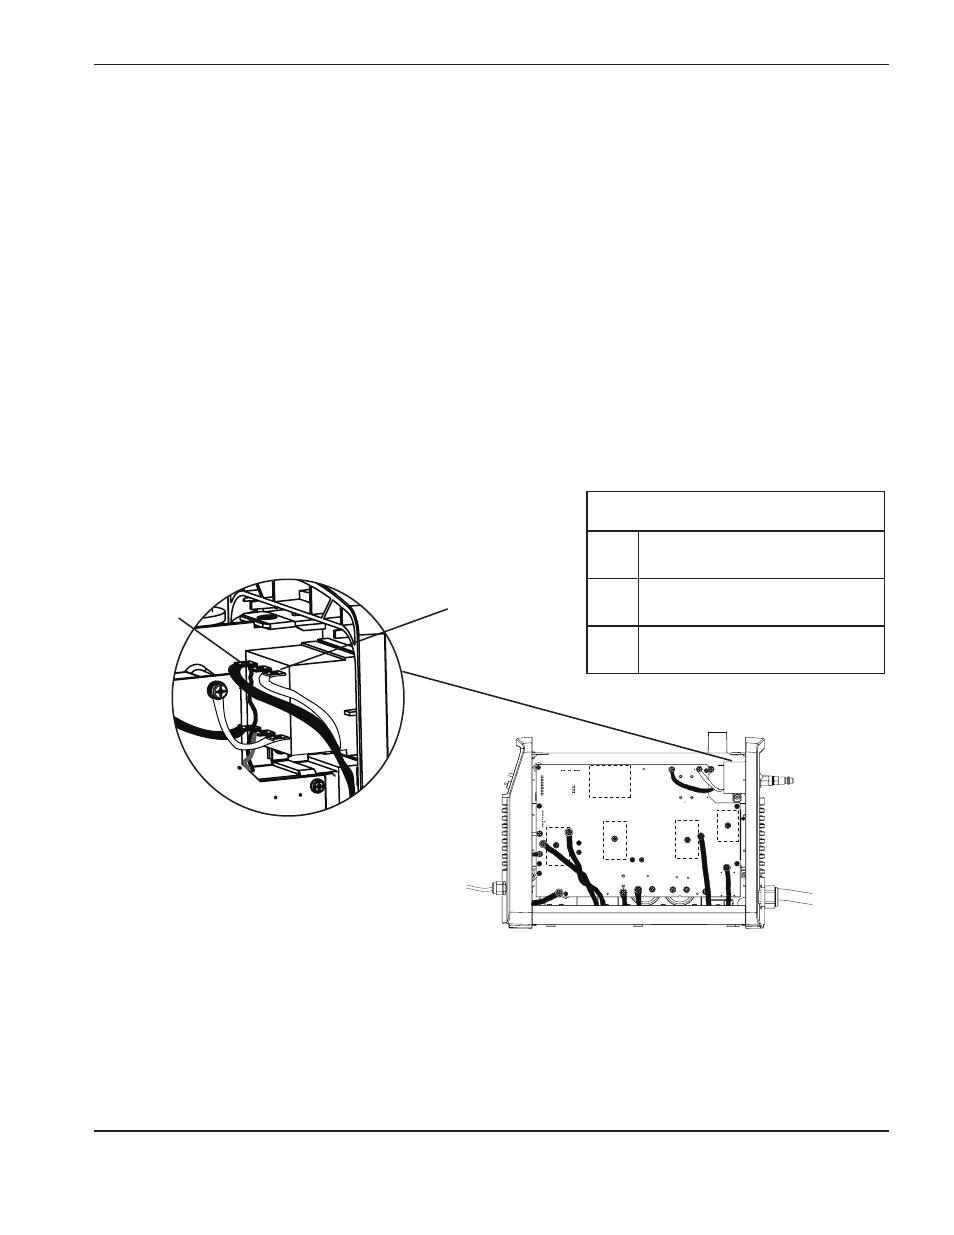
Replace the power cord (200–240 V CSA)
1. Turn OFF the power, disconnect the power cord, and disconnect the gas supply.
2. Use a #2 Phillips screwdriver to remove the 2 screws from the handle on the top of the power supply. Tip the end
panels back slightly so that you can get the edges of the handle out from underneath them. Lift the cover off the
power supply. Remove the Mylar barrier that protects the power board.
The 200–240 V CSA power cord has a black wire and a white wire that connect to the power switch, and a green
ground wire that connects to the heat sink.
3. Remove the rear end panel or gently tilt it away from the power supply until you can access the screws that secure
the power cord wires to the back of the power switch.
NOTE: To remove the rear end panel, you must first remove the air fitting.
4. Remove the screws that secure the connectors for the white and black wires from the power switch to disconnect
them.
5. Remove the screw that holds the green wire to the heat sink.
6. On the outside of the power supply, loosen the power cord’s strain relief retention nut so that the wires move
freely. If you will replace the strain relief, use an adjustable wrench to unscrew the strain relief nut on the inside of
the power supply to remove the old strain relief.
7. From the outside of the power supply, pull the old power cord through the strain relief or through the hole in the
rear end panel to remove it.
l
Black wire (CSA)
N
White wire (CSA)
Single phase (CSA)
L
Black
N
White
PE
Green
TP 19
W
-
+
-
+
TP 18
R
TP 17
B
192 VDC
192 VDC