Exit end view – Rena T-950 User Manual
Page 12
GETTING ACQUAINTED
6
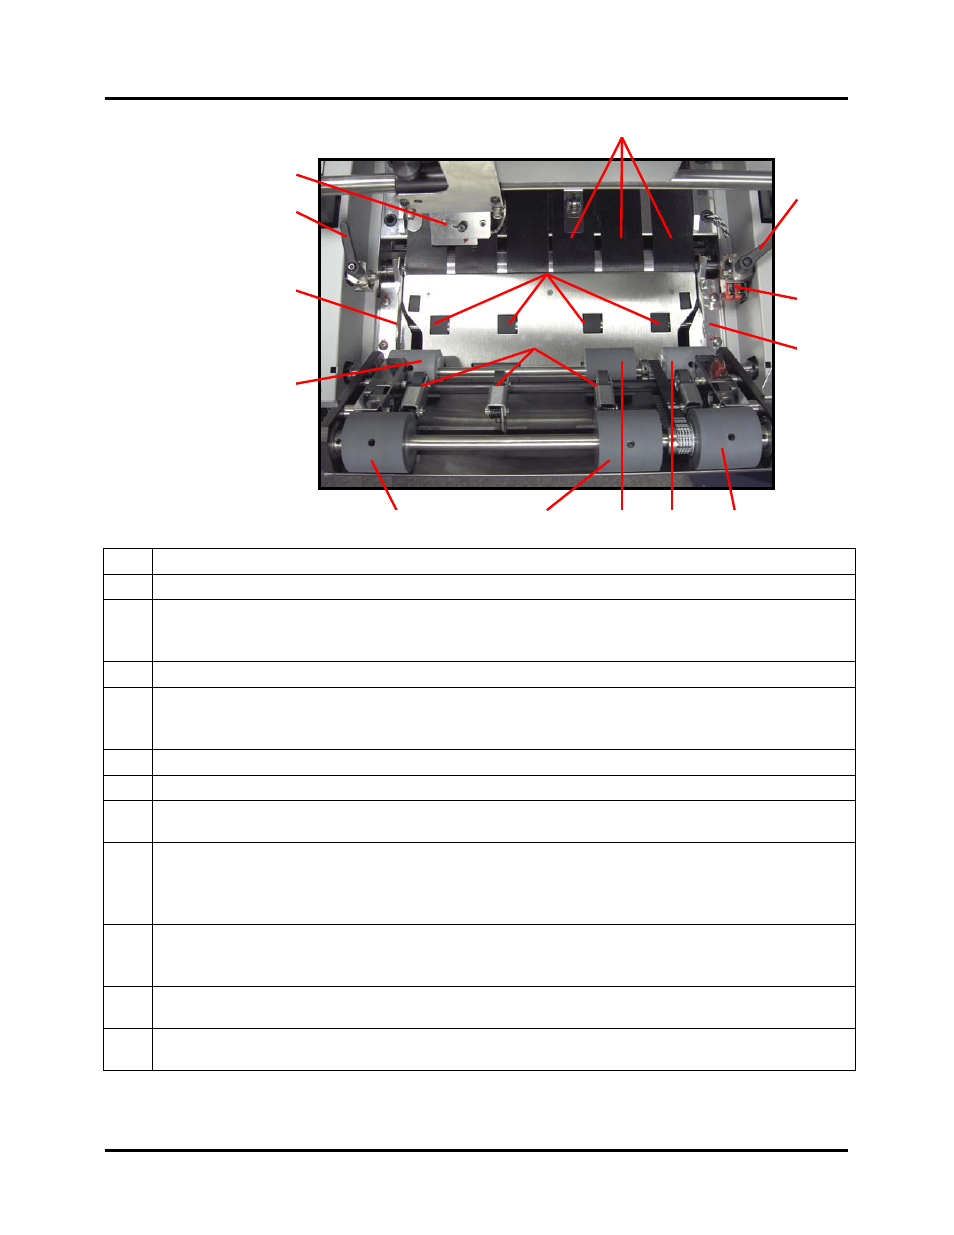
Exit End View
* Not present in earlier units.
1
Tab Folding Guide (Front) –
This plate folds the tab under the media.
2
Exit Roller Assembly Lock –
This lever locks the Exit Roller Assembly in place.
3
Tab/Label Applicator Head –
Two applicator heads are supplied; one for tabs or stamps and
one for labels. (Tab Applicator head shown). This device contains the Tab Sensor and provides the
peel point for dispensing tabs/stamps/labels.
4
Transport Belts –
The belts transport the media through the tabber.
5
Safety Interlock Switches –
The safety interlock switches prevent the tabber from operating
when the Exit Roller Assembly is open.
DO NOT DISABLE THESE SWITCHES AS SEVER INJURY CAN RESULT.
6
Tab Folding Guide (Rear) –
This plate folds the tab under the media.
7
Media Forwarding Rollers –
These rollers forward the media while the tab is being applied.
8
Tab Pressure Rollers –
These rollers press the tab to the underside of the media to complete the
seal.
9
Adjustable Pressure Roller –
When applying labels/stamps, this roller is responsible for
applying pressure to attach the label/stamp to the media. If necessary the set screw, that secures this
roller to the shaft, can be loosened; allowing the roller to be repositioned over the area that the
label/stamp is being applied.
10
Adjustable Media Forwarding Roller –
Used to help transport the media out the exit end of
the tabber. This roller can be positioned at two different locations on the shaft. If you change its
location, please be sure it aligns with the lower drive roller.
11
*Short Media Drive Rollers–
These rollers help drive short media through the exit roller
assembly area.
12
*Short Media Pressure Rollers–
These rollers help drive short media through the exit roller
assembly area.
7
4
11
10
2
12
8
6
5
3
2
1
8
7
9