Rena T-950 User Manual
Page 29
SETUP & OPERATION
23
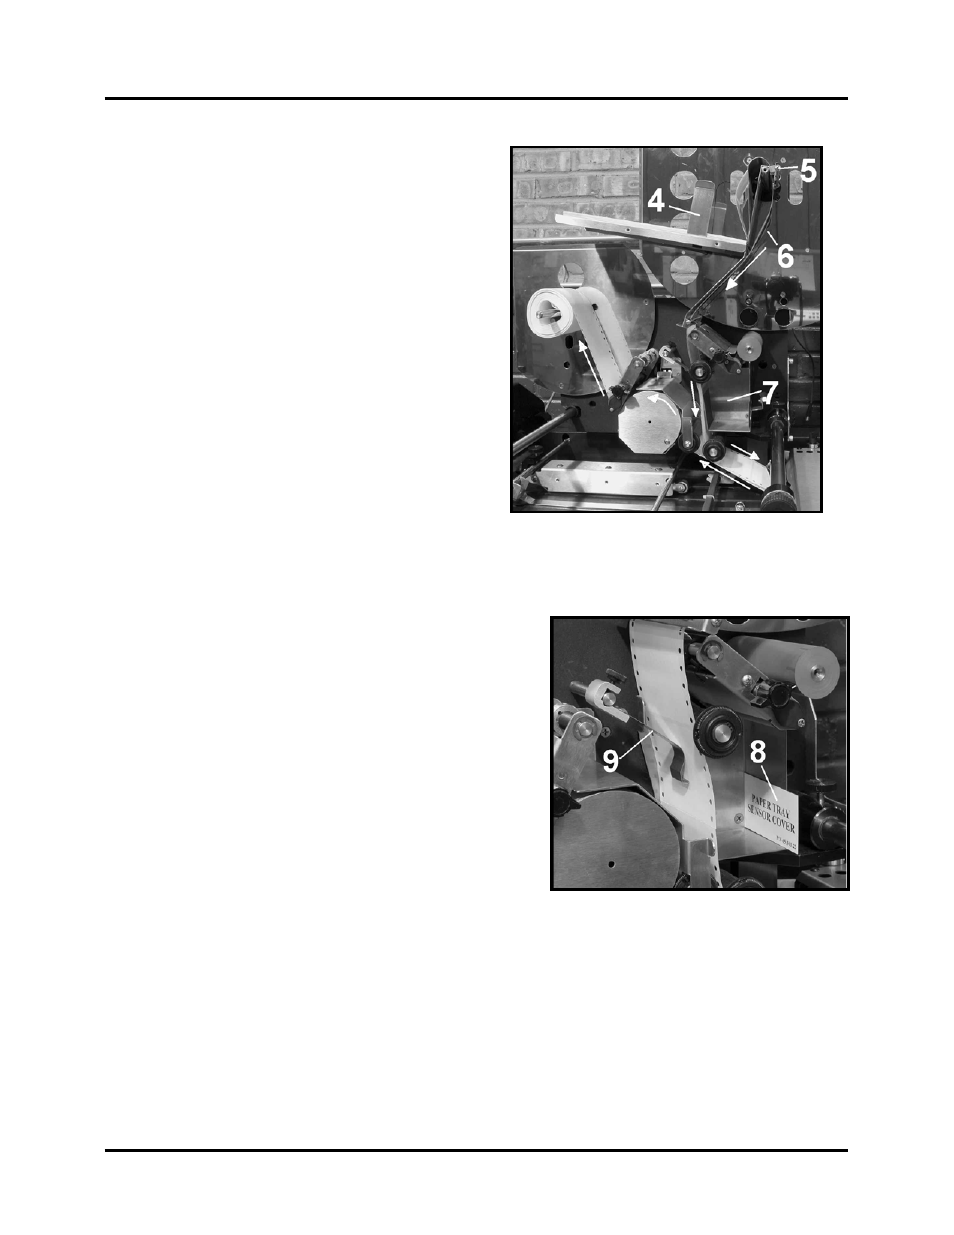
6. Remove enough labels to expose 29 to 30
inches of backing material. Then place the
stack on the Label Tray.
7. Adjusts the Side guide [4] so that it is
within 1/16” of the labels.
8. Thread the labels over the top of the Tray
in the direction of the arrows and then
down through the two guide rods [5] as
shown.
9. Hook the Label Plate [6] over the top guide
and behind the lower guide, but in front of
the labels.
10. Thread the labels behind the TAB Bin [7]
and down to the applicator head. Around
the applicator head and up to the tab drive
roller. Over the tab drive roller, to the
take-up spool.
NOTE: DO NOT THREAT THE LABELS THROUGH THE TAB UNWIND ROLLER
AND DO NOT PLACE THE LABELS IN THE BIN [7].
11. Install the tab bin Sensor Cover/Reflector [8]
over the bin sensor opening, as shown. This
cover/reflector will interrupt the bin sensor so
the unwind drive motor won’t turn on.
12. Adjust the Idler Roller Tension spring [9] so that
it touches the label but does not press the label
against the bin, as shown.
13. To program the job, refer to the “Programming
the Job” section in this manual.
Tip: When applying labels with perforated backing, the perforations must be strong enough to
withstand the force it takes to advance and peel a label. If the perforations are not strong enough
the label backing (web) will break. This type of stock will not perform correctly with this system.