Status router, Salvos – Sierra Video G.R.I.P. V3.1.0 User Manual
Page 45
GRIP 3.1.0
39
Alternate switching method
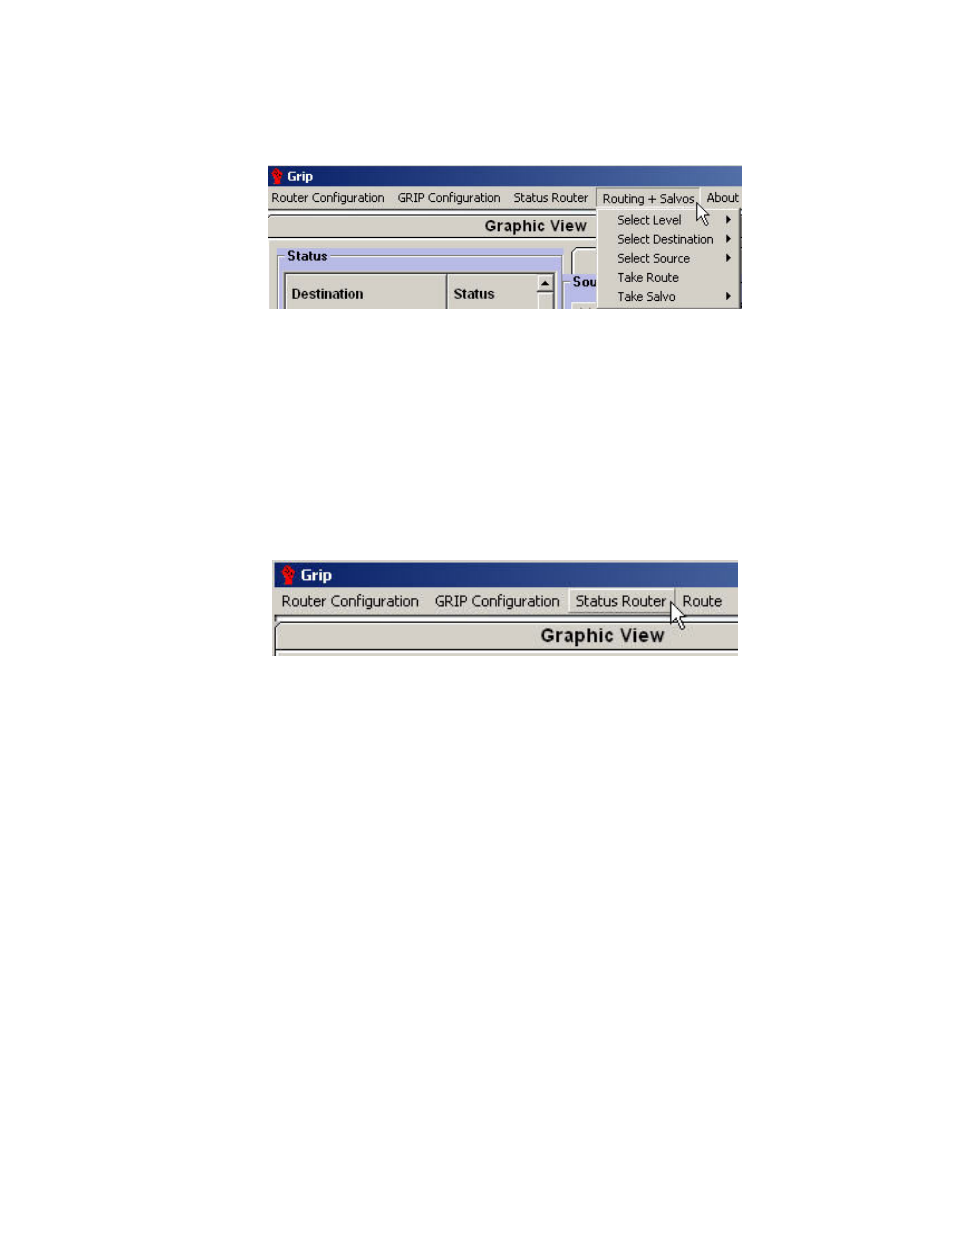
The router can also be switched by selecting “Routing + Salvos” from the menu.
•
Select the level(s) you want to change.
•
Select the destination.
•
Select the Source.
•
Select “Take Route” to make the switch.
Stored Salvos can also be switched from this menu. Select the salvo from the drop
down menu and “Take” (see the Salvo section of this manual for Salvo details).
Status Router
Clicking on “Status Router” will cause GRIP to request all I/O data from the router and
update the Destination information in the Status column.
Salvos
Overview
A Salvo is a list of crosspoint switches that are downloaded to the routing switcher and
switched by a single “Salvo Take” command.
GRIP Software allows up to 40 Salvos to be named and stored in the routing switcher.
The program is limited to 160 takes per salvo.
Salvo Setup
To program a salvo, enter the desired Destination/Source combinations in the preset
window and click on the “Save Salvo” Button. All salvo buttons begin to flash between red
and light blue, indicating a selection must be made. If a name is desired, type the name
into the “Salvo Name” Textbox in the lower right hand corner of the window. Click on the
desired flashing salvo button. The newly entered name is displayed on the salvo button,
the button stops flashing and the salvo is stored in the routing switcher and available to
all control points of the routing system.