Grounding the switch – H3C Technologies H3C S12500-X Series Switches User Manual
Page 31
23
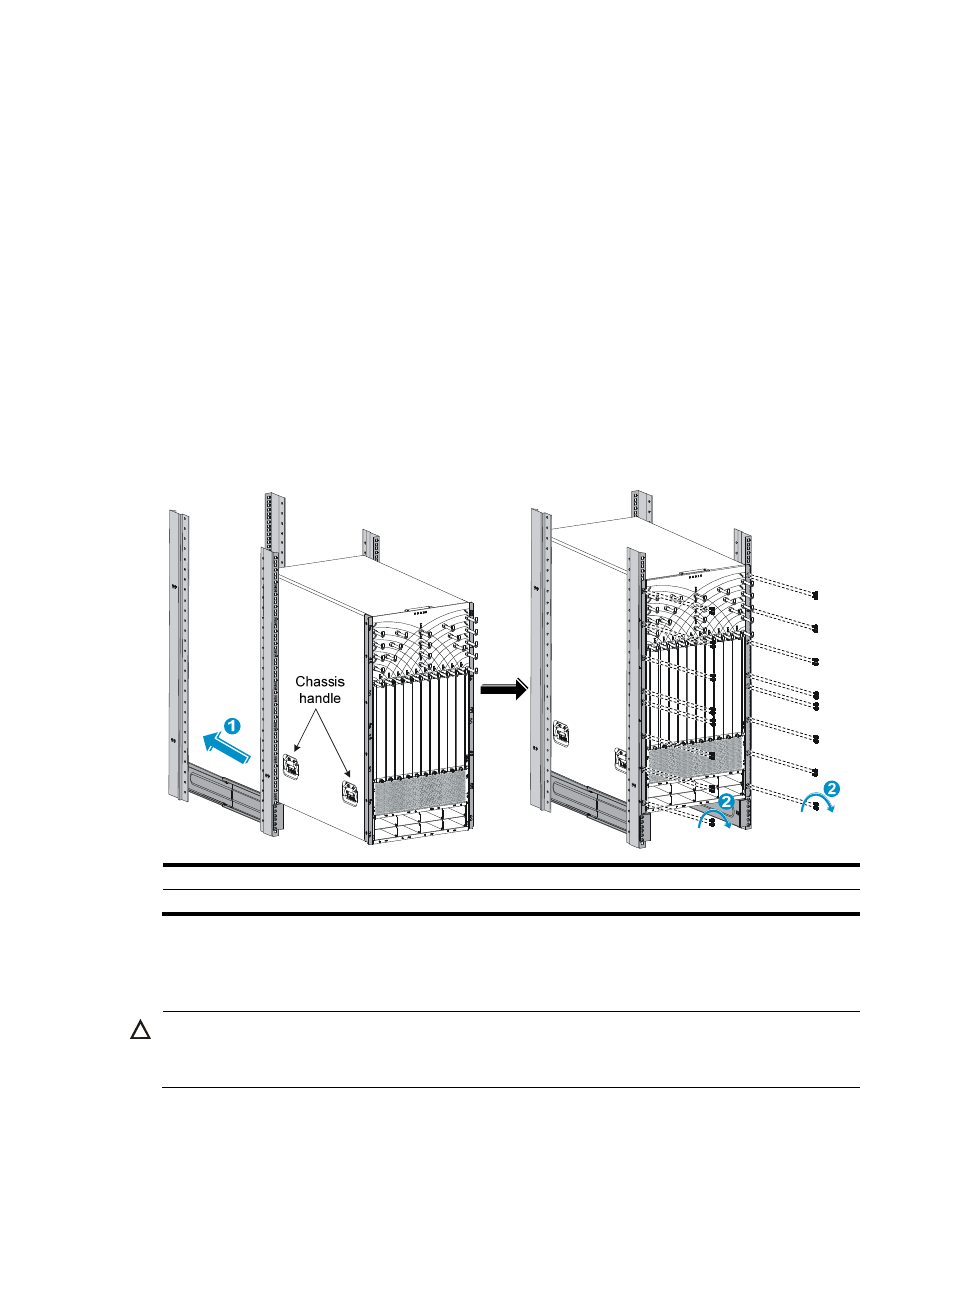
To mount the switch in the rack:
1.
Move the chassis to face the rear of the chassis towards the front of the rack.
2.
Cooperate with a minimum of four people to lift the switch by holding the chassis handles until the
bottom of the switch is a little higher than the slide rails on the rack.
3.
Place the switch on the slide rails from the front of the rack and slide the switch along the slide rails
until the mounting brackets on the switch touch the front rack posts tightly, as shown by callout 2
in
After placing the switch on the slide rails, do not leave go of your hands immediately because this
might tip the switch, damaging the switch or even causing bodily injury.
4.
Use screws provided with the switch to attach the mounting brackets to the rack posts.
If the mounting holes in the mounting brackets cannot align with the cage nuts on the rack, verify
the following items:
{
The top flange of the slide rail aligns with the middle of the narrower metal area between holes.
{
The cage nuts are installed in the correct holes.
Figure 17 Installing the chassis in the rack
(1) Push the chassis slowly into the rack along the slide rails
(2) Use screws to attach the mounting brackets to the rack
Grounding the switch
CAUTION:
Before you use the switch, ground the switch reliably to guarantee lightning protection and
anti-interference of the switch.