Installing a fip module – H3C Technologies H3C SR6600 User Manual
Page 27
17
The MCP MPU is hot swappable and you must perform the remove slot number command to stop the
module before you remove it.
When two MCP MPUs are installed on the router, the ACT LED (green) is steady on.
To install an MCP:
1.
Locate the slot to install the MCP (slot 1 or slot 2, the figures illustrate how to install an MCP to slot
1).
2.
Remove the captive screws on the filler panel with a Phillips screwdriver.
3.
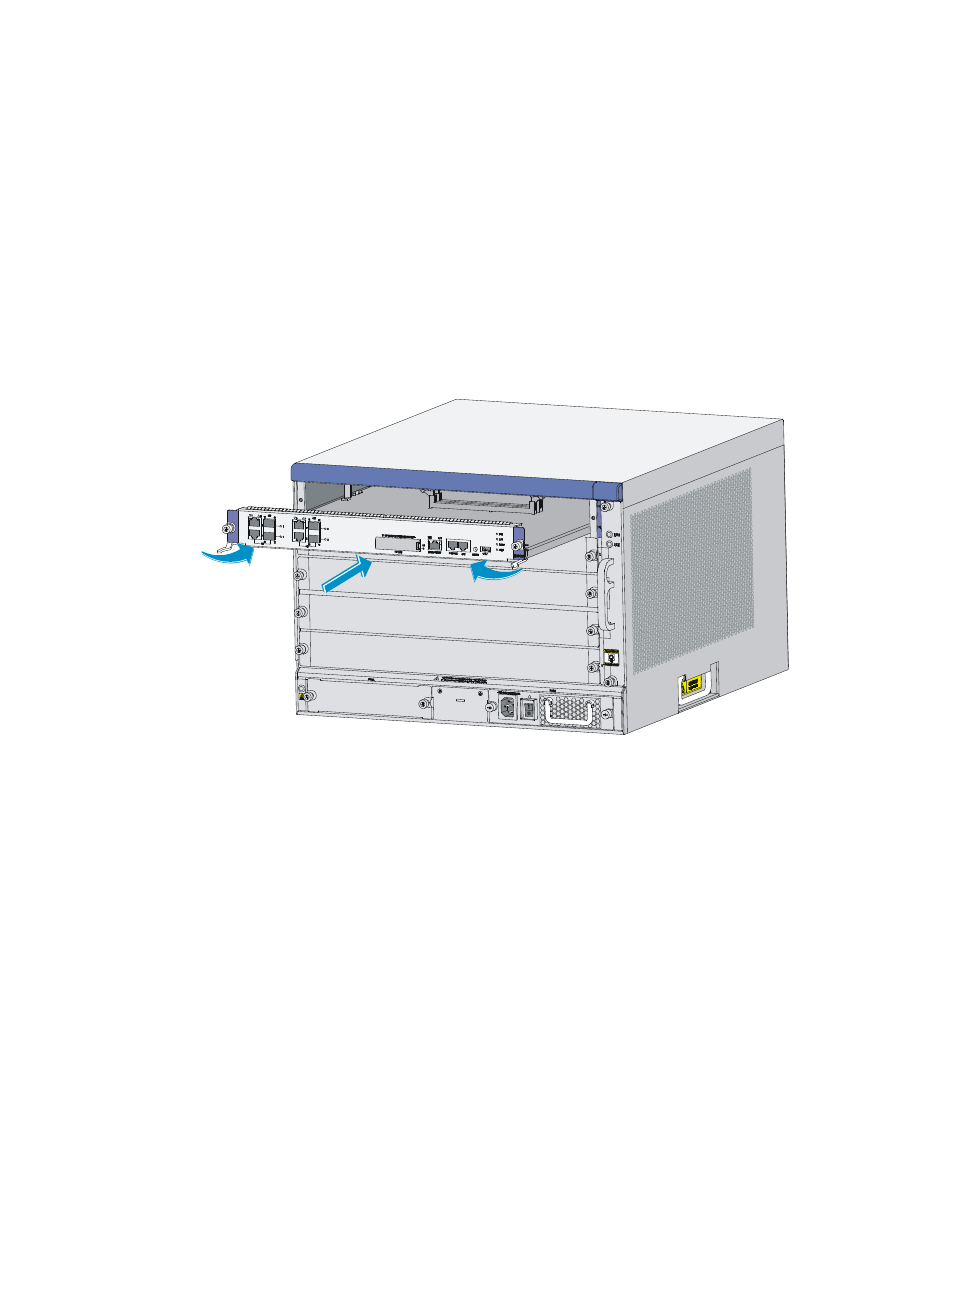
Use even pressure to gently push the MCP into slot 1 along the slide rails until positioning pins on
the backplane are seated in the positioning holes, and then push the ejector levers inward to lock
the MCP in position.
Figure 14 Inserting the MCP into the slot
4.
Fasten the captive screws with a Phillips screwdriver.
5.
If the router is powered off, power it on.
After the MCP is powered on, the RUN LED (green) flashes fast (at 8 Hz). It flashes slowly (at 1 Hz)
after the MCP application is loaded. This means that the MCP runs correctly. For the MCP LED
description, see "
Installing a FIP module
FIP modules are hot swappable and you must perform the remove slot number command to stop the
module before you remove it.
FIP-10 and FIP-20 can only be installed in a router installed with an MCP.
The following uses a FIP-20 as an example.
To install a FIP module:
1.
Locate the slot to install the FIP module.
2.
Remove the captive screws on the filler panel with a Phillips screwdriver.