Installation procedure – H3C Technologies H3C SR6600 User Manual
Page 38
28
Installation procedure
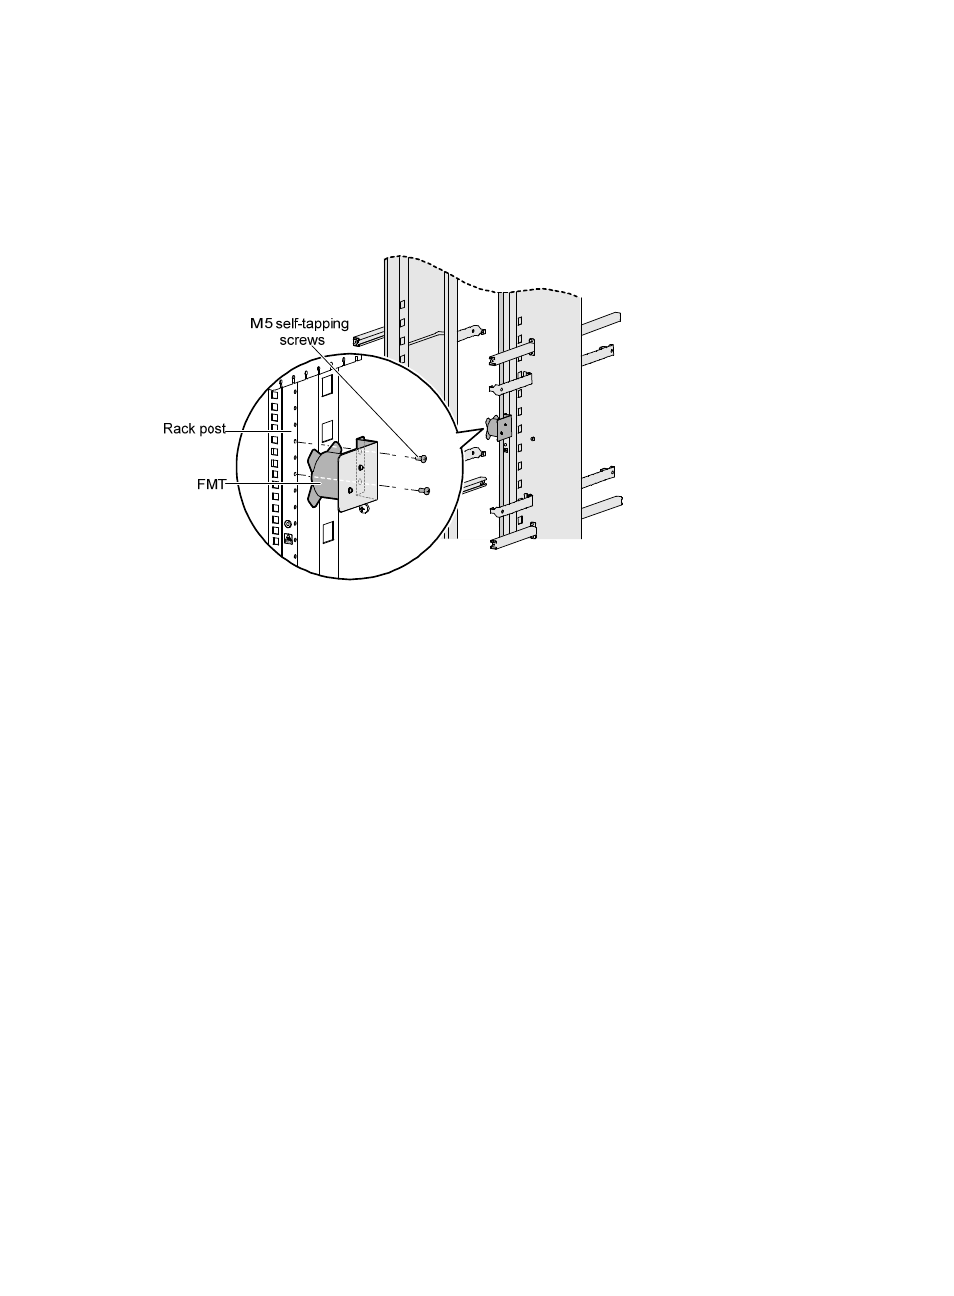
To install an FMT:
1.
Align the FMT and the installation holes on the rack post.
2.
Use a Phillips screwdriver to fix each FMT with two M5×10 self-tapping screws.
Figure 31 Installing FMTs
Installing a lightning protector for a network port
Lightning protectors are applicable to only 10/100 Mbps copper Ethernet ports.
Read the instructions for the lightning protector carefully before you install it.
The router does not come with any lightning protector.
If part of the network cable of a copper Ethernet port must be routed outdoors, connect a lightning
protector to the cable before you plug the cable into the port. The router provides this type of lightning
protector: single port, residual pulse energy (8/20μs test pulse) 5 KA, output voltage (8/20μs waveform):
core-core ≤ 40 V, core-ground ≤ 600 V.
Installation procedure
1.
Use a double-faced adhesive tape to stick the lightning protector onto the router chassis, and make
sure it is as close to the grounding screw of the router as possible.
2.
Measure the distance between the protector and the grounding screw of the router, cut the ground
wire of the protector as appropriate, and securely tighten the ground wire to the grounding screw
of the router.
3.
Use the multimeter to measure whether the ground wire of the protector contacts well with the
grounding screw of chassis.
4.
Insert the outdoor network cable into the protector's IN end, and the cable connected to the router
into the OUT end, and look at the indicators on the lightning protector to verify that the connection
is correct.
5.
Use nylon ties to bundle the cables neatly.