Setting the aspect ratio conversion, P426 – Grass Valley EDIUS Pro v.6.5 User Manual
Page 448
Export of Edited Contents
426
EDIUS - Reference Manual
Setting the Aspect Ratio Conversion
0
For the items in the list of the aspect ratio conversion setting to be set in the [Print to File] (Detailed Settings) dialog box,
what follows are example descriptions of converting a 16:9 screen to a 4:3 screen, and a 4:3 screen to a 16:9 screen.
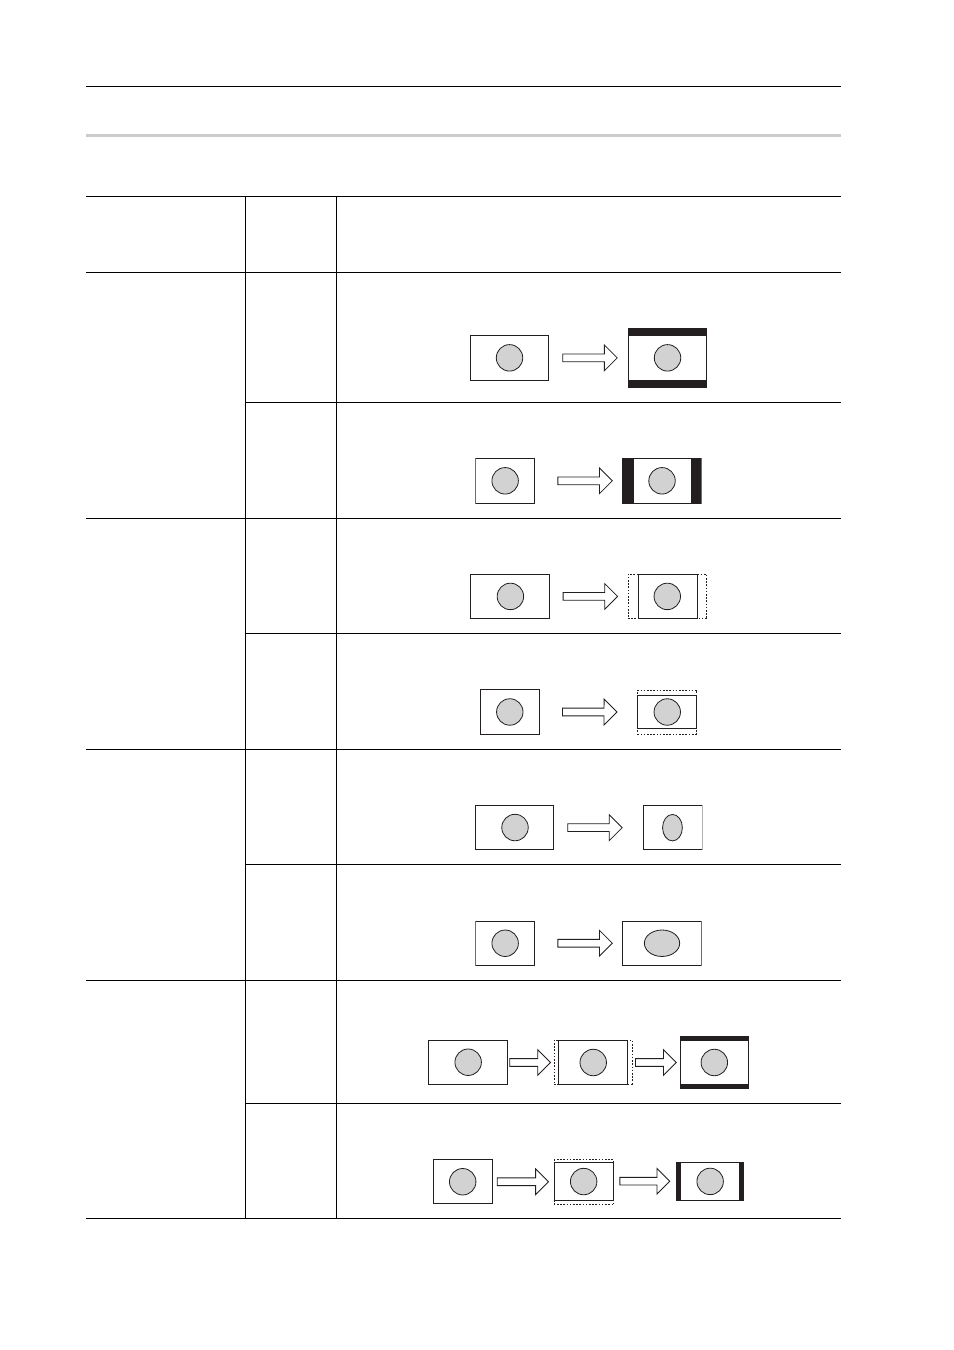
Item
Original
screen
→
Converted
screen
Description
Letter box / Side panel 16:9
→ 4:3
The 16:9 screen is displayed in the center of a 4:3 screen, and a letter box
effect is added above and below.
4:3
→ 16:9
The 4:3 screen is displayed in the center of a 16:9 screen, and side panels
are added at the edges.
Side cut / Crop top
and bottom
16:9
→ 4:3
The left and right sides of the 16:9 screen are cropped to fit the 16:9 screen
to a 4:3 screen size.
4:3
→ 16:9
The top and bottom parts of the 4:3 screen are cropped to fit the 4:3 screen
to a 16:9 screen size.
Anamorphic
16:9
→ 4:3
The 16:9 screen is compressed horizontally to fit a 4:3 screen size. The
frame aspect ratio is not conserved.
4:3
→ 16:9
The 4:3 screen is stretched horizontally to fit a 16:9 screen size. The frame
aspect ratio is not conserved.
Semi-letter box (14:9/
13:9)
16:9
→ 4:3
The 16:9 screen is cropped to a 14:9 or 13:9 screen size, displayed in the
center of a 4:3 screen and a letter box effect is added above and below.
4:3
→ 16:9
The 4:3 screen is cropped to a 14:9 or 13:9 screen size, displayed in the
center of a 16:9 screen and side panels are added at the edges.