Binding disk modules – Grass Valley K2 Storage System Instruction Manual v.3.2 Sep.24 2007 User Manual
Page 162
162
K2 Storage System Instruction Manual
September 7, 2007
Chapter 4 Installing the Level 3 Storage System
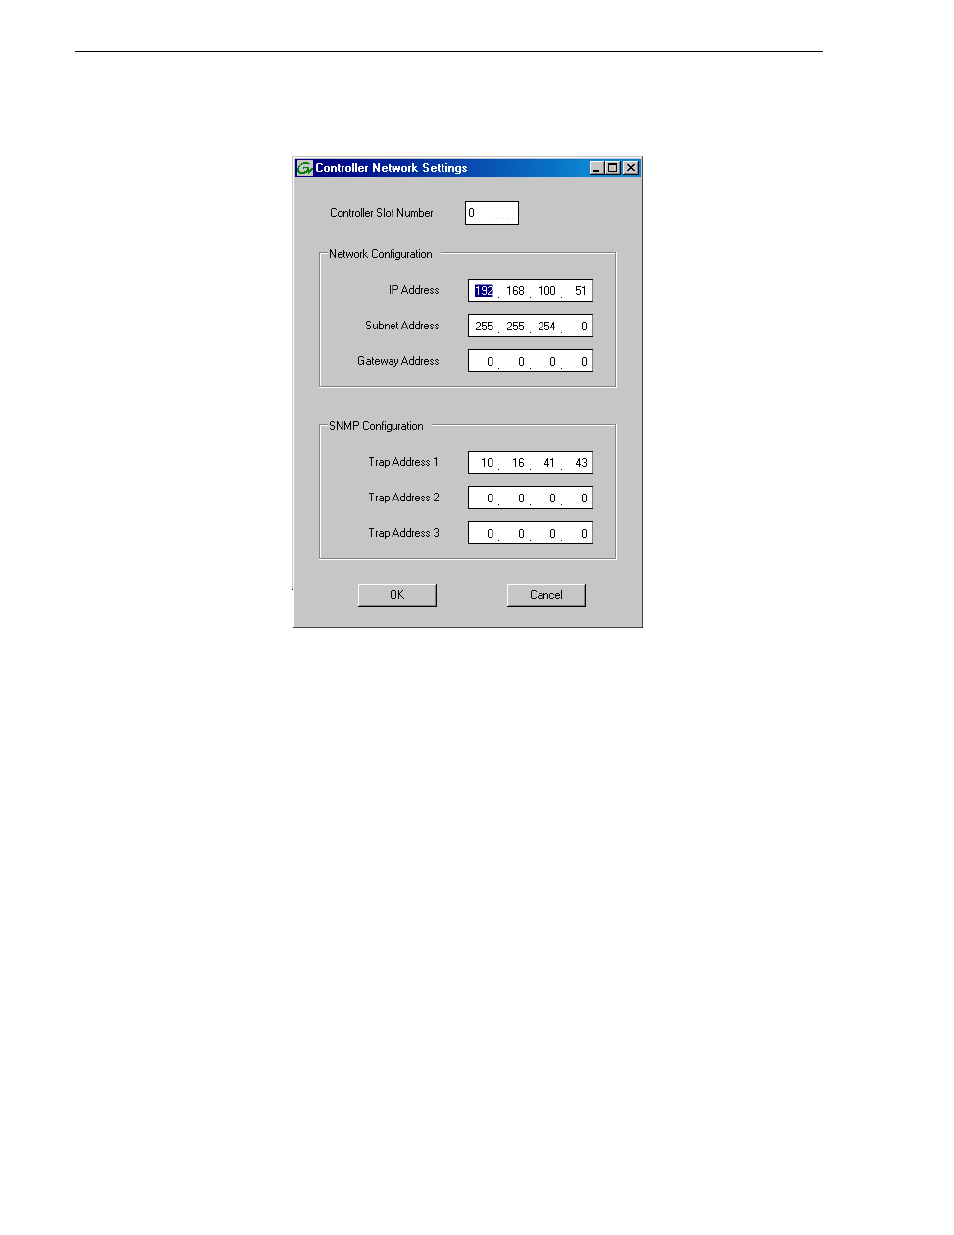
4. In the Controller Slot Number field enter
0
and then press
Enter
. The settings from
controller 0 are loaded into the Controller Network Settings dialog box and are
available for you to modify.
5. Enter the control network IP address and other network settings.
6. You want SNMP trap messages go to the NetCentral server PC, so for SNMP
Configuration enter the IP address of the NetCentral server PC. You can also enter
IP addresses for other SNMP managers to which you want to send SNMP trap
messages.
7. Click
OK
to save settings and close.
8. In Storage Utility click
View | Refresh
. Continue with the next procedure
Binding disk modules
Use the following procedure to bind disk modules as required for the Level 3 storage
system.
Also refer to
“About RANKs and LUNs in Storage Utility” in Chapter 15,
NOTE: Binding destroys all user data on the disks.
1. In the Storage Utility main window, identify bound RANKs and unbound disks by