Level 3 system power-on procedure, Chapter 4 installing the level 3 storage system – Grass Valley K2 Storage System Instruction Manual v.3.2 Sep.24 2007 User Manual
Page 174
174
K2 Storage System Instruction Manual
September 7, 2007
Chapter 4 Installing the Level 3 Storage System
Level 3 system power-on procedure
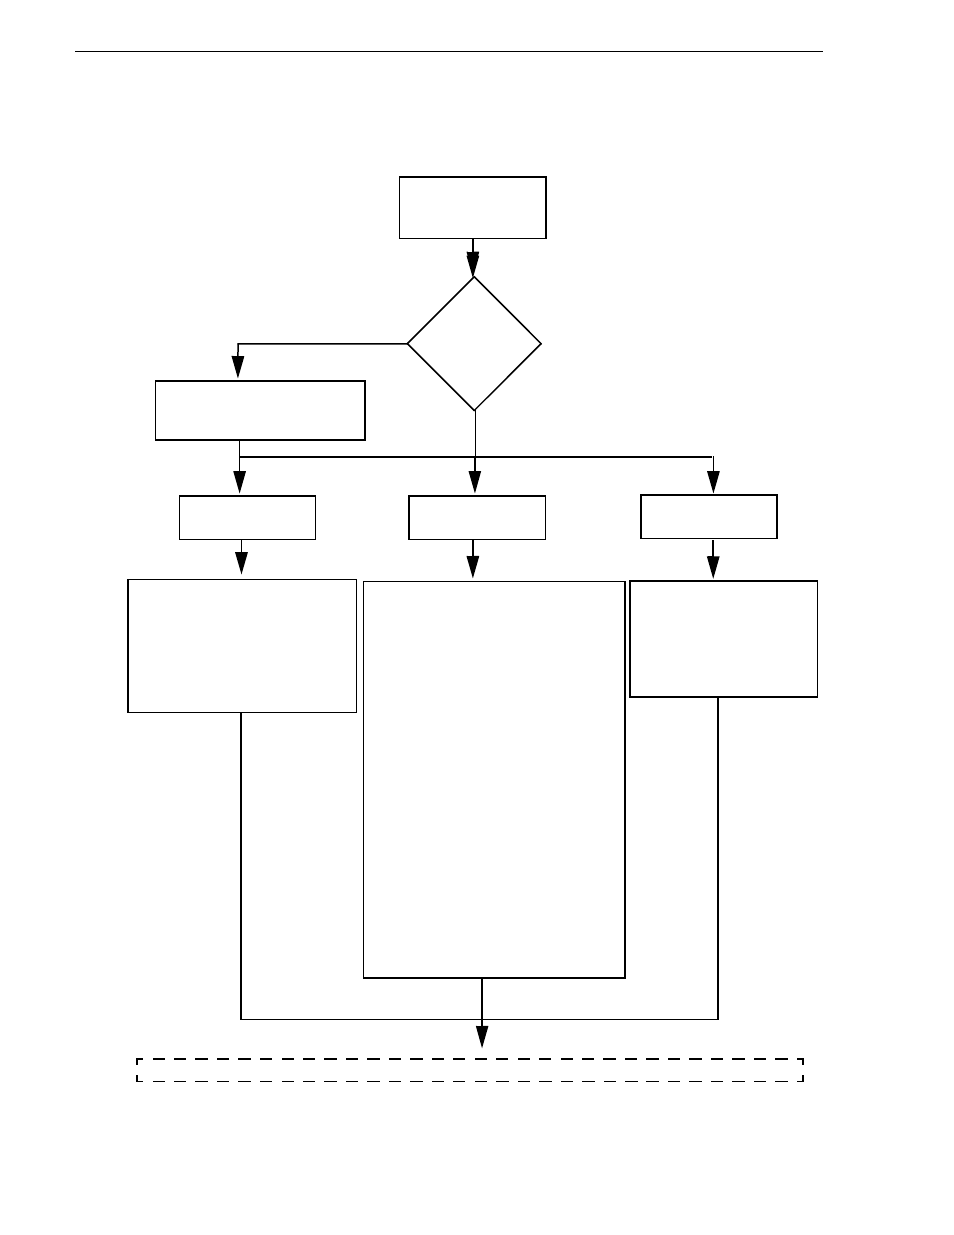
Power on Level 3
(iSCSI) K2 Storage
System
Continue with page 2 of Level 3 power-on procedure
Verify control point PC.
After log on, start NetCentral.
NetCentral reports devices as
offline. As each device is
powered on, check NetCentral
to verify the device’s status
Verify HP ProCurve switch.
Diagnostic self test LED Behavior is as
follows:
-Initially, all the status, LED Mode and port
LEDs are on for most of the duration of the
test.
-Most of the LEDs go off and then may
come on again during phases of the self
test. For the duration of the self test, the
Test LED stays on.
When the self test completes successfully,
the Power and Fan Status LEDs remain on,
the Fault and Test LEDs go off, and the port
LEDs on the front of the switch go into their
normal operational mode, as follows:
-If the ports are connected to active network
devices, the LEDs behave according to the
LED Mode selected. In the default view
mode (Link), the LEDs should be on.
-If the ports are not connected to active
network devices, the LEDs will stay off.
Verify Level 3 RAID devices:
-DIR and SVP LEDs on the RAID
controllers are blinking green
-Disk Link LED is steady ON green.
-FLT and BAT LEDs are OFF.
-The front Power LED is ON, Service
LED is OFF. Elapsed time: 5 minutes
Elapsed time: 1 minute
Does the
system have
RAID
expansion
chassis?
Yes
Power on the Expansion Chassis
prior to or simultaneous with the
primary RAID chassis
No
Power on the
primary RAID chassis
Power on the
GigE switch
Power on the
control point PC