Switching the monitor view, Audio level meter indication, Basic operations – Roland V-160HD SDI/HDMI Streaming Video Switcher User Manual
Page 11
11
Basic Operations
Switching the Monitor View
Aside from multi-view display, you can switch between videos to monitor such as the input video or a list of still images, according to your needs.
1 .
Press one of the MONITOR [1], [2], [3] or [4] buttons.
The selected button is lit, and both the display from the monitor
of this unit and the output video from the HDMI OUT 3 connector
switch at the same time.
* The display from the monitor of this unit and the output from the
HDMI OUT 3 connector always switch together.
MONITOR [1] (MULTI-VIEW) button
The final output video, preview output video and the videos
allocated to the cross-point [1]–[8] buttons are shown in sections of
the display (multi-view).
1
2
3
1
PVW (preview) section
Displays the preview output video (the video to be output next).
* The fade-in/out effect (p. 26) is not reflected here.
2
PGM (program) section
Displays the final output video.
3
Cross-point [1]–[8] button video
Displays the video assigned to each cross-point button.
The final video output and preview output video are displayed
with tally frames (red and green).
1
2
1
REC indicator
If a camera that supports the REC status
function is connected, this is shown when
the camera’s REC button is pressed.
2
AUX/SOURCE indicator
This displays as follows.
Yellow
PinP & KEY inset screen
Magenta
DSK video source
Green
AUX bus video source
MONITOR [2] (16 INPUT-VIEW) button
The input video from the HDMI IN connectors and the SDI IN
connectors are shown as 16 separate sections on the screen.
MONITOR [3] (16 STILL-VIEW) button
Shows the loaded still images in 16 separate sections on the screen.
MONITOR [4] (PROGRAM) button
Shows the final output video.
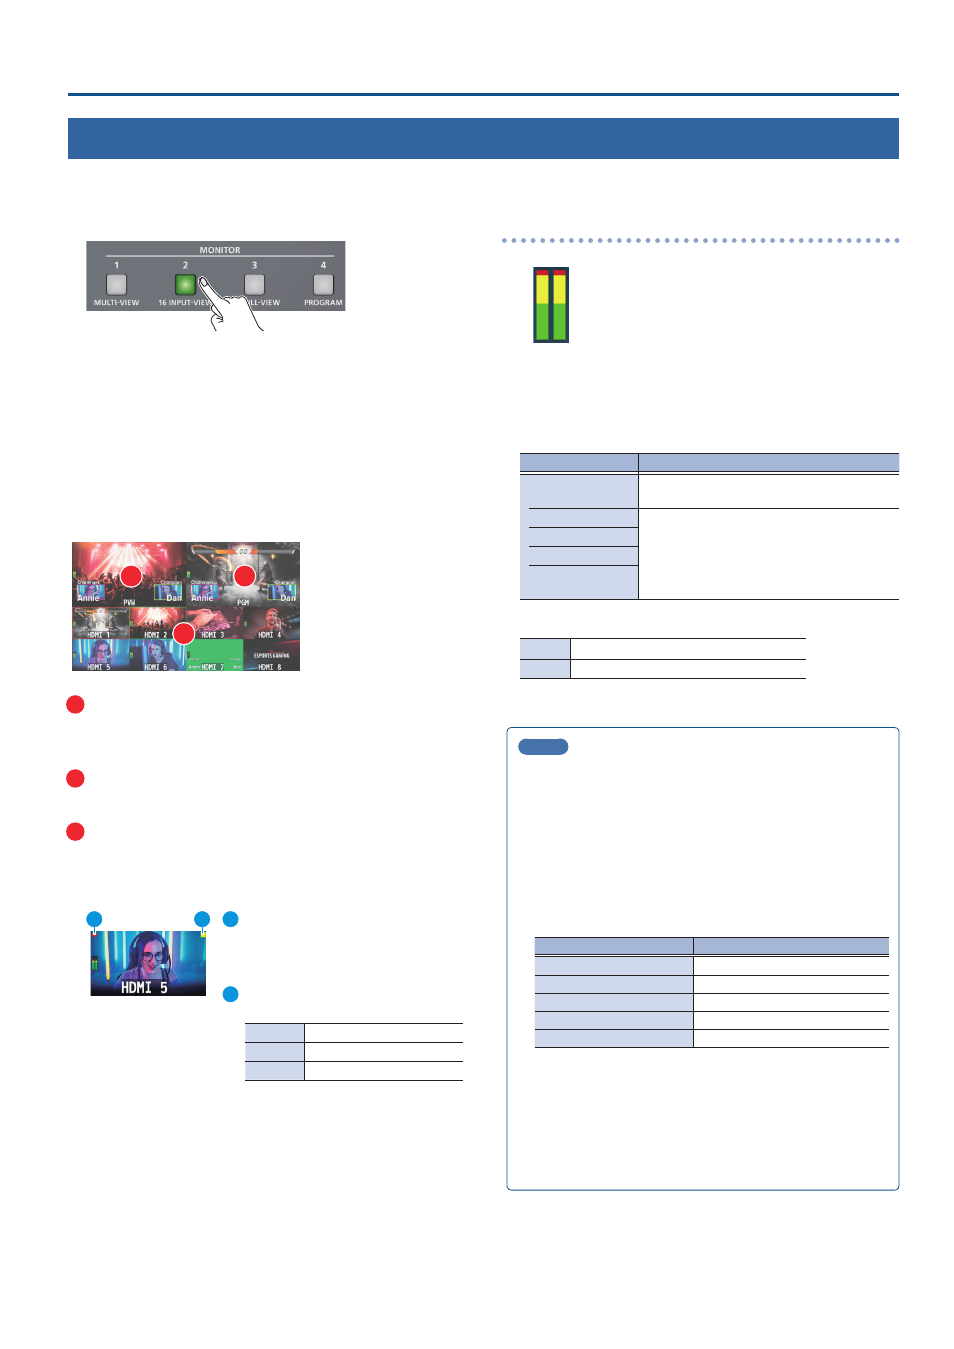
Audio level meter indication
Red: Excessive
Yellow: Suitable
Green: Insufficient
(dB)
-30
-20
-6
0
-50
¹
You can set the audio level meter to show or hide. You can also
individually set where each audio level meter in the multi-view is
displayed.
Configure the settings of the following menu items from the
[MENU] button
Ó
“SYSTEM.”
Menu item
Explanation
AUDIO LEVEL METER
Sets whether to show or hide the audio level
meter.
MASTER OUTPUT
Sets the display position of the audio level meter.
When this is “OFF,” the level meter is always hidden.
AUX
USB OUT
AUDIO IN/USB/
Bluetooth
¹
The following status marks are shown below the audio level meter.
MT
The mute function (p. 44) is on.
A.F
The audio follow function (p. 43) is on.
* This is not shown on this unit’s display.
MEMO
¹
You can change the monitoring videos assigned to the
MONITOR [1]–[4] buttons.
To make this setting, use the [MENU] button
Ó
“SYSTEM”
Ó
“MONITOR SW ASSIGN”
Ó
“MONITOR 1 SW” –“MONITOR 4 SW.”
¹
Items shown on the monitor
You can individually set whether items like the tally frame,
label and so on are shown or hidden.
Configure the settings of the following menu items from the
[MENU] button
Ó
“SYSTEM.”
Menu item
Explanation
TALLY FRAME
Tally frame
AUX/SOURCE INDICATOR
AUX/SOURCE indicator
REC INDICATOR
REC indicator
AUDIO LEVEL METER
Audio level meter
MULTI-VIEW LABEL
Label
¹
You can change the label names that are shown in the monitor.
Edit this from the [MENU] button
Ó
“SYSTEM”
Ó
“MULTI-VIEW
LABEL EDIT.”
¹
For details on the cameras that support the REC status function,
refer to the Roland website.
https://proav .roland .com/