Controlling the volume automatically (auto mixing), Interlinking audio output to video switching, Audio follow) – Roland V-160HD SDI/HDMI Streaming Video Switcher User Manual
Page 43: Adding an object for audio follow, Audio operations
43
Audio Operations
Interlinking Audio Output to Video
Switching (Audio Follow)
Here’s how the audio output can be automatically switched in
tandem with video switching (the audio follow function).
1 .
[MENU] button
Ó
select “AUDIO FOLLOW,” and press the
[VALUE] knob.
2 .
Use the [VALUE] knob to select the input video that you
want to use with Audio Follow, and press the [VALUE] knob.
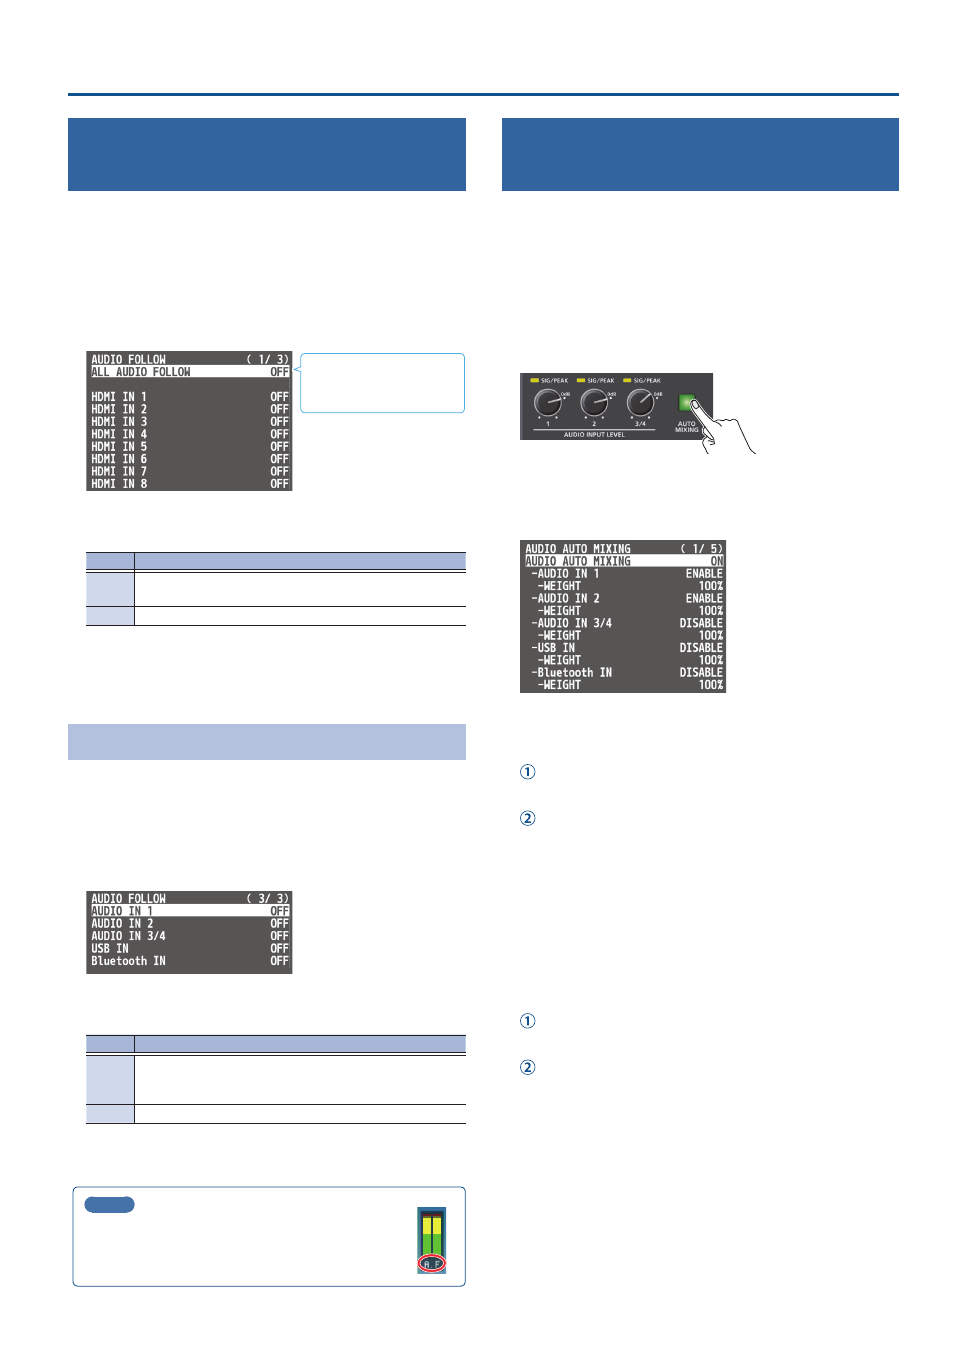
Select “ALL AUDIO FOLLOW”
to edit the HDMI IN and SDI
IN settings all at once.
3 .
Use the [VALUE] knob to select “ON,” and press the
[VALUE] knob.
Value
Explanation
ON
The audio is output only when the video is selected. The
audio is automatically muted if another video is selected.
OFF
The audio is always output regardless of the video selection.
4 .
Press the [MENU] button to close the menu.
Adding an Object for Audio Follow
You can set Audio Follow to apply to the audio from the AUDIO IN,
USB IN or Bluetooth IN.
1 .
[MENU] button
Ó
“AUDIO FOLLOW”
Ó
and select the
audio input that will be the object of Audio Follow, and
press the [VALUE] knob.
2 .
Use the [VALUE] knob to select one of “INPUT 1”–“INPUT 10,”
and press the [VALUE] knob.
Value
Explanation
INPUT
1–10
For each audio source, these settings specify the input video
that will use the audio follow function. Audio is output only
when the specified input video is selected.
OFF
The audio is always output regardless of the video selection.
3 .
Press the [MENU] button to close the menu.
MEMO
The level meter indicates the audio follow setting.
The “A.F” symbol is shown to indicate audio for which
audio follow is on.
Controlling the Volume Automatically
(Auto Mixing)
The volume adjustments that would normally be done by the
operator can be controlled automatically (auto mixing function).
Since this lets you leave the volume adjustments up to the V-160HD,
it can be used in situations where there is no dedicated operator.
This is especially useful for meetings, discussions, debates, and other
situations where multiple microphones are used.
1 .
Press the [AUTO MIXING] button to turn the auto mixing
function on (lit).
2 .
[MENU] button
Ó
select “AUDIO AUTO MIXING,” and
press the [VALUE] knob.
The AUDIO AUTO MIXING menu appears.
3 .
Specify whether the selected audio is affected or is not
affected by auto mixing.
Use the [VALUE] knob to select the audio whose setting you
want to specify.
Use the [VALUE] knob to specify whether the selected audio
is affected (ENABLE) or is not affected (DISABLE) by auto
mixing, and press the [VALUE] knob.
For audio that does not require auto mixing, such as background
music, choose “DISABLE.”
4 .
Specify the priority level for volume-level distribution.
If there is audio that you want to make more prominent, such as
when you want to raise the volume level of an emcee microphone,
raise the weight level of that audio to emphasize it, and lower the
weight level for other audio.
Use the [VALUE] knob to select “WEIGHT,” and press the
[VALUE] knob.
Use the [VALUE] knob to set the priority level for volume-level
distribution (from 0 to 100%), and press the [VALUE] knob.
When air-conditioner noise or the like is a concern, specify the
weight level to a low value.
5 .
Press the [MENU] button to close the menu.
6 .
To turn the auto mixing function off, press the [AUTO
MIXING] button once again.