Compositing video with picture-in-picture (pinp), Een (p, Video composition operations – Roland V-160HD SDI/HDMI Streaming Video Switcher User Manual
Page 28
28
Video Composition Operations
Compositing Video with Picture-in-Picture (PinP)
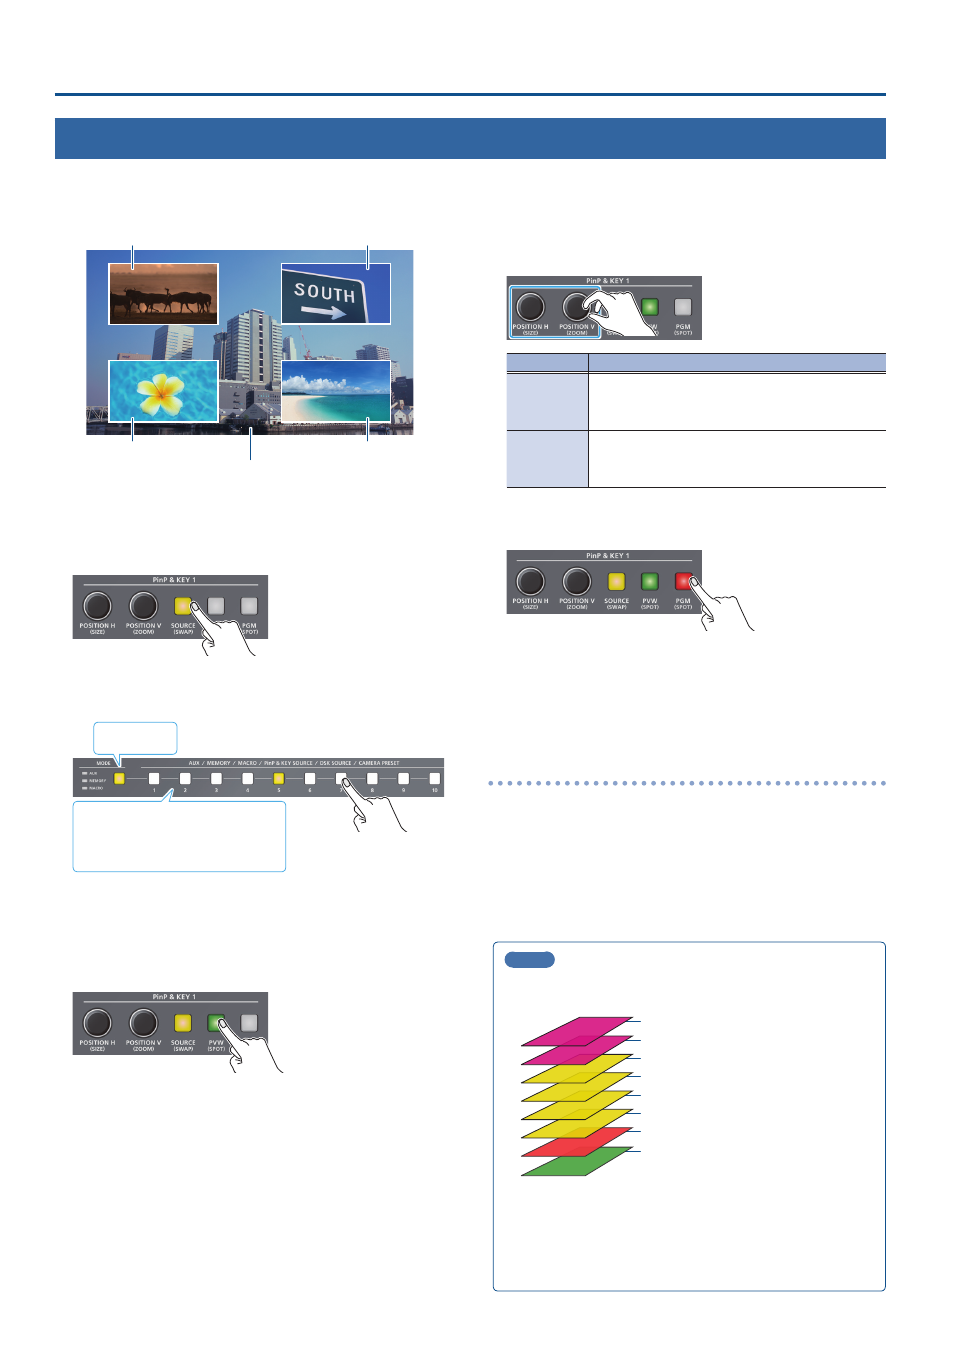
Here’s how to composite an inset screen onto the background video. You can use PinP & KEY 1–4 at the same time to display four inset screens.
This example shows you how to composite video using “PinP & KEY 1.” The operation is the same when using “PinP & KEY 2–4.”
Inset screen 1 (PinP & KEY 1)
Inset screen 2 (PinP & KEY 2)
Inset screen 3 (PinP & KEY 3)
Background video
Inset screen 4 (PinP & KEY 4)
1 .
Press the PinP & KEY 1 [SOURCE] button to turn it on (the
button lights up).
2 .
Press a PinP & KEY SOURCE [1]–[10] button to select the
video you want to make the inset screen.
Yellow: Inset screen video
White: Video input available
Unlit: Video input unavailable
Lit yellow
* When selecting a video not assigned to INPUT 1–10, set this from
the [MENU] button
Ó
“PinP & KEY”
Ó
“PinP & KEY 1”
Ó
“PinP
SOURCE.”
3 .
Press the PinP & KEY 1 [PVW] button to turn on the inset
screen preview output (lit).
The inset screen appears in the PVW section of the multi-view,
allowing you to check the inset screen’s location and size.
At this stage, the final output has not yet been changed.
4 .
Use the PinP & KEY 1 [POSITION H] [POSITION V] knobs to
adjust the inset screen.
Knob
Explanation
[POSITION H]
Adjusts the horizontal position of the inset screen.
Turn while pressing:
Adjusts the size of the inset screen.
[POSITION V]
Adjusts the vertical position of the inset screen.
Turn while pressing:
Adjusts the zoom of the video shown in the inset screen.
5 .
Press the PinP & KEY 1 [PGM] button to turn on PinP
compositing (lit).
The inset screen is displayed on the final output.
6 .
To turn off PinP compositing, press the PinP & KEY 1
[PGM] button once again.
Turning PinP/DSK composition on/off in tandem
with video transitions
You can make PinP/DSK composition (p. 30) turn on/off in tandem
with the video transitions.
From the [MENU] button
Ó
“SYSTEM,” set “EFFECTS TRANSITION
SYNC” to “ON.”
After step 4, use the [AUTO] and [CUT] buttons or operate the
video fader to switch the video. PinP composition turns on, and the
composited result that is previewed is sent to final output.
MEMO
¹
The output video layers are structured as shown in the
illustration below.
PinP & KEY 4
PinP & KEY 3
PinP & KEY 2
PinP & KEY 1
PGM/A (background video)
PST/B (background video)
Long-pressing the [PVW] or [PGM] button for each layer shows
only the layer that is targeted for the operation while the
button is pressed (this is the spot function).
¹
Set the fade-in/out time for the inset screen from the [MENU]
button
Ó
“TRANSITION TIME”
Ó
“PinP & KEY 1–4 TIME.”