Interchanging the imager block, Rebooting after interchanging the imager block – Sony LHP-1 Lens Hood User Manual
Page 19
2. Preparation
19
Interchanging the Imager Block
You can interchange the imager block.
This section describes the procedure for
interchanging the 8K imager block with the 6K
imager block as an example.
When attaching the 6K imager block, attach
the cover (MPC-3628: accessory, MPC-3626:
attached) for the 6K imager block.
[Note]
Before interchanging the imager block, turn off the
power for at least 10 minutes to allow the unit to cool.
Also, be careful of sharp edges when interchanging the
imager block.
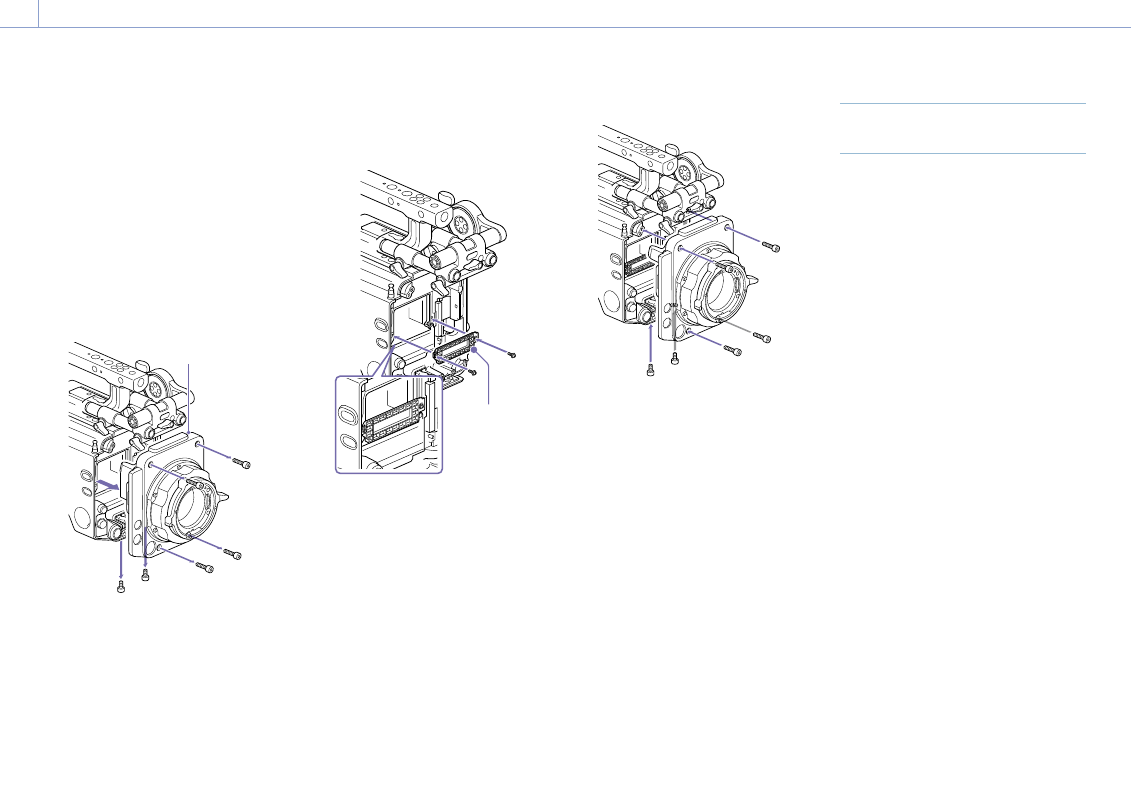
1
Remove the two hex screws on the
bottom and four hex screws on the front,
and remove the 8K imager block.
Imager block
2
Attach the cover for the 6K imager block
with the side with engraved text facing
forward, and tighten with two screws
(tightening torque: 0.19 N·m).
Cover for 6K
imager block
[Notes]
• If the cover for the 6K imager block is not
attached, the heat dissipation of the 6K imager
block will become poor.
• Remove the cover for the 6K imager block when
attaching the 8K imager block.
3
Attach the 6K imager block.
Make sure the imager block is straight,
and tighten the six hex screws removed in
step 1 (tightening torque: 1.4 N·m).
Rebooting After Interchanging the
Imager Block
When the unit is turned on for the first time
after interchanging the imager block, startup
will take a bit longer because the unit needs
to reload sensor-specific data.
The unit will reboot automatically a few
minutes after being turned on when the
sensor-specific data has finished loading.